Jen
Creative Chick  Admin
Admin
Posts: 8,309 
|
Post by Jen on Sept 8, 2010 13:42:43 GMT -6
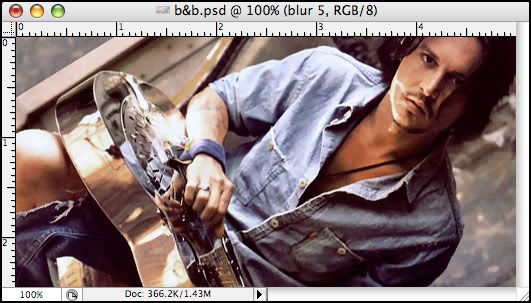
This is a very simple two step signature you can make.   |
|
Jen
Creative Chick
Admin
Posts: 8,309
|
Post by Jen on Sept 8, 2010 13:43:11 GMT -6
|
|
Jen
Creative Chick
Admin
Posts: 8,309
|
Post by Jen on Sept 8, 2010 13:43:42 GMT -6
Make a copy of the pic layer. Select Filter>Blur>Box Blur... Set the radius to 5. 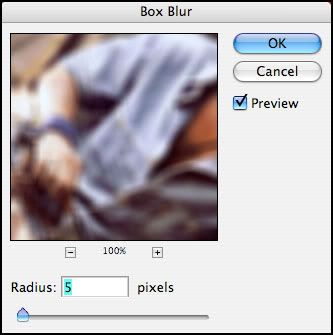 |
|
Jen
Creative Chick
Admin
Posts: 8,309
|
Post by Jen on Sept 8, 2010 13:44:23 GMT -6
Now change the blending mode for the pic copy layer to Darker Color. 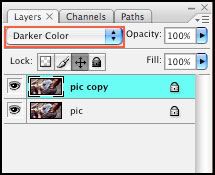 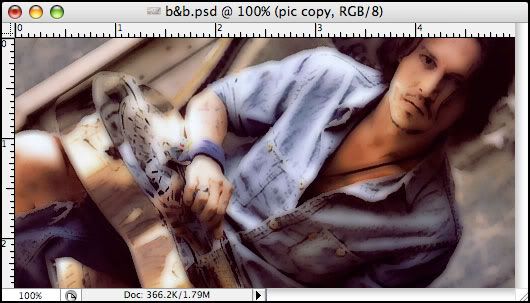 |
|
Jen
Creative Chick
Admin
Posts: 8,309
|
Post by Jen on Sept 8, 2010 13:44:52 GMT -6
Select the eraser tool. In the options bar set the mode to brush. Go to your brushes palette and choose a brush. With the pic copy layer as the active layer, erase sections of the picture to bring out the original image. I erased the face and sections of his shirt in the picture below.  And you're done. To save this signature use the save as a jpg in Photoshop setting found here, My settings. |
|
Jen
Creative Chick
Admin
Posts: 8,309
|
Post by Jen on Sept 8, 2010 13:45:28 GMT -6
When choosing the radius for the box blur the higher you go the more washed out your image will appear. Radius 30 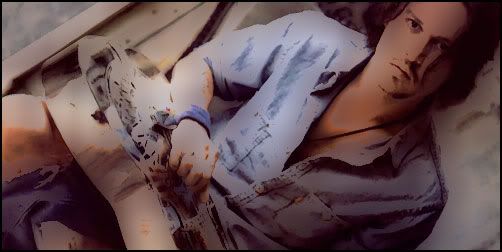 Radius 50  |
|