Jen
Creative Chick  Admin
Admin
Posts: 8,309 
|
Post by Jen on Nov 2, 2009 17:55:04 GMT -6
Here's the signature we'll be making. 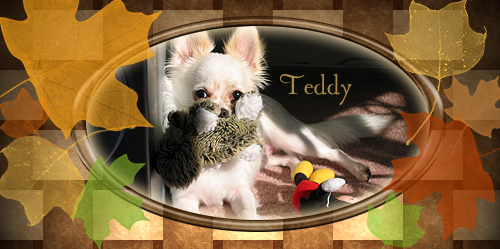 I made the leaf brushes used in this tutorial. To see how to make your own brushes check out the tutorial How to make a brush. |
|
Jen
Creative Chick
Admin
Posts: 8,309
|
Post by Jen on Nov 2, 2009 19:47:02 GMT -6
|
|
Jen
Creative Chick
Admin
Posts: 8,309
|
Post by Jen on Nov 2, 2009 19:49:01 GMT -6
Apply a pattern overlay effect to Layer 1. Use the settings below. To choose a pattern click on the one showing in the layer Style window. Let your cursor hover over a pattern to see its name. With the Layer Style window open you can go to your file and click down and drag to position the pattern. 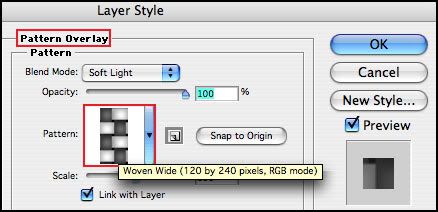 |
|
Jen
Creative Chick
Admin
Posts: 8,309
|
Post by Jen on Nov 2, 2009 19:52:19 GMT -6
Add a new layer. Link and merge Layers 1 and 2. Apply another pattern overlay effect to the layer using the settings below. 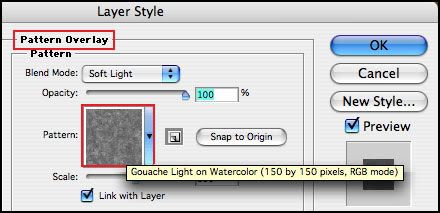
|
|
Jen
Creative Chick
Admin
Posts: 8,309
|
Post by Jen on Nov 2, 2009 20:16:01 GMT -6
Add a new layer. Link and merge your two layers. Name the layer weave. Choose Filter>Render>Lighting Effects... Below is what you'll see. For the lighting effect we'll be using you're going to need to reposition the directional light in the preview window. 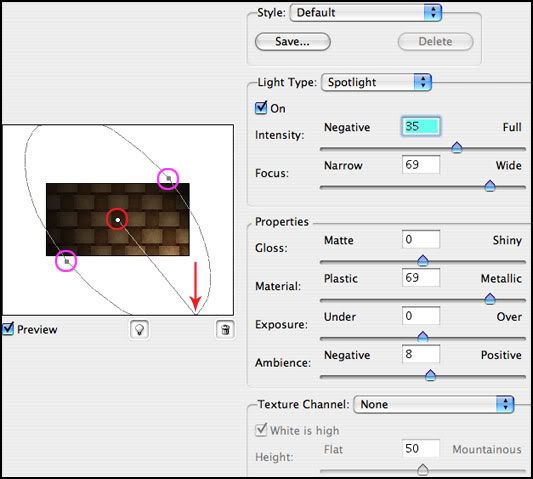 The settings you want are below. First click on the center of the directional light, red ring, and drag up until you see the handle at the bottom, red arrow. Drag this handle to the left until you have a vertical line. Now drag the center until it's in the same position as in the picture below. Grab one of the handles on the side, pink rings, and drag away from the center. Go to the right side of the Lighting Effects window and move each of the sliders, red arrows, until you get to the amount seen in the boxes, green arrows. If you'd like to save this lighting effect, click the Save... button once you have all the settings. 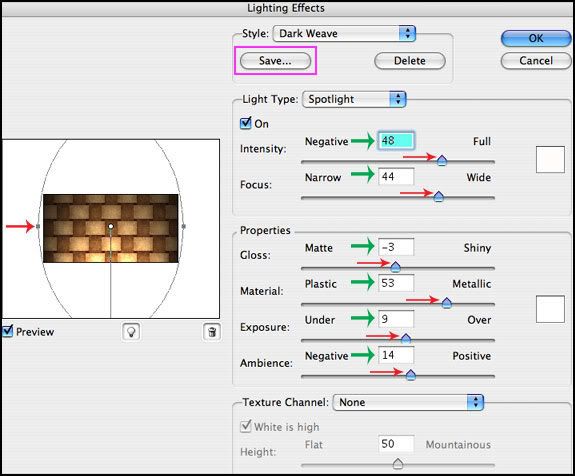 |
|
Jen
Creative Chick
Admin
Posts: 8,309
|
Post by Jen on Nov 2, 2009 20:18:25 GMT -6
Drag a guide to the center of your file. 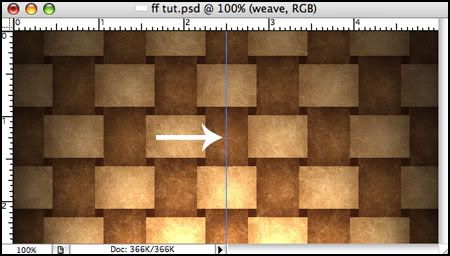 |
|
Jen
Creative Chick
Admin
Posts: 8,309
|
Post by Jen on Nov 2, 2009 20:20:41 GMT -6
With the elliptical marquee tool make an oval selection. If it's not centered within your file, click in the center of the selection and drag it over the guide until you feel it snap. Subtract from your selection so it looks like the one below. 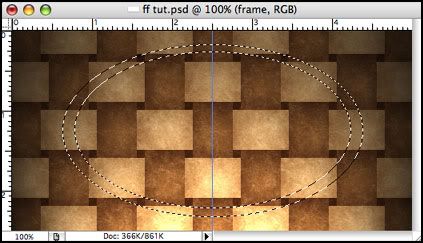 Choose Layer>New>Layer via Copy. Name Layer 1 frame. |
|
Jen
Creative Chick
Admin
Posts: 8,309
|
Post by Jen on Nov 2, 2009 20:31:07 GMT -6
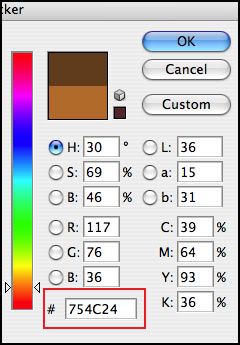
First apply a stroke effect to the frame layer using the settings below. To change the color click on the Color box in the Layer Style window. I used a medium brown. 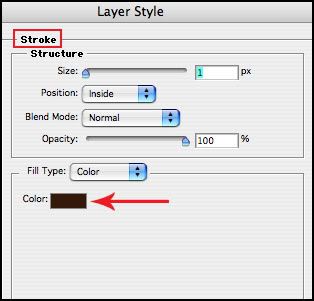 |
|
Jen
Creative Chick
Admin
Posts: 8,309
|
Post by Jen on Nov 2, 2009 20:36:04 GMT -6
Now apply a bevel and emboss effect to the frame layer using the settings below. This effect uses a custom Gloss Contour. First click on the contour showing in the Layer Style window. 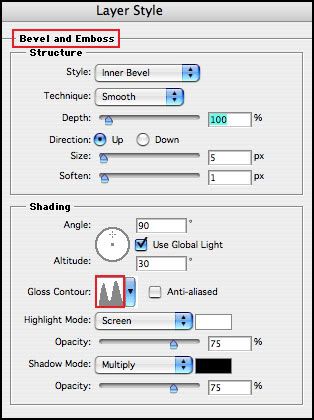 Now recreate the contour below. If you don't know how see replies 6-8 in the thread Layer effects & styles. 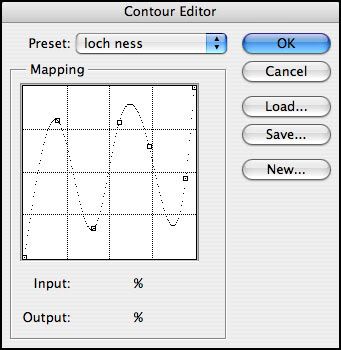 |
|
Jen
Creative Chick
Admin
Posts: 8,309
|
Post by Jen on Nov 2, 2009 20:48:50 GMT -6
Open the image you'd like to put in your frame and bring it into your file. Make sure Layer 1 is under the frame layer in the layers palette. Reduce/enlarge Layer 1 until the part of your image you want to use fits within the frame. Don't worry if the rest of your image goes past the frame. Click on the frame layer so it's the active layer. Select the magic wand. Go to your file and click down in the center of your frame. Now click on Layer 1 in the layers palette and choose Layer>New>Layer via Copy. Name Layer 2 image. I named mine TEDDY. Throw away Layer 1. Apply an inner glow to the image layer using the settings below. To change the color click on the color box. 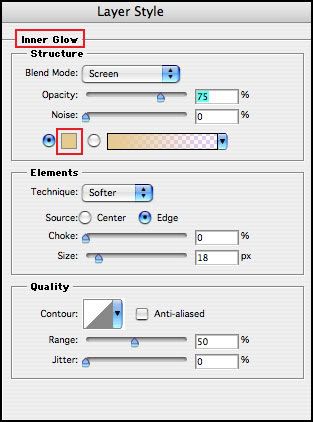 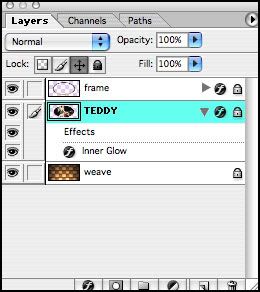 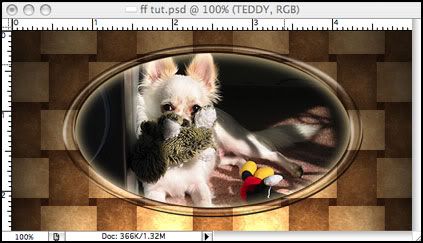 |
|