Jen
Creative Chick  Admin
Admin
Posts: 8,309 
|
Bubbles
Nov 20, 2009 16:10:03 GMT -6
Post by Jen on Nov 20, 2009 16:10:03 GMT -6
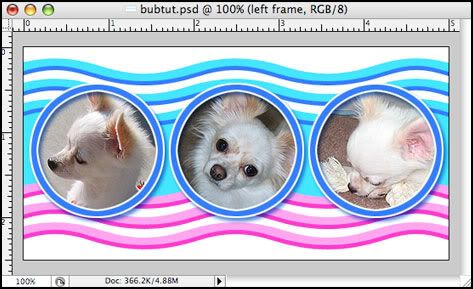
Here's the signature we'll be making.  |
|
Jen
Creative Chick
Admin
Posts: 8,309
|
Bubbles
Nov 20, 2009 19:35:33 GMT -6
Post by Jen on Nov 20, 2009 19:35:33 GMT -6
START With A New File. Only difference is the height is 2.5" Fill Layer 1 with white and name the layer white back. Add a new layer and name it top blue. Select the custom shape tool and use the settings below. Select the Waves shape.  Make your foreground color 44E6FE. Now click and drag across your signature. If you want to extend your window click and drag it by the corner. 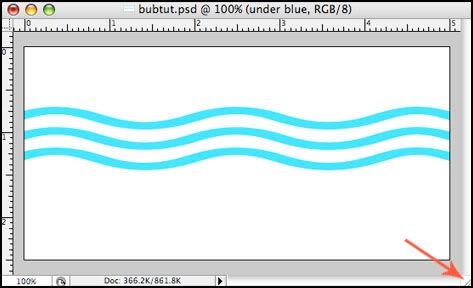
|
|
Jen
Creative Chick
Admin
Posts: 8,309
|
Bubbles
Nov 20, 2009 19:38:41 GMT -6
Post by Jen on Nov 20, 2009 19:38:41 GMT -6
Add a new layer and name it under blue. Put this layer below the top blue layer in the layers palette. Make your foreground color 357EFF. Now make your top blue layer a selection. With your under blue layer as the active layer, fill the selection. Deselect. Hold the shift key while you use the move tool to drag the under blue layer down a little. 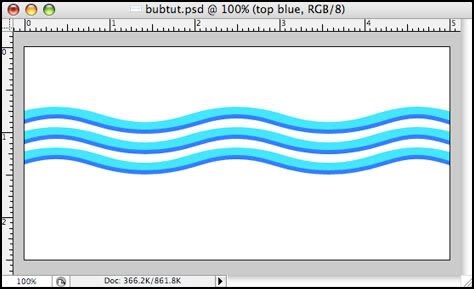 |
|
Jen
Creative Chick
Admin
Posts: 8,309
|
Bubbles
Nov 20, 2009 19:44:18 GMT -6
Post by Jen on Nov 20, 2009 19:44:18 GMT -6
Link the top blue and under blue layers and drag them to the top of your signature. Add a new layer and name it top pink. Make FFA6EF your foreground color. Now make your top blue layer a selection. With your top pink layer as the active layer, fill the selection. Deselect. Add a new layer and name it under pink. Put this layer below the top pink layer in the layers palette. Make FF32CD your foreground color. Now make your under blue layer a selection. With your under pink layer as the active layer, fill the selection. Deselect. Link the top pink and under pink layers and drag them to the bottom of your signature. 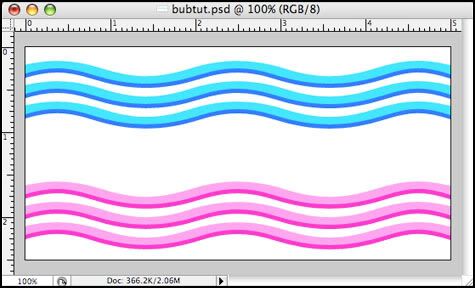
|
|
Jen
Creative Chick
Admin
Posts: 8,309
|
Bubbles
Nov 20, 2009 19:53:55 GMT -6
Post by Jen on Nov 20, 2009 19:53:55 GMT -6
Add a layer and name it blue middle. Put it below your under pink layer. 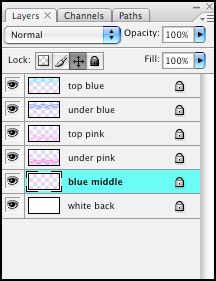 Use the lasso tool to make a selection between the top and bottom waves. 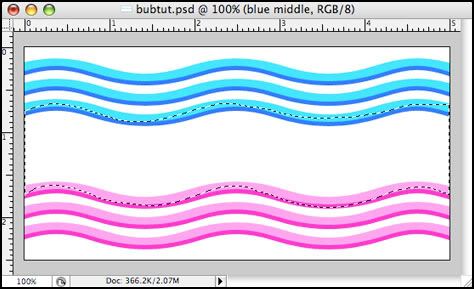 Make 44E6FE your foreground color and fill the selection. Deselect. |
|
Jen
Creative Chick
Admin
Posts: 8,309
|
Bubbles
Nov 20, 2009 19:57:34 GMT -6
Post by Jen on Nov 20, 2009 19:57:34 GMT -6
Add a new layer and name it middle frame. Make 357EFF your foreground color. With the elliptical marquee tool hold the shift key while you click and drag to make a circle. Fill the selection but don't deselect. Choose Select>Modify>Contract>8. 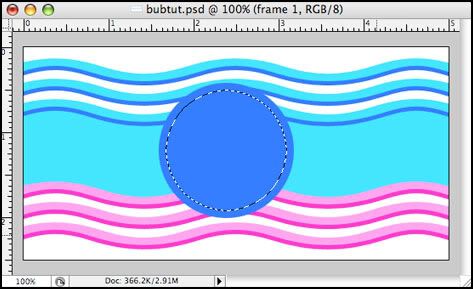 Delete then deselect. |
|
Jen
Creative Chick
Admin
Posts: 8,309
|
Bubbles
Nov 20, 2009 19:59:50 GMT -6
Post by Jen on Nov 20, 2009 19:59:50 GMT -6
Make white your foreground color. With the middle frame layer as the active layer, choose Edit>Stroke and use the settings below. 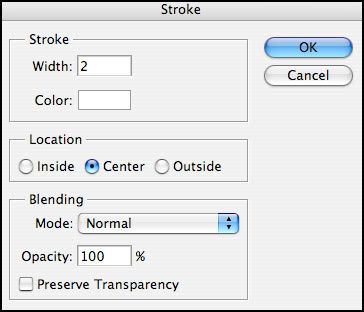 |
|
Jen
Creative Chick
Admin
Posts: 8,309
|
Bubbles
Nov 20, 2009 20:02:34 GMT -6
Post by Jen on Nov 20, 2009 20:02:34 GMT -6
Now apply a drop shadow effect to the middle frame layer. Use the settings below. To change the color click on the color box. Use 357EFF for the drop shadow's color.  |
|
Jen
Creative Chick
Admin
Posts: 8,309
|
Bubbles
Nov 20, 2009 20:07:04 GMT -6
Post by Jen on Nov 20, 2009 20:07:04 GMT -6
Place a vertical guide in the center of your file. Use the move tool to center the middle frame with the guide. Make a copy of the middle frame layer and name it left frame. Hold the shift key while you use the move tool to drag the left frame over. Make a copy of the middle frame layer and name it right frame. Hold the shift key while you use the move tool to drag the right frame over. 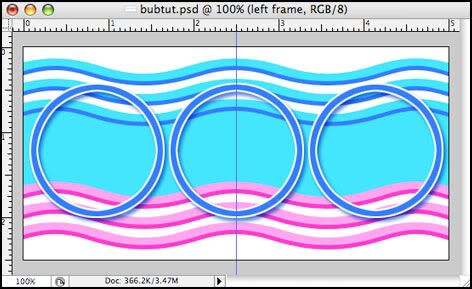 |
|
Jen
Creative Chick
Admin
Posts: 8,309
|
Bubbles
Nov 20, 2009 20:21:38 GMT -6
Post by Jen on Nov 20, 2009 20:21:38 GMT -6
|
|