Jen
Creative Chick  Admin
Admin
Posts: 8,309 
|
Post by Jen on Dec 10, 2010 16:57:13 GMT -6
Here's the signature we'll be making.  |
|
Jen
Creative Chick
Admin
Posts: 8,309
|
Post by Jen on Dec 10, 2010 16:57:37 GMT -6
START with a new file. Fill Layer 1 with white and name the layer white back. Apply a pattern overlay to this layer. Use the settings below. To choose a pattern click on the one showing in the Layer Style window. To see a pattern's name let your cursor hover over the pattern.  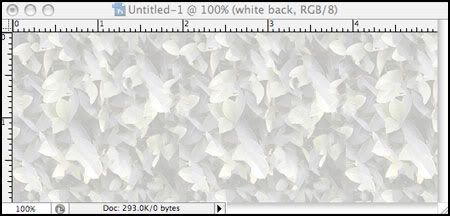
|
|
Jen
Creative Chick
Admin
Posts: 8,309
|
Post by Jen on Dec 10, 2010 16:58:03 GMT -6
Add a new layer and name it shapes. Choose the custom shape tool and use these settings in the options bar. To select a shape click on the one showing.  Add your shapes. It doesn't matter what color they are. 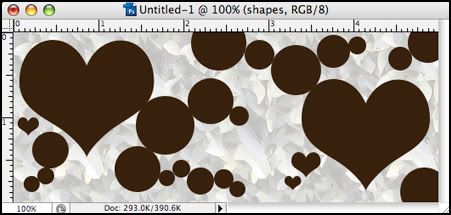 
|
|
Jen
Creative Chick
Admin
Posts: 8,309
|
Post by Jen on Dec 10, 2010 16:58:26 GMT -6
|
|
Jen
Creative Chick
Admin
Posts: 8,309
|
Post by Jen on Dec 10, 2010 16:58:57 GMT -6
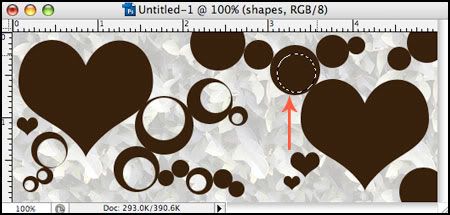
To delete from the hearts first select the custom shape tool. Use the settings below in the options bar.  Now make paths where you want to delete. 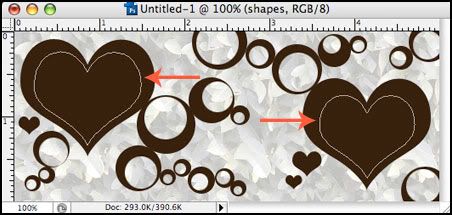 Go to your paths palette and click on the Load path as a selection button. The path will shut off in the palette and the paths in your file will be a selection. Hit delete then deselect. 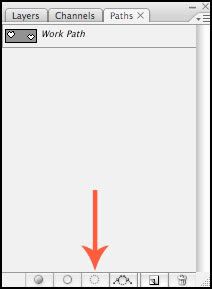 |
|
Jen
Creative Chick
Admin
Posts: 8,309
|
Post by Jen on Dec 10, 2010 16:59:21 GMT -6
Add the following effects to the shapes layer. To change an effect's Contour or Gloss Contour click on the arrow next to the one showing in the Layer Style window. To see the name of a contour let your cursor hover over it. 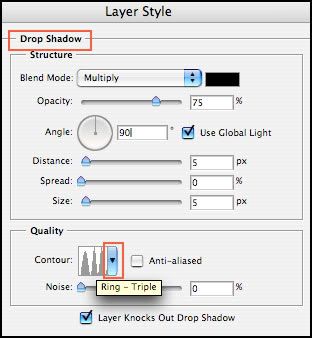 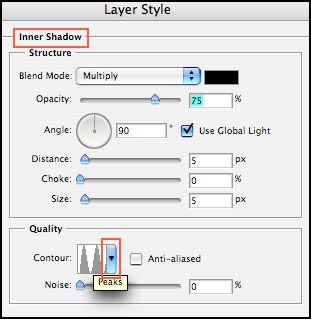 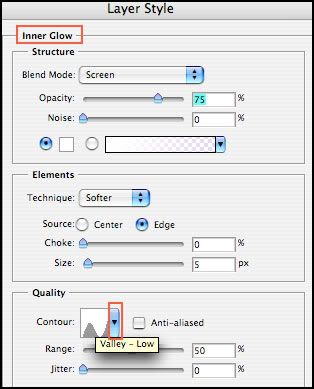  To select a gradient click on the one showing in the Layer Style window. 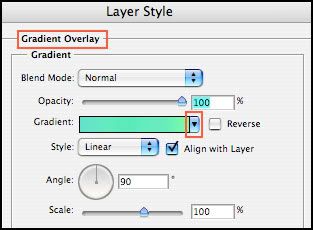 Your shapes should look like this. Depending on the gradient you selected yours might be a different color. 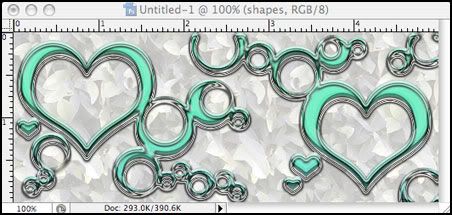 |
|
Jen
Creative Chick
Admin
Posts: 8,309
|
Post by Jen on Dec 10, 2010 16:59:46 GMT -6
Add a new layer and put it at the top in the layers palette. Name the layer color. Change the blending mode for this layer to Overlay. 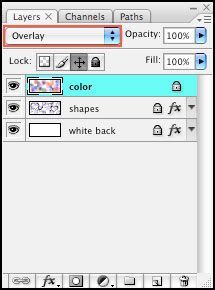 Select the brush tool. Choose a fairly large feathered brush and add your color. 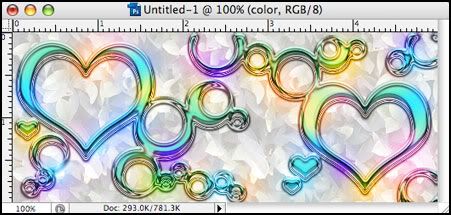 |
|
Jen
Creative Chick
Admin
Posts: 8,309
|
Post by Jen on Dec 10, 2010 17:00:14 GMT -6
Open the image you'd like to put into one of the heart frames. Bring it into your file. Put Layer 1 under the shapes layer. Reduce/enlarge the image until the section you want fits in the frame. Click on the shapes layer. 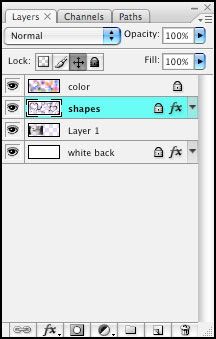 Select the magic wand and click within your frame. 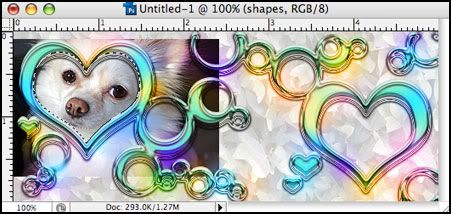 Click on the color layer and choose delete. 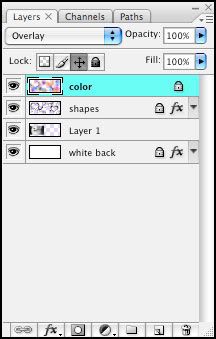 Click on Layer 1 and choose Layer>New>Layer via Copy. 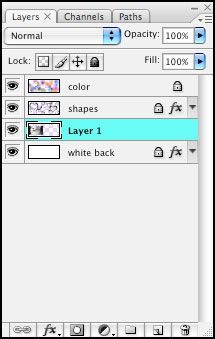 Name the copy left photo. Throw away Layer 1. 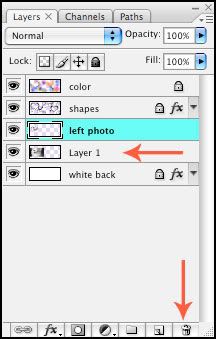 Repeat the steps above to add an image to the other heart frame. 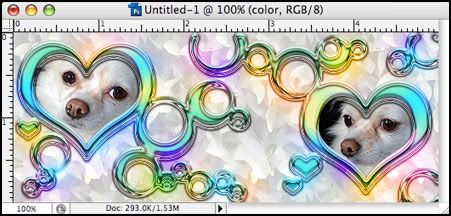 |
|
Jen
Creative Chick
Admin
Posts: 8,309
|
Post by Jen on Dec 10, 2010 17:00:40 GMT -6
Use the type tool to add your text. 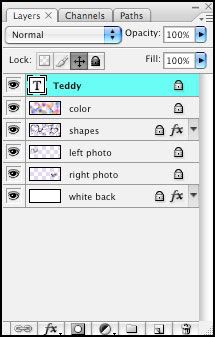 And you're done. To save this signature use the save as a jpg in Photoshop setting found here, My settings. |
|