Jen
Creative Chick  Admin
Admin
Posts: 8,309 
|
Post by Jen on Nov 13, 2009 13:15:03 GMT -6
Here's the signature we'll be making.  |
|
Jen
Creative Chick
Admin
Posts: 8,309
|
Post by Jen on Nov 13, 2009 13:16:03 GMT -6
Start with a new file 5" x 2" at 100 ppi with a transparent background. Fill the layer with black. Choose your foreground color, I went with a gold. Make a new layer and using the custom shape tool with the settings you see below make your large center heart. Name this layer heart w/pics. Use your move tool to position it. Add two new layers and make your left and right hearts. Name their layers left med and right med. You'll see I applied the Lock position lock to each layer once they were in place.  |
|
Jen
Creative Chick
Admin
Posts: 8,309
|
Post by Jen on Nov 13, 2009 13:16:36 GMT -6
One heart at a time click on its layer and with the elliptical marquee tool delete sections from your hearts. If you hold the shift key while you click and drag your selections will be perfect circles. Once your selection is made you can click inside the selection and drag it where you want. 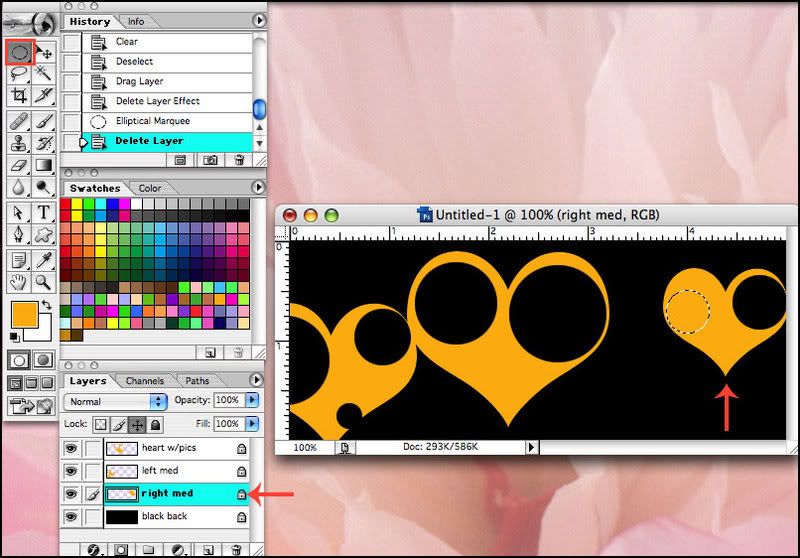 |
|
Jen
Creative Chick
Admin
Posts: 8,309
|
Post by Jen on Nov 13, 2009 13:17:38 GMT -6
Apply this layer effect to the heart w/pics layer. When choosing the color for this effect click on the box filled with color in the Layer Style window... 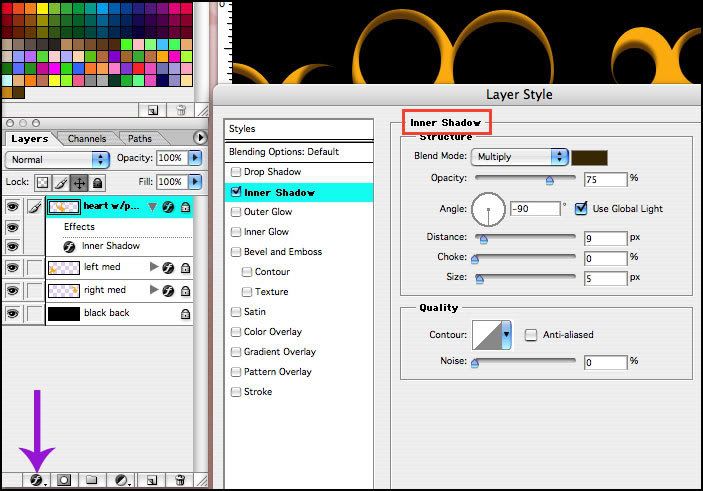 ...and the Color Picker window will pop up. Go to your picture, you will see your cursor has changed to the eyedropper, click down on your heart. Now go to the Color Picker window and grab the ring and drag it straight down until you get to a darker version of the color you started with. In this picture the red arrow is pointing to the ring. The ring's initial location depends on what your foreground color is when the Color Picker window first pops up. When you have your color click OK. Now apply the same effect to the left med and right med layers. 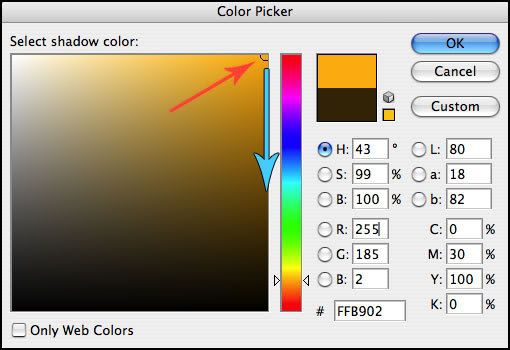 |
|
Jen
Creative Chick
Admin
Posts: 8,309
|
Post by Jen on Nov 13, 2009 13:18:09 GMT -6
Add a new layer and name it faded hearts. Change the opacity of the layer to 20%. Now with the custom shape tool make your background hearts the same way you made the three big hearts.  |
|
Jen
Creative Chick
Admin
Posts: 8,309
|
Post by Jen on Nov 13, 2009 13:18:37 GMT -6
Add another layer and name it faded big hearts. Change the opacity of this layer to 20% as well. Now make some big hearts in the background. 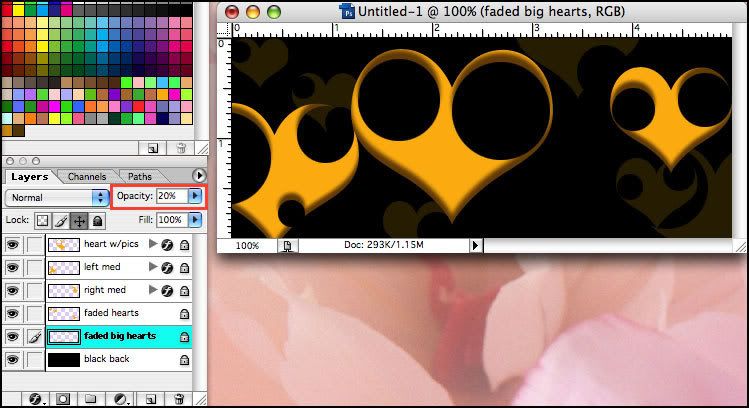 |
|
Jen
Creative Chick
Admin
Posts: 8,309
|
Post by Jen on Nov 13, 2009 13:19:17 GMT -6
Add a new layer and name it spirals & rings. Apply the Inner Shadow layer effect from the heart w/pics layer to it but change the Distance and Size settings to the ones below. Put this layer above the others in the layers palette.  With the custom shape tool and the settings you see make your shapes on the spirals & rings layer. Because this layer is above the others in the layers palette whatever shapes you make that overlap the hearts will appear in front of them. 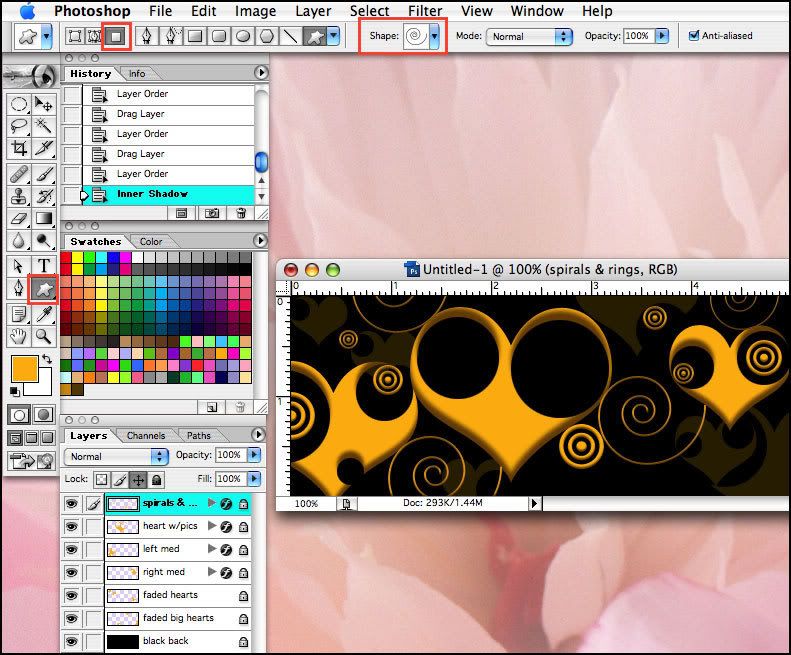 |
|
Jen
Creative Chick
Admin
Posts: 8,309
|
Post by Jen on Nov 13, 2009 13:20:14 GMT -6
Add a new layer and name it pattern. Select the paintbucket tool and in the options bar set the Fill to Pattern. Make the heart w/pics, left med and right med layers a selection. Click on whatever pattern is showing in the options bar, red outline, to see all your available patterns. 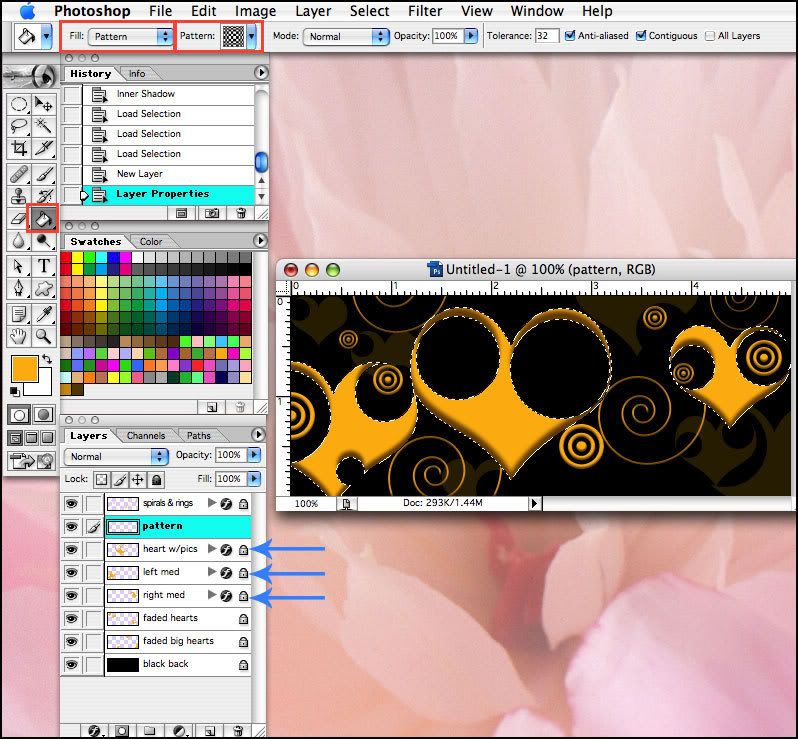 I chose the pattern below. With the pattern layer as the active layer click anywhere in the selection to fill it. Deselect. 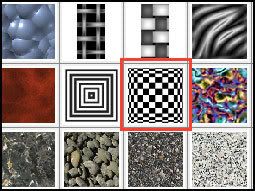 |
|
Jen
Creative Chick
Admin
Posts: 8,309
|
Post by Jen on Nov 13, 2009 13:20:41 GMT -6
And this is what you should see... 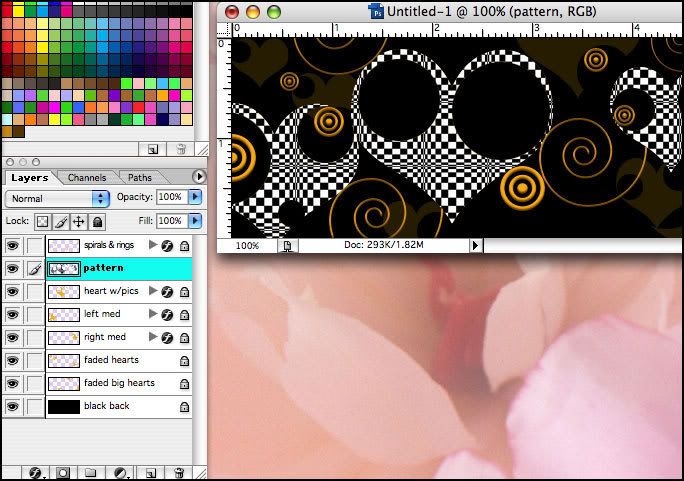 |
|
Jen
Creative Chick
Admin
Posts: 8,309
|
Post by Jen on Nov 13, 2009 13:21:07 GMT -6
Change the opacity of the pattern layer to 10%. 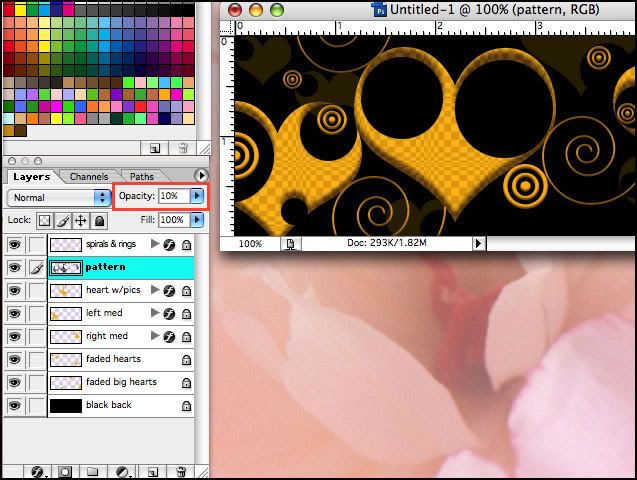 |
|


