Jen
Creative Chick  Admin
Admin
Posts: 8,309 
|
Post by Jen on Dec 4, 2009 1:14:42 GMT -6
For this tutorial I used wolf photos for my signature's background and main subject. You of course can use whatever images you'd like. 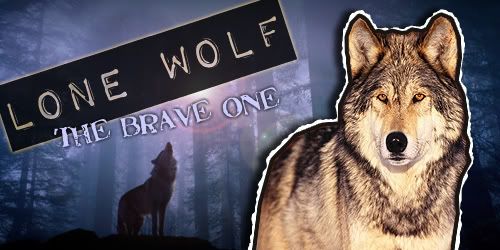 |
|
Jen
Creative Chick
Admin
Posts: 8,309
|
Cut-out
Dec 4, 2009 15:33:51 GMT -6
Post by Jen on Dec 4, 2009 15:33:51 GMT -6
START With A New File. The only difference is the height is 2.5". Open up the image you want to use for the background and bring it into your signature's file. Name the layer whatever you'd like. I named mine howling. If needed reduce/enlarge the image. Throw away Layer 1.
|
|
Jen
Creative Chick
Admin
Posts: 8,309
|
Cut-out
Dec 4, 2009 15:46:40 GMT -6
Post by Jen on Dec 4, 2009 15:46:40 GMT -6
Now open the image you want to use as your main subject. You're going to use the pen tool with the settings below to cut your main subject out. Don't worry if you haven't mastered the pen tool yet.  If you need to, use the zoom tool to magnify your view during this step. With the pen tool you're going to make a path around your subject. To do this you click down, move your cursor and then click down again. Every time you click down you're creating an anchor point. As long as you don't drag as you click down you'll have straight segments between your anchor points which is what you want. 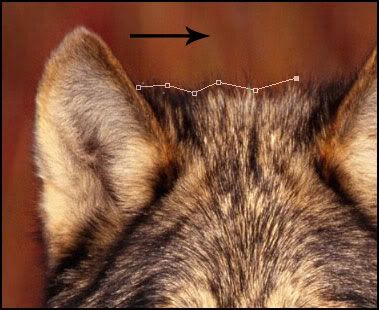 When you've made your way all around your subject the very last click will be on the first anchor point. 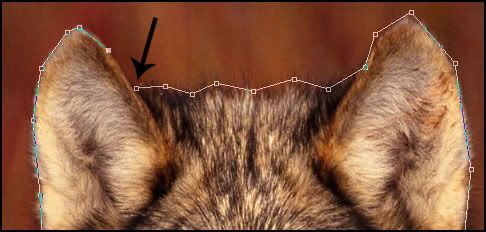 After you click on the first anchor point your path will be closed and all of the anchor points will disappear. 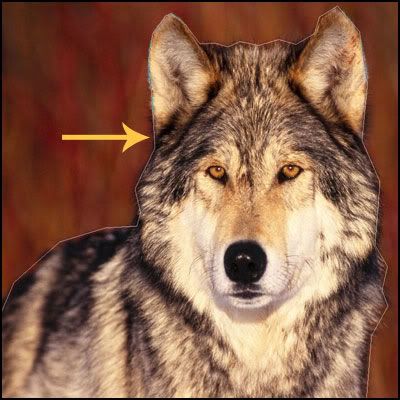 |
|
Jen
Creative Chick
Admin
Posts: 8,309
|
Cut-out
Dec 4, 2009 15:50:11 GMT -6
Post by Jen on Dec 4, 2009 15:50:11 GMT -6
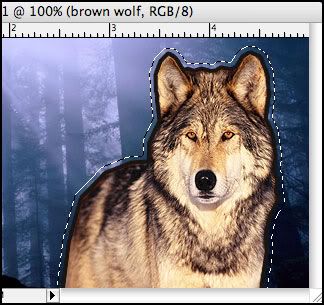
Go to the paths palette and click the Load path as a selection button. When you do the path will turn off in the paths palette and become a selection in your file. 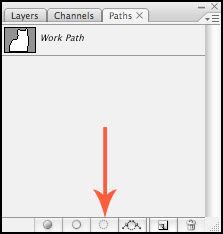 Choose Layer>New>Layer via Copy. Name the layer whatever you want, I named mine brown wolf. Bring this layer into your signature's file. If needed, reduce/enlarge your main subject (brown wolf). You can see below that I had to reduce mine. 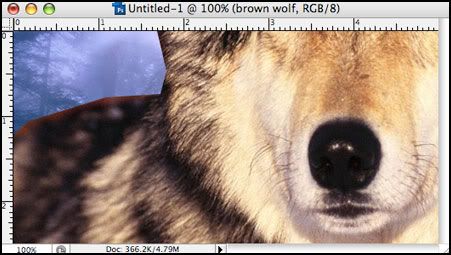 |
|
Jen
Creative Chick
Admin
Posts: 8,309
|
Cut-out
Dec 4, 2009 15:53:07 GMT -6
Post by Jen on Dec 4, 2009 15:53:07 GMT -6
Now apply a stroke effect with the settings below to your main subject's layer (brown wolf). To change the color click on the color box in the Layer Style window. 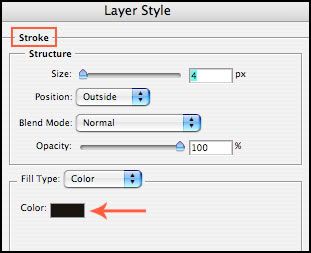 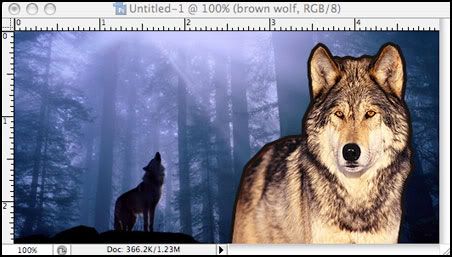 |
|
Jen
Creative Chick
Admin
Posts: 8,309
|
Cut-out
Dec 4, 2009 16:08:48 GMT -6
Post by Jen on Dec 4, 2009 16:08:48 GMT -6
|
|
Jen
Creative Chick
Admin
Posts: 8,309
|
Cut-out
Dec 4, 2009 16:14:31 GMT -6
Post by Jen on Dec 4, 2009 16:14:31 GMT -6
Apply a drop shadow effect with the settings below to the cut out layer. Click the color box to change the color of the effect. 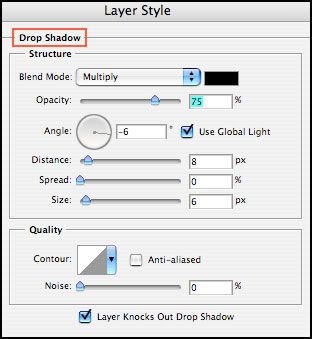 |
|
Jen
Creative Chick
Admin
Posts: 8,309
|
Cut-out
Dec 4, 2009 16:17:26 GMT -6
Post by Jen on Dec 4, 2009 16:17:26 GMT -6
Click on the cut out layer so it's the active layer. Take the lasso tool and make a rough jagged selection over the white border. 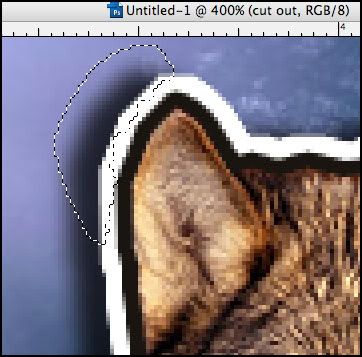 Delete and deselect. 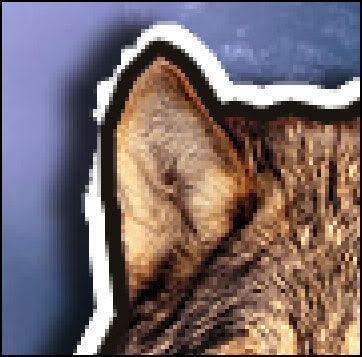 Continue this step all around your main subject (brown wolf). |
|
Jen
Creative Chick
Admin
Posts: 8,309
|
Cut-out
Dec 4, 2009 16:43:47 GMT -6
Post by Jen on Dec 4, 2009 16:43:47 GMT -6
To my background layer (howling), I added a lens flare. 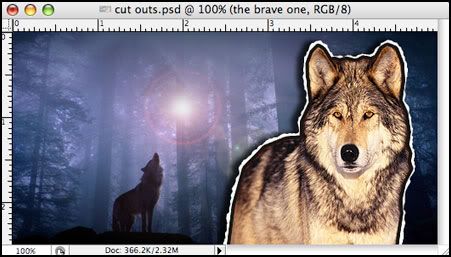 If you're unfamiliar with this filter select Filter>Render>Lens Flare... from the menu bar. In the Lens Flare window you can choose the lens type and adjust its brightness. To position the flare click and drag the cross in the preview window. The lens flare is applied to the active layer which is why only my howling layer is seen in the preview window. 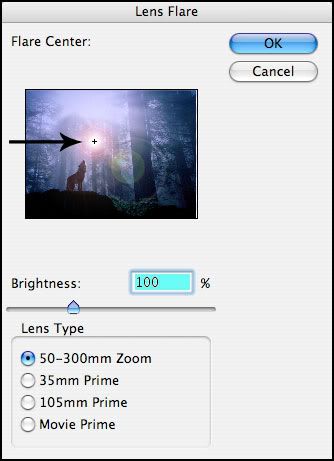 |
|
Jen
Creative Chick
Admin
Posts: 8,309
|
Cut-out
Dec 4, 2009 16:53:06 GMT -6
Post by Jen on Dec 4, 2009 16:53:06 GMT -6
Use the type tool to add your text. My title's font is Impact Label. I applied an outer glow to its layer using the settings below. 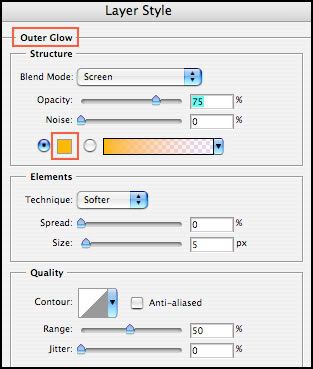 I then rotated the title by choosing Edit>Transform...>Rotate. The subtext's font is Stamp Act Jumbled. To this layer I applied a drop shadow using the settings below. To change the Contour click on the one showing in the Layer Style window. In the next window let your cursor hover over a contour to see its name. 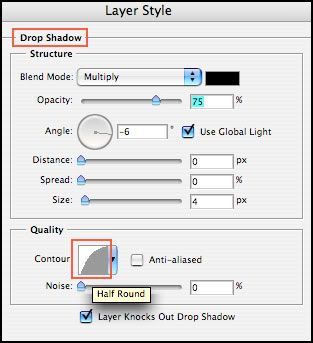 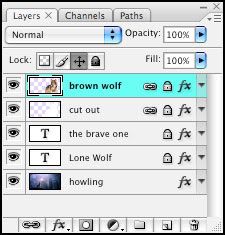 And you're done. To save this signature use the save as a jpg in Photoshop setting found here, My settings. |
|