Jen
Creative Chick  Admin
Admin
Posts: 8,309 
|
Post by Jen on Oct 1, 2009 10:04:53 GMT -6
Photoshop provides you with a nice variety of effects you can add to your layers. The effects added to a layer make up the Layer's Style. This thread is mainly about the changes you can make to the effects you apply. Photoshop also offers a selection of preset Layer Styles that you just click on to apply them to your layers. Check out the thread Preset Styles to see how. |
|
Jen
Creative Chick
Admin
Posts: 8,309
|
Post by Jen on Oct 1, 2009 10:05:14 GMT -6
To add an effect to a layer it needs to be the active layer so click on it in the layers palette so it's highlighted, red arrow. Next click on the tiny f in a circle at the bottom of the layers palette, purple arrow. In some versions of Photoshop this will be an fx. 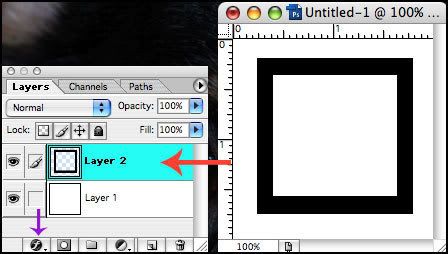 |
|
Jen
Creative Chick
Admin
Posts: 8,309
|
Post by Jen on Oct 1, 2009 10:05:35 GMT -6
When you click the f a tiny window will pop up with a list of the effects you can choose from. Click on an effect to select it. 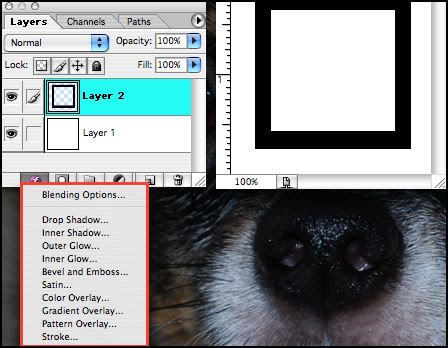 |
|
Jen
Creative Chick
Admin
Posts: 8,309
|
Post by Jen on Oct 1, 2009 10:06:01 GMT -6
After you've selected an effect the Layer Style window will pop up. The effect you've chosen will be checked in the column on the left of the window and its name will appear at the top. Although some of the windows for the different effects might look similar if you look at all the settings you can adjust you'll see how they differ, purple outline. You can see the preview of the effect in the preview window, green arrow. As you make adjustments to the effect they will change in this window as well as in your file. To go from one effect to another from the Layer Style window just click on the effect's name in the left column, blue outline. Doing this will add the effect you click on to your layer. If you decide you don't want to use any of the effects after you've clicked on their name just uncheck the box next to the name. 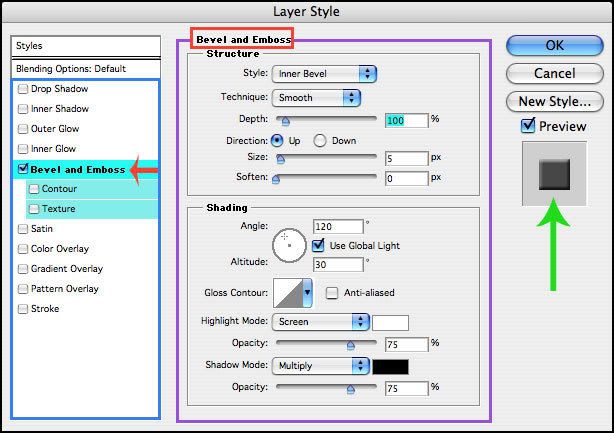 |
|
Jen
Creative Chick
Admin
Posts: 8,309
|
Post by Jen on Oct 1, 2009 10:06:26 GMT -6
Some effects like Drop Shadow allow you to change the color of the effect. To do that you would click in the color box, purple outline. For some effects the Color box is located at the bottom of the Layer Style window. 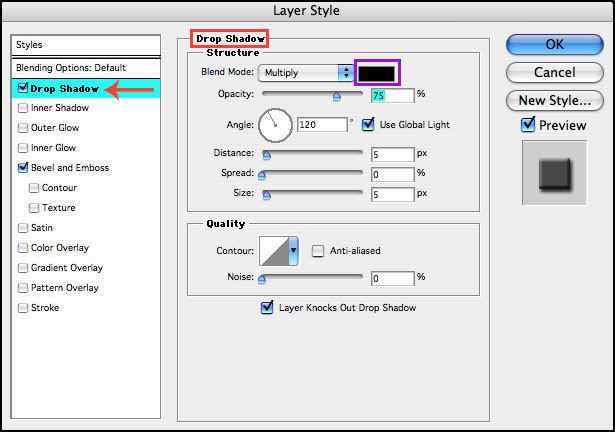 |
|
Jen
Creative Chick
Admin
Posts: 8,309
|
Post by Jen on Oct 1, 2009 10:07:32 GMT -6
After you click the color box the Color Picker window will pop up. With the Color Picker window open there are a few ways you can choose your color. When you change the color you'll see the new color appear in the top color box in the Color Picker window as well as in your file, purple arrow. The 1st way is to enter the color's values, if you know them, in the fields located in the bottom right section of the window. In some of the tutorials I've given you RGB amounts that you had to enter into the RGB fields. The 2nd way is to click and drag the white ring (white arrow) and/or the arrow sliders (red arrow) to get your color. 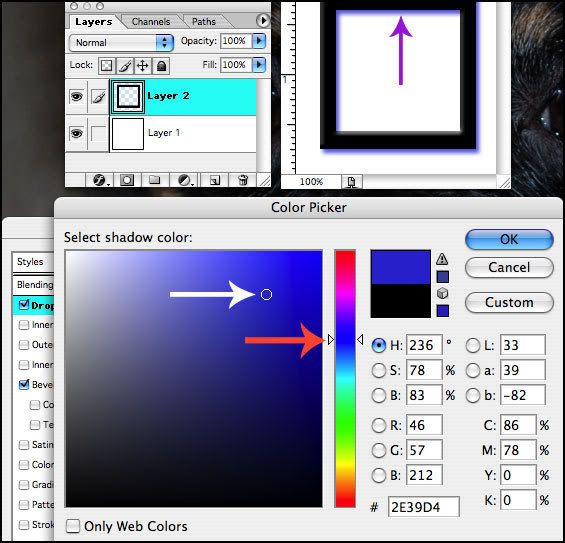 The 3rd way is to go to your swatches palette and click on a swatch to select your color. 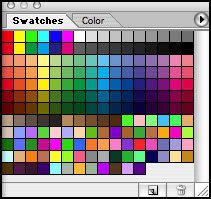 The 4th way is to click on the foreground or background color in the toolbox.  The 5th way is to click down on a color in any file you have open. When you do you'll see your cursor changes to the eyedropper tool. |
|
Jen
Creative Chick
Admin
Posts: 8,309
|
Post by Jen on Oct 1, 2009 10:08:00 GMT -6
Some effects will have Contours or Gloss Contours that you can make changes to. If you click on the Contour showing, red outline... 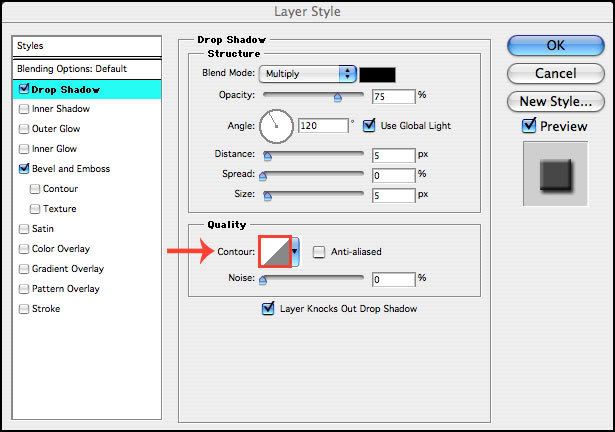 |
|
Jen
Creative Chick
Admin
Posts: 8,309
|
Post by Jen on Oct 1, 2009 10:08:23 GMT -6
...the Contour Editor window will pop up. This is where you can make changes to the contour that's showing which will create a new contour that you can then save if you choose. This is the Linear contour so there isn't much going on here just a diagonal line with tiny squares at either end. You change the contour by clicking on any of the tiny squares on the line and dragging them to a new location. You also change the contour by adding and deleting tiny squares. To add squares you just need to click and drag anywhere on the line, red arrow. To delete a square just click and drag it outside the contour window. 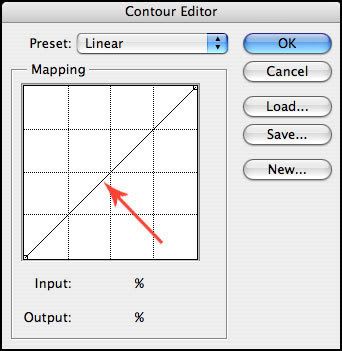 |
|
Jen
Creative Chick
Admin
Posts: 8,309
|
Post by Jen on Oct 1, 2009 10:08:47 GMT -6
As you add, delete and move the squares you'll see the contour change in your file. Look close and you can see exactly how each square changes a certain part of the contour. When you start to make changes to the contour the Preset name will change to Custom in the Contour Editor window. 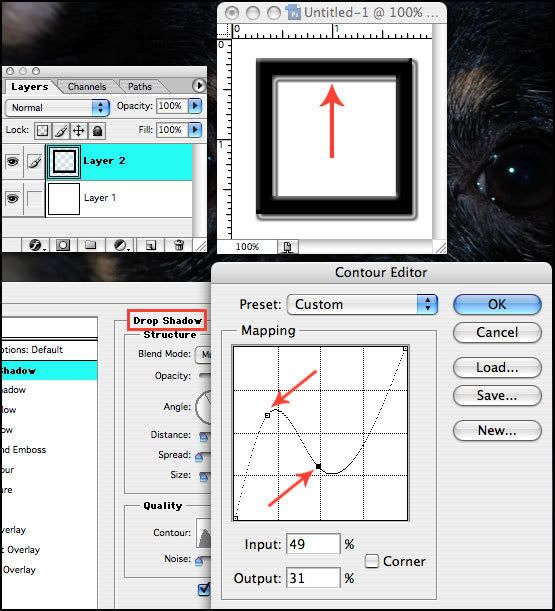 After you've made your adjustments to the contour if you are happy with the new look and would like to save it for future use just click on New... 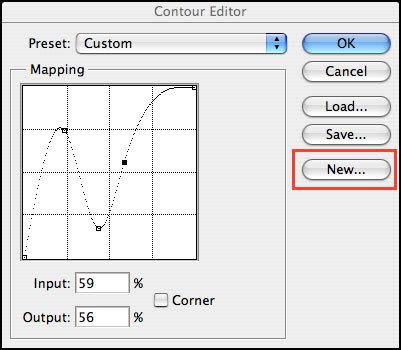 In the dialog box name the new contour and click OK.  |
|
Jen
Creative Chick
Admin
Posts: 8,309
|
Post by Jen on Oct 1, 2009 10:10:12 GMT -6
If you decide you really don't want to make any adjustments to the contour but would rather choose from one of the contours available then click on the arrow to the right of the one that's showing, red outline. When you do a window with the contour set you currently have loaded will pop up. Any new contours you create and save will be added to this window and will appear as the last contours in the set. Hold you cursor over a contour in this window and its name will pop up. If you don't see that many contours in the window click on the arrow in the top right corner, purple outline.  |
|


