Jen
Creative Chick  Admin
Admin
Posts: 8,309 
|
Post by Jen on Nov 9, 2009 14:35:03 GMT -6
Here's the signature we'll be making.  |
|
Jen
Creative Chick
Admin
Posts: 8,309
|
Post by Jen on Nov 9, 2009 19:17:55 GMT -6
START with a new file. The only change is the height is 2.5". Fill Layer 1 with black and name it back color. Select the custom shape tool and use the settings below. To choose a shape click on the one showing in the options bar. You want to use the Tile 2 shape.  Add a new layer. Make white your foreground color and then click and drag. 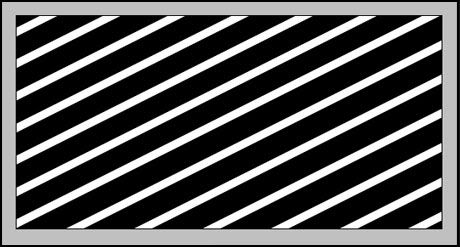
|
|
Jen
Creative Chick
Admin
Posts: 8,309
|
Post by Jen on Nov 9, 2009 19:22:29 GMT -6
Change Layer 1's opacity to 10%. Make a copy of Layer 1. Choose Edit>Transform>Flip Horizontal. Link and merge Layer 1 and Layer 1 copy. Name the layer pattern. 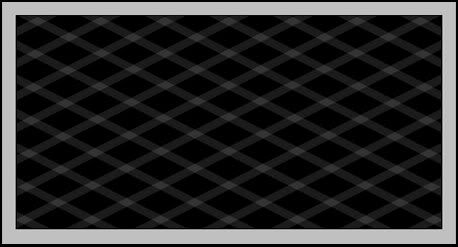 |
|
Jen
Creative Chick
Admin
Posts: 8,309
|
Post by Jen on Nov 9, 2009 19:25:27 GMT -6
Add a new layer and name it A. Use the rectangular marquee tool to make a selection. 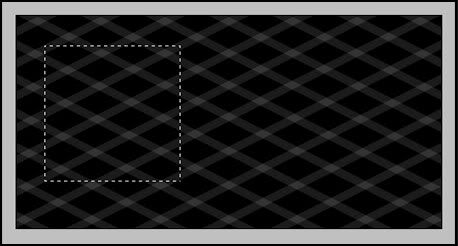 Choose Select>Transform Selection. Grab a corner of the bounding box and rotate the selection. Double click inside the box to apply the rotation. 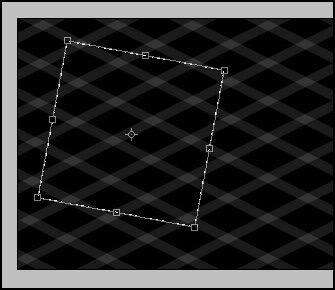 Fill Fill the selection with white. Don't deselect. Choose Select>Modify>Contract>8 then delete. Deselect.  |
|
Jen
Creative Chick
Admin
Posts: 8,309
|
Post by Jen on Nov 9, 2009 19:29:52 GMT -6
Make a copy of layer A and name it B. Put this layer below layer A in the layers palette. Choose Edit>Transform>Flip Horizontal. Use the move tool to place the frame. Make a copy of layer A and name it C. Put this layer below layer B in the layers palette. Use the move tool to place the frame. 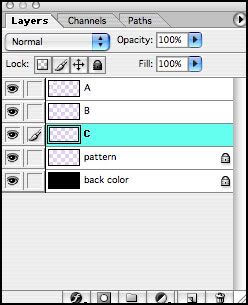 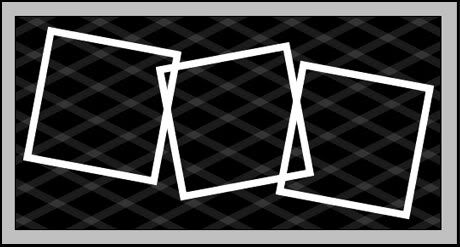 |
|
Jen
Creative Chick
Admin
Posts: 8,309
|
Post by Jen on Nov 9, 2009 19:39:28 GMT -6
Click on layer A and apply the following effects. To change an effect's color click on the color box in the Layer Style window. 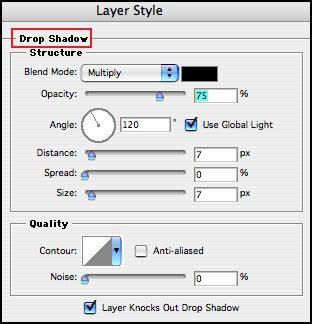 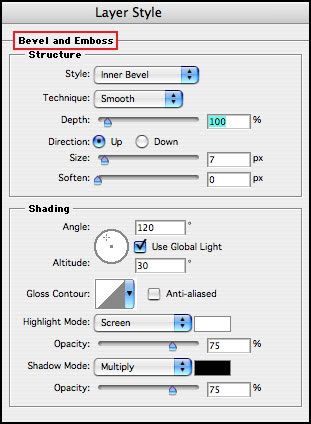 To choose the contour for the Bevel and Emboss click on the word Contour on the left side of the Layer Style window. To select the Contour used click the arrow on the right side of the one showing in the Layer Style window. To see a contour's name let your cursor hover over it. 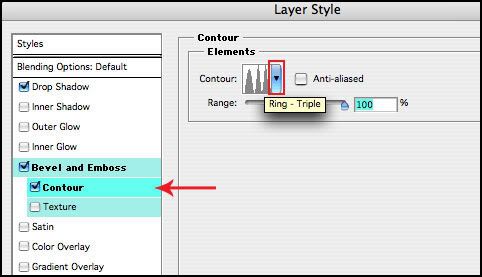  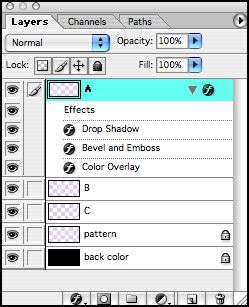 |
|
Jen
Creative Chick
Admin
Posts: 8,309
|
Post by Jen on Nov 9, 2009 19:46:36 GMT -6
The effects applied to layer A make up its style. Apply this style to layers B and C. To do that grab the Effects layer, black in picture below.  Drag it down until you see a bold line below layer B then release. In some versions of Photoshop you'll need to hold the option key for Macs and the alt key for Windows while you drag. Now grab the Effects layer again and drag it down until you see a bold line below layer C then release. 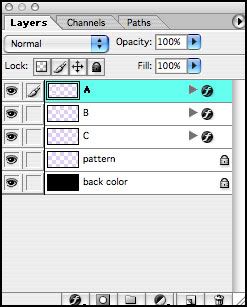 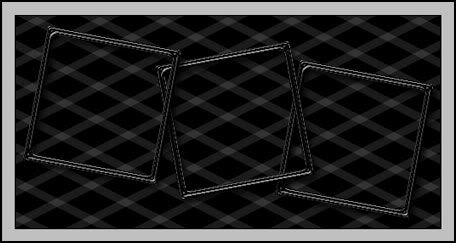 |
|
Jen
Creative Chick
Admin
Posts: 8,309
|
Post by Jen on Nov 9, 2009 19:57:51 GMT -6
Open the image you want to put in layer A's frame. Bring it into your file. Put this image into layer A's frame. Once your image is in layer A's frame link and merge the image and layer A. Name the layer pic 1. Open the image you want to put in layer B's frame. Bring it into your file. Put this image into layer B's frame. Once your image is in layer B's frame link and merge the image and layer B. Name the layer pic 2. Open the image you want to put in layer C's frame. Bring it into your file. Put this image into layer C's frame. Once your image is in layer C's frame link and merge the image and layer C. Name the layer pic 3. 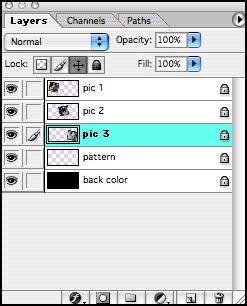 |
|
Jen
Creative Chick
Admin
Posts: 8,309
|
Post by Jen on Nov 9, 2009 20:00:17 GMT -6
Use the type tool to add your text. 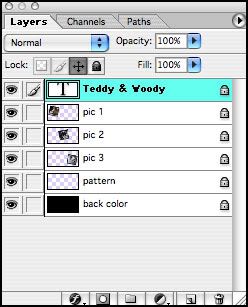 |
|
Jen
Creative Chick
Admin
Posts: 8,309
|
Post by Jen on Nov 9, 2009 22:24:49 GMT -6
Click on the ImageReady button in the toolbox. Below are the settings I used. 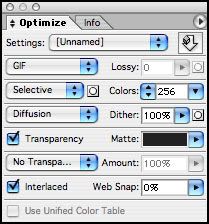 If you're not using Photoshop 7 but instead using a later version that doesn't have ImageReady then open your animation palette. |
|


