Jen
Creative Chick  Admin
Admin
Posts: 8,309 
|
Post by Jen on Oct 1, 2009 16:48:53 GMT -6
Here's a simple glitter border you can make using the custom shape tool.  |
|
Jen
Creative Chick
Admin
Posts: 8,309
|
Post by Jen on Oct 1, 2009 16:49:21 GMT -6
Start with a new file 5" x 2" at 100 ppi with a transparent background. Take the rectangular marquee tool and make a selection. 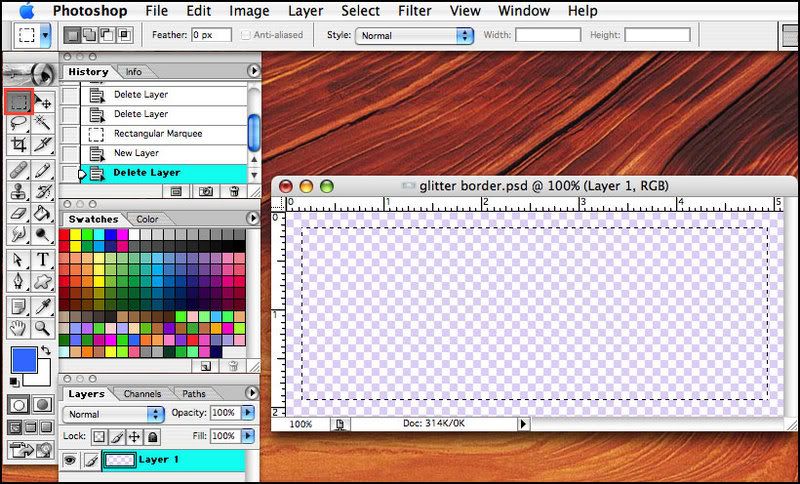 |
|
Jen
Creative Chick
Admin
Posts: 8,309
|
Post by Jen on Oct 1, 2009 16:49:53 GMT -6
If you don't know how to make the inner selection check out this thread, frame selections. Choose your color. It doesn't matter what color you use since the glitter layer will determine the color of your border. Choose Edit>Fill... and make sure foreground color is selected. Deselect that selection. Name this layer border. 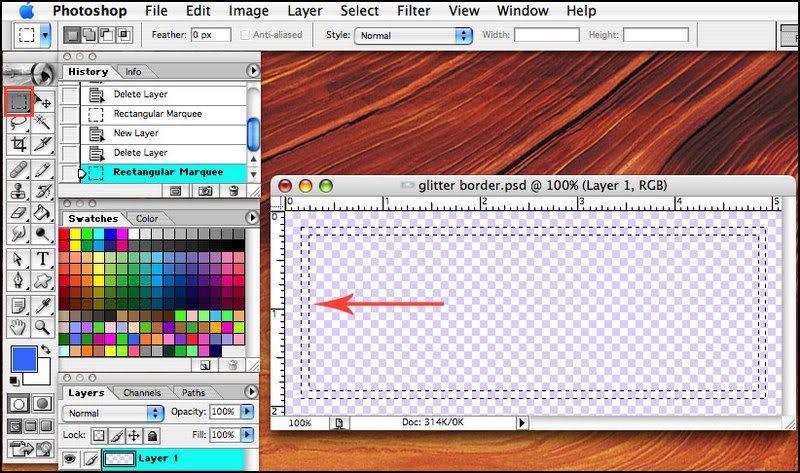 |
|
Jen
Creative Chick
Admin
Posts: 8,309
|
Post by Jen on Oct 1, 2009 16:50:37 GMT -6
Using the settings you see take the Custom Shape Tool and make your shapes around the border. If it helps you can put your shapes on individual layers so you can move them around with the move tool. Once your shapes are all in place link and merge all the shape layers to the border layer Link and Merge Layers. 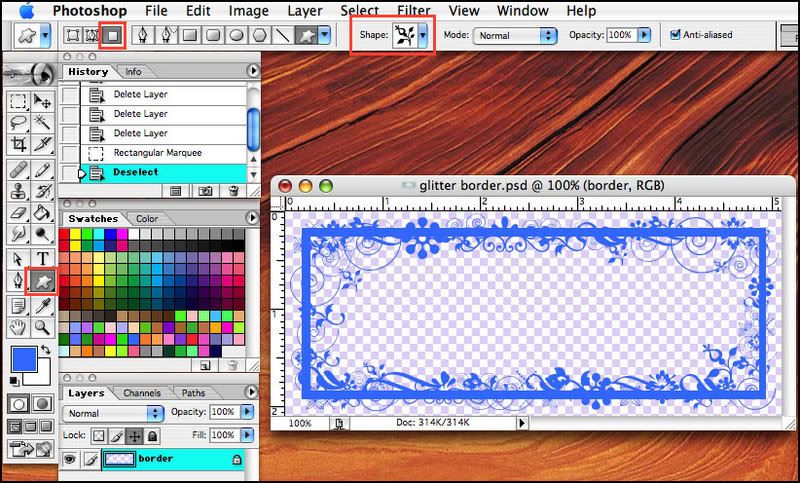 |
|
Jen
Creative Chick
Admin
Posts: 8,309
|
Post by Jen on Oct 1, 2009 16:51:43 GMT -6
To add your picture open the file and click on the Background from the layers palette and drag it into your siggy file and release. To see how to adjust the size of your picture se the Reduce/enlarge thread. I named my picture layer daisies. Make sure your picture layer is under your border layer. To delete the areas of your picture that extend past your frame, after you have your picture at the right size take the rectangular marquee tool and make a selection on top of your border. Choose Select>Inverse and then delete. 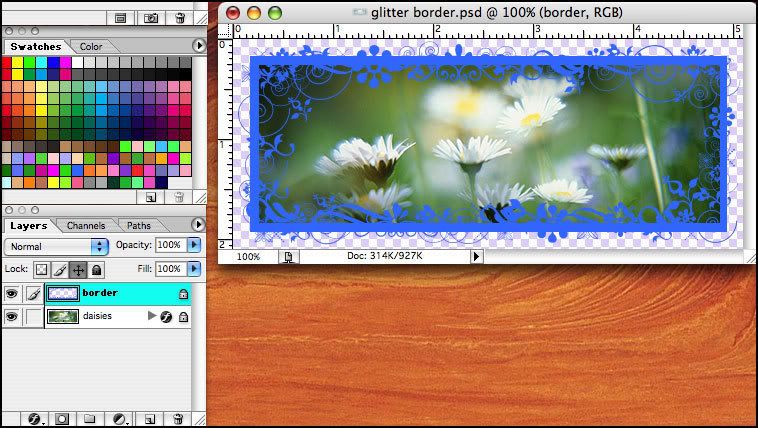 Add a layer and put it at the top in the layers palette and fill it with the color you want your glitter to be. Mine is named gold glitter. I then added another layer and filled it with white and lowered the opacity to 40%. I put this layer above the daisies layer and named it white. I added this to soften my picture. Then I added this layer style to the daisies layer... 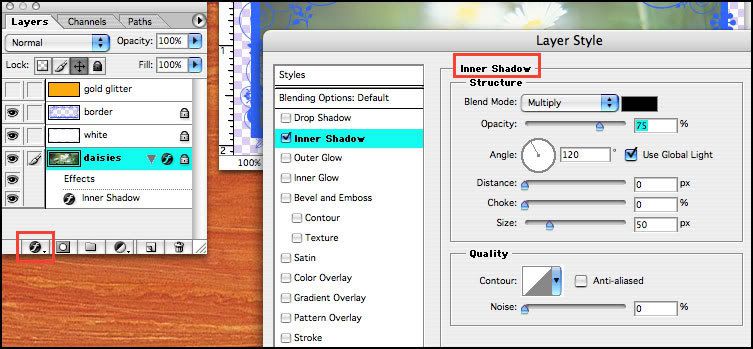 |
|
Jen
Creative Chick
Admin
Posts: 8,309
|
Post by Jen on Oct 1, 2009 16:57:07 GMT -6
This is what my picture looks like with the white layer and inner shadow. 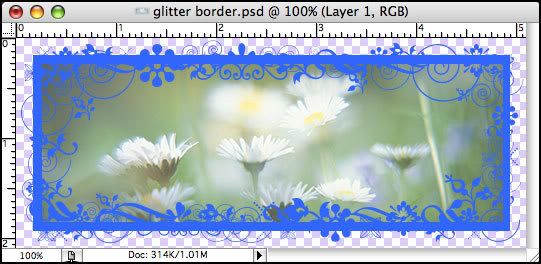 |
|
Jen
Creative Chick
Admin
Posts: 8,309
|
Post by Jen on Oct 1, 2009 16:58:17 GMT -6
Go into ImageReady. The settings I used are in the thread My Settings. The only change I made was I set the matte to the color of this forum so blue. Set your matte to the color of the forum you will be using your signature on. Click on the glitter layer/gold glitter and choose Filter>Texture>Grain. Then choose Filter again and at the top where it says Apply Grain choose that. Now make your border a selection. With your glitter layer/gold glitter as the active layer in the layers palette, choose Layer>New>Layer via Copy from the menu bar and then deselect. Lock the layer and name it 1. 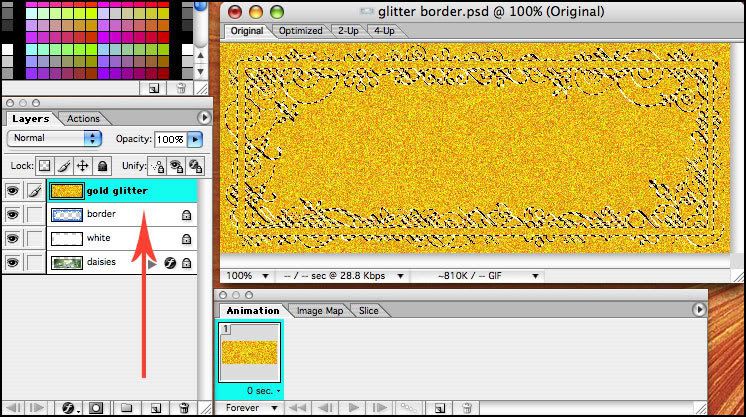 |
|
Jen
Creative Chick
Admin
Posts: 8,309
|
Post by Jen on Oct 1, 2009 16:58:56 GMT -6
Click on your glitter layer/u]gold glitter[/u] in the layers palette and choose Edit>Transform>Flip Horizontal. Now make layer 1 a selection. With your glitter layer/gold glitter as the active layer in the layers palette, choose Layer>New>Layer via Copy from the menu bar. Deselect and lock this new layer. Name it 2. 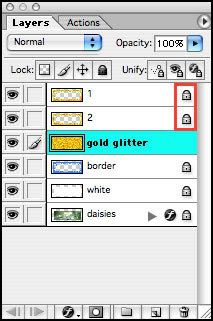 |
|
Jen
Creative Chick
Admin
Posts: 8,309
|
Post by Jen on Oct 1, 2009 16:59:28 GMT -6
Click on your glitter layer/gold glitter and choose Edit>Transform>Flip Vertical. Make layer 1 a selection. With your glitter layer/gold glitter as the active layer in the layers palette choose Layer>New>Layer via Copy from the menu bar. Deselect and lock this new layer. Name it 3. You can now throw out your border layer as well as your glitter layer/gold glitter. 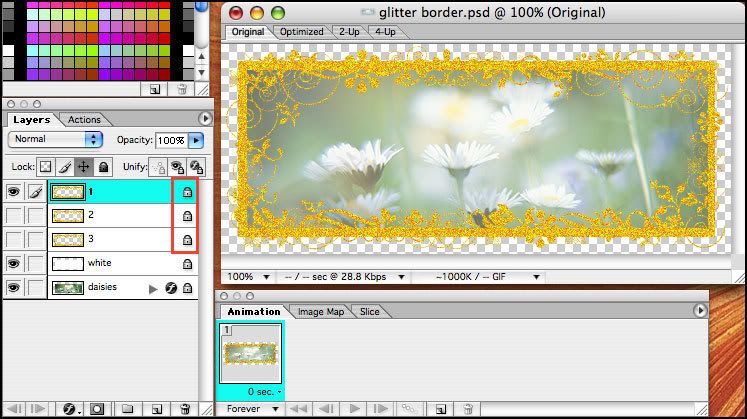 |
|
Jen
Creative Chick
Admin
Posts: 8,309
|
Post by Jen on Oct 1, 2009 16:59:56 GMT -6
I applied this layer effect to layer 1. To do that make layer 1 the active layer and then click on the tiny f in a circle at the bottom of the layers palette and choose Inner Shadow. When you do the Layer Options palette will now be called Inner Shadow. Now you can change the settings. To choose your color for the Inner Shadow click on the Color box in the Inner Shadow palette. Now in the Color Picker window that pops up select a color by dragging the ring and moving the arrow sliders up and down the vertical bar. When done click OK. Now add the same Inner Shadow effect to layers 2 & 3. 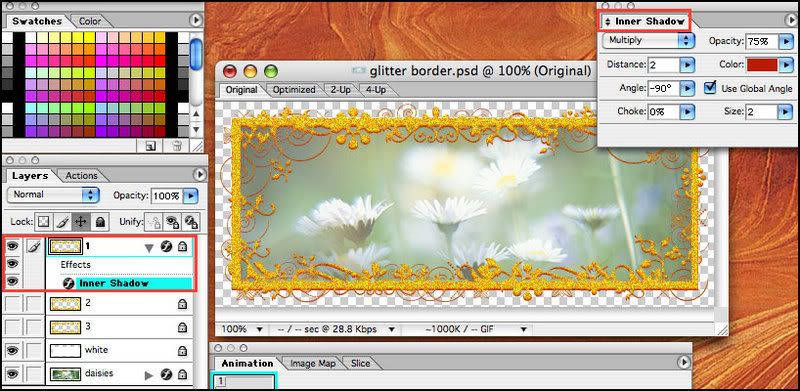 |
|


