Jen
Creative Chick  Admin
Admin
Posts: 8,309 
|
Post by Jen on Nov 13, 2009 13:21:32 GMT -6
Take the type tool and write your name. Use the move tool to put it in place. 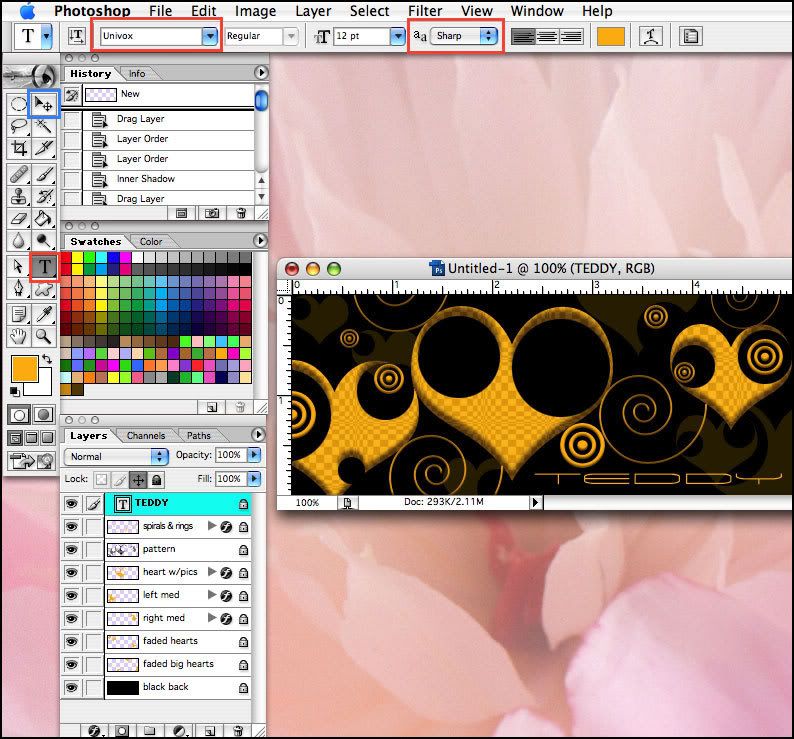 |
|
Jen
Creative Chick
Admin
Posts: 8,309
|
Post by Jen on Nov 13, 2009 13:22:55 GMT -6
Add a new layer and put it under your name layer. Name this layer name trim. Make your name (for me TEDDY), a selection then choose Select>Modify>Expand>1. Make black your foreground color. With the name trim layer as the active layer choose option + delete for Macs and alt + delete for Windows to fill the selection with the foreground color. Deselect. You do this to add a thin black border where the name overlaps the hearts, red arrow. If your name doesn't overlap any hearts you don't need to make a name trim layer.  |
|
Jen
Creative Chick
Admin
Posts: 8,309
|
Post by Jen on Nov 13, 2009 13:23:30 GMT -6
Open a picture you'd like to put into the frame. You can bring the picture into your signature two different ways. First you can click and drag the Background from the layers palette and release it over your file. If you hold the shift key while you click and drag your picture will be centered in your siggy file when you release. The second way is to first select the move tool from the toolbox and then click on the picture, drag it over your siggy and release. If you have more than one file open the way to tell which file is the active one is to look where the purple arrow is pointing. The files that aren't active will have their title area greyed out. 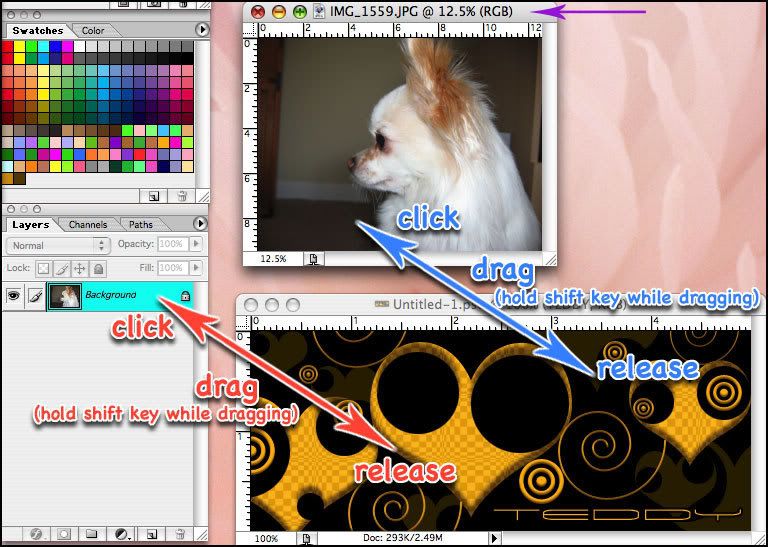 |
|
Jen
Creative Chick
Admin
Posts: 8,309
|
Post by Jen on Nov 13, 2009 13:23:54 GMT -6
Put your picture's layer under the heart w/pics layer. 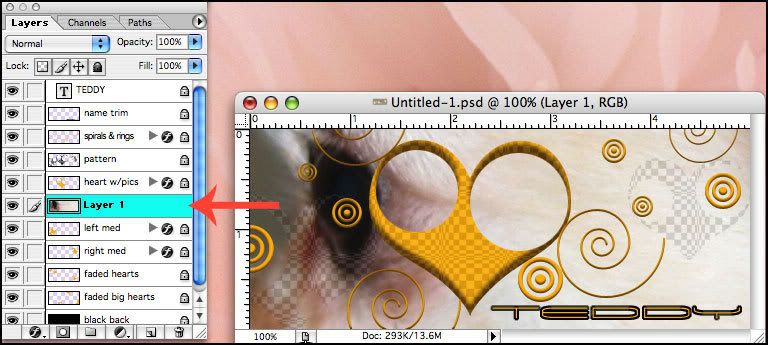 |
|
Jen
Creative Chick
Admin
Posts: 8,309
|
Post by Jen on Nov 13, 2009 13:24:17 GMT -6
To reduce or enlarge your picture choose Edit>Transform>Scale. In the options bar fill in an amount in the W and H fields. If you click on the link, green arrow, you just need to fill in an amount in one of the fields. Double click inside the bounding box or click the check to apply it, blue outline. You may need to repeat this step a couple of times before your picture is at the size you want. 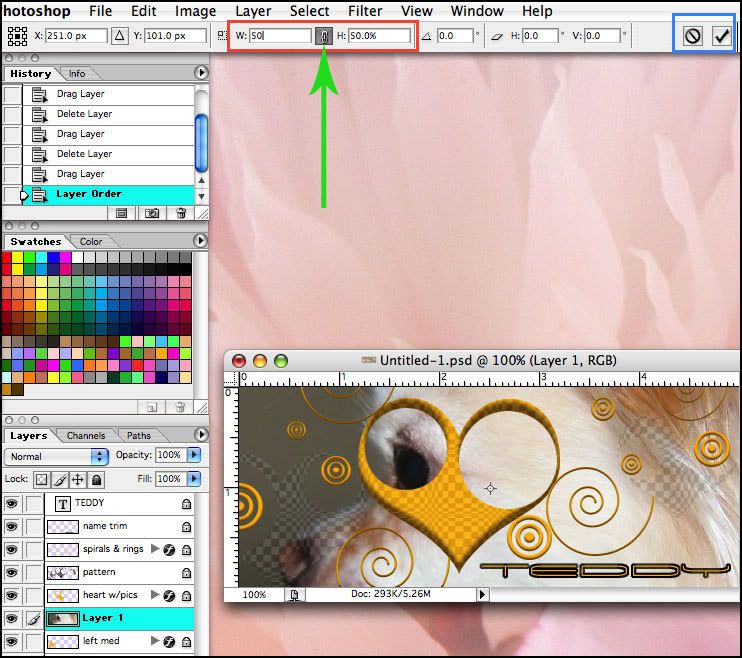 You can see when I reduced my picture to the size I wanted it wasn't positioned where I could see how it would look in the frame. Since I haven't clicked the check to apply the reduction yet, which is why you see the bounding box, I just need to click inside the box and drag it wherever I want.  |
|
Jen
Creative Chick
Admin
Posts: 8,309
|
Post by Jen on Nov 13, 2009 13:25:16 GMT -6
With your picture where you want click on the heart w/pics layer. Take the magic wand and click inside the section of your heart, blue arrow. Choose Select>Modify>Expand>3. 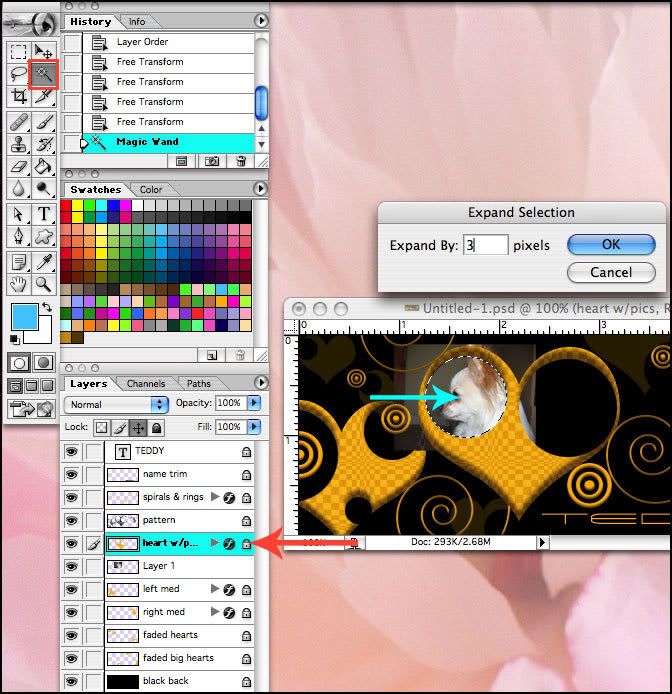 |
|
Jen
Creative Chick
Admin
Posts: 8,309
|
Post by Jen on Nov 13, 2009 13:25:40 GMT -6
Click on Layer 1 and choose Layer>New>Layer via Copy. Deselect. Throw away Layer 1. Name Layer 2 left PIC. Then apply Filter>Sharpen>Sharpen to it. Now add your second picture the same way you did for the first one. Name this layer right PIC. 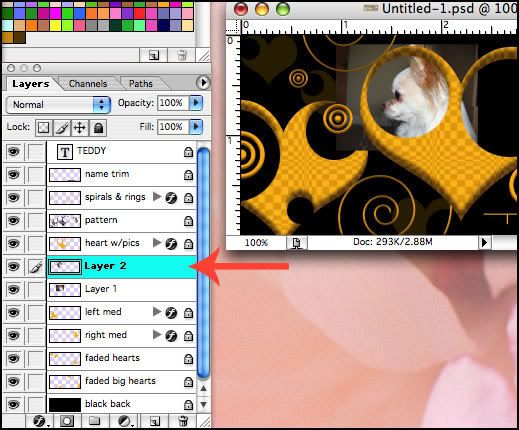 |
|
Jen
Creative Chick
Admin
Posts: 8,309
|
Post by Jen on Nov 13, 2009 13:26:07 GMT -6
Take your brush tool and set the Mode to Color in the options bar. Click on your left PIC layer and then apply the lock I added a blue outline to in the layers palette. Choose your foreground color, I used a dark gold. Paint over your left picture. Now click on the right PIC layer, apply the same lock and brush over that picture to change its color. 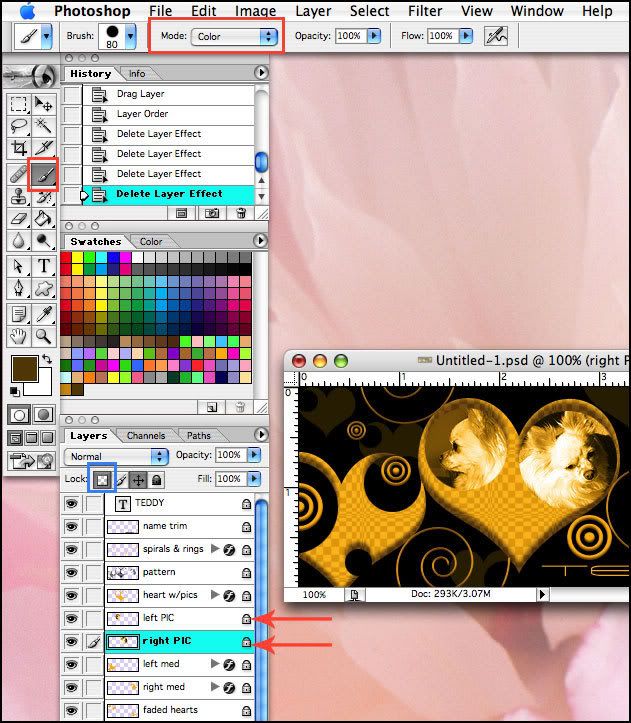 |
|
Jen
Creative Chick
Admin
Posts: 8,309
|
Post by Jen on Nov 13, 2009 13:26:46 GMT -6
Apply these two layer effects to the left PIC layer and then apply them to the right PIC layer. I chose my colors for both effects by clicking on the Color box in the Layer Style window and then sampling the colors from my picture. 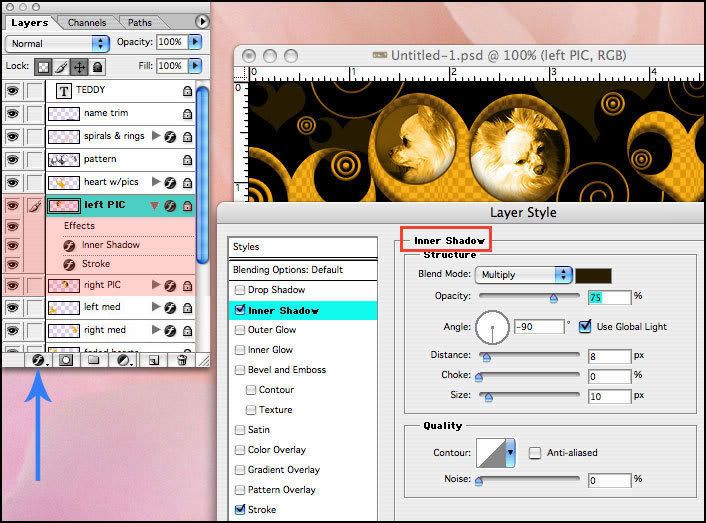 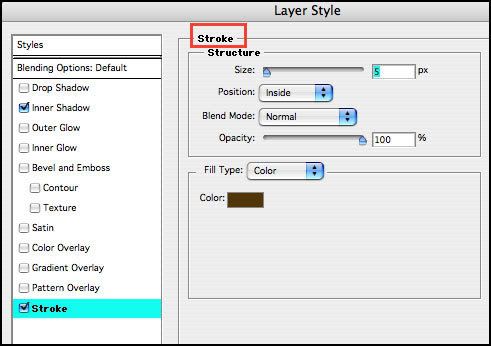 |
|
Jen
Creative Chick
Admin
Posts: 8,309
|
Post by Jen on Nov 13, 2009 13:27:10 GMT -6
Make a new layer and put it above the left PIC layer in the layers palette. Take your elliptical marquee tool and make a selection like in the picture. Take your gradient tool and click in the gradient in the options bar, choose the Black, White grad. Now go to your selection and click at the bottom of the selection, hold the shift key and drag to the top of the selection and release. Deselect. 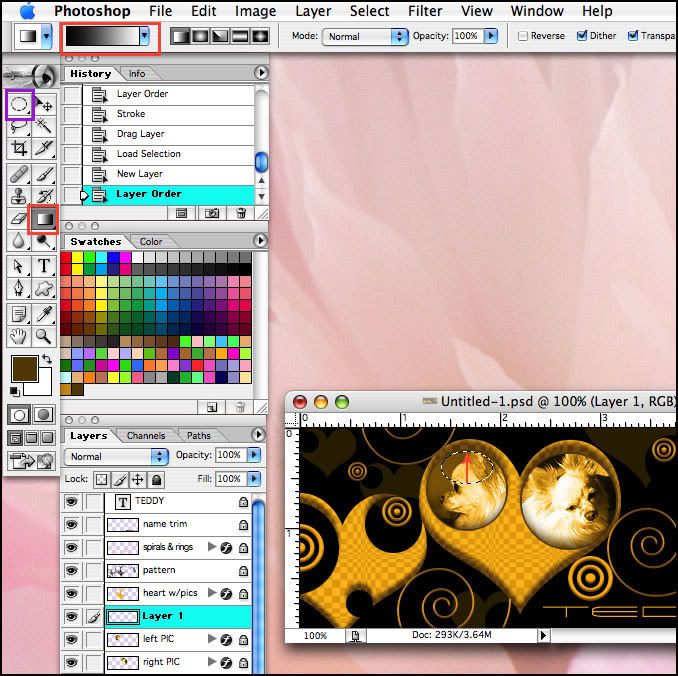 |
|


