Jen
Creative Chick  Admin
Admin
Posts: 8,309 
|
Post by Jen on Oct 1, 2009 10:34:43 GMT -6
This is just another way you can delete your backgrounds. Instead of erasing the background you're going to remove your object from the background using Quick Mask Mode. Open your picture. The two buttons I put a red border around are what you use to go in and out of Quick Mask Mode. Click the button on the right to go into Quick Mask Mode. You'll notice when in QMM your foreground and background colors automatically change to black and white. Also if you look in the file's title bar it will say (Quick Mask) after the file's name. Double click on the button on the right and the Quick Mask Options window you see will pop up. Choose Selected Areas and hit okay. 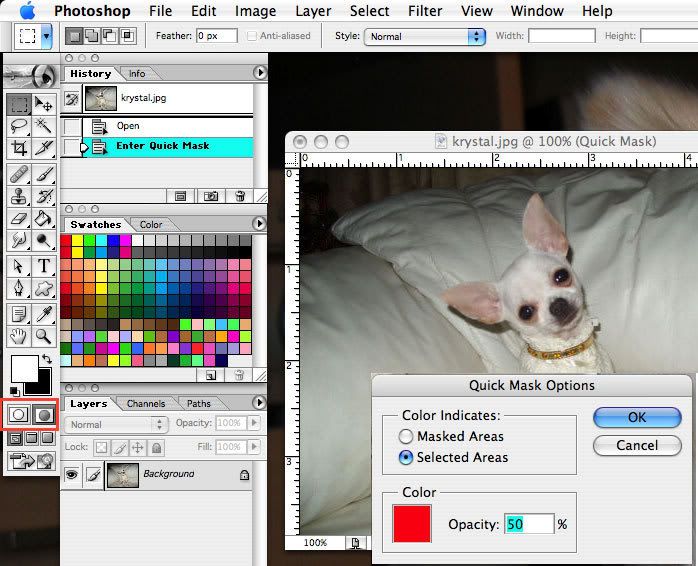 |
|
Jen
Creative Chick
Admin
Posts: 8,309
|
Post by Jen on Oct 1, 2009 10:35:09 GMT -6
Now while in Quick Mask Mode fill your picture with black. You do that by making black the foreground color and choosing option + delete for Macs and alt + delete for Windows. You'll see it filled your picture with a red mask and not black at all. This is because you're going to be working with a mask and not colors. The red areas are what will be selected when you leave QMM. Select your brush tool from the toolbox and pick a brush from the brushes palette. Now with white as your foreground color start coloring your object to remove the red mask from it. If you happen to go past your object and have exposed some of the background just make black your foreground color and add the mask back with the brush tool. You can choose to go in and out of Quick Mask Mode by pressing the buttons to see how your selection looks. Your mask will be replaced by a selection when you leave QMM. When your picture looks like the one below go out of Quick Mask Mode by clicking the button on the left. 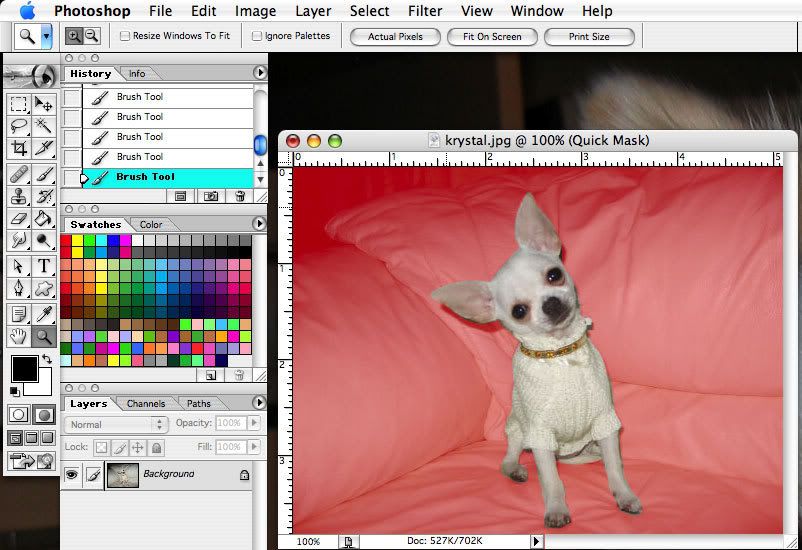 |
|
Jen
Creative Chick
Admin
Posts: 8,309
|
Post by Jen on Oct 1, 2009 10:36:05 GMT -6
When you're out of QMM your picture should look like this. The red mask is gone and has been replaced with a selection. If your picture is on a layer and isn't the Background in the layers palette you can click delete and then deselect. If you like a feathered border, like you get using the eraser tool to delete your background, after you leave QMM and before you choose delete choose Select>Modify>Smooth>1 from the Menu Bar. Then choose Select>Feather>1. Now click delete then deselect. But if your picture is the Background in the layers palette like mine was and not on a layer, then double click in the area next to where it says Background and the New Layer window will pop up. (In CS3/Photoshop 10 you need to click in the thumbnail to the left of the word Background). Choose OK from the window and now your Background is a layer. You do this so when you delete you have a transparent background and not one filled with a color. Now you can either click delete or smooth and feather your selection like described above before you delete. 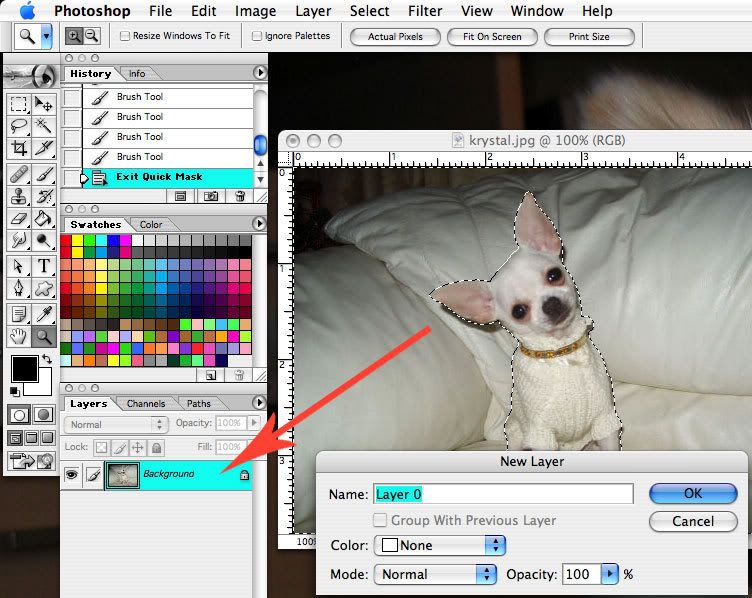 |
|
Jen
Creative Chick
Admin
Posts: 8,309
|
Post by Jen on Oct 1, 2009 10:36:29 GMT -6
And your background is gone. 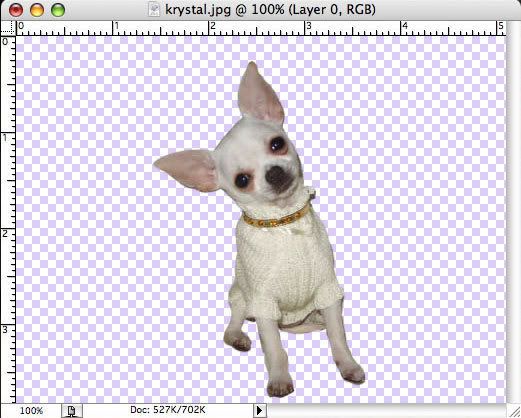 |
|


