Jen
Creative Chick  Admin
Admin
Posts: 8,309 
|
Post by Jen on Oct 1, 2009 13:20:15 GMT -6
Once you know how to use the pen tool you can make your own custom shapes. |
|
Jen
Creative Chick
Admin
Posts: 8,309
|
Post by Jen on Oct 1, 2009 13:21:01 GMT -6
When you make a path with the pen tool if you look in the paths palette you'll see it's called a Work Path. To make the work path below I opened a photo of my Chihuahua and then lowered the opacity of its layer. I went around his head with the pen tool and used the direct selection tool to make any needed adjustments to the path. 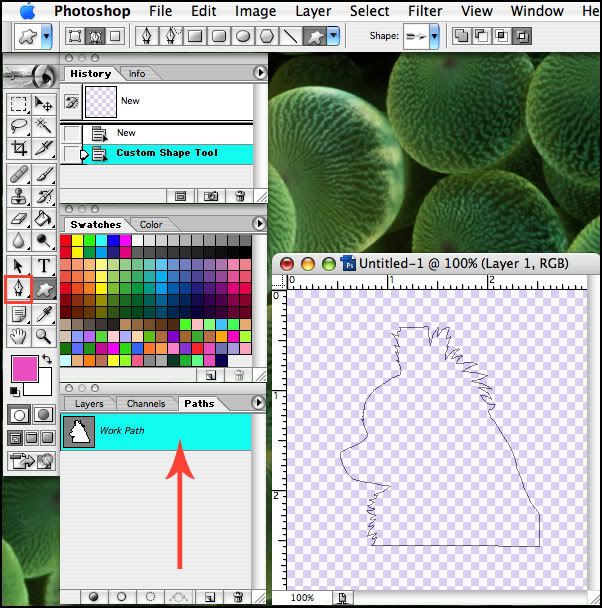 |
|
Jen
Creative Chick
Admin
Posts: 8,309
|
Post by Jen on Oct 1, 2009 13:21:23 GMT -6
To save my path I made sure it was highlighted in the paths palette and then clicked the tiny arrow in the top right corner of the palette. I chose Save Path... 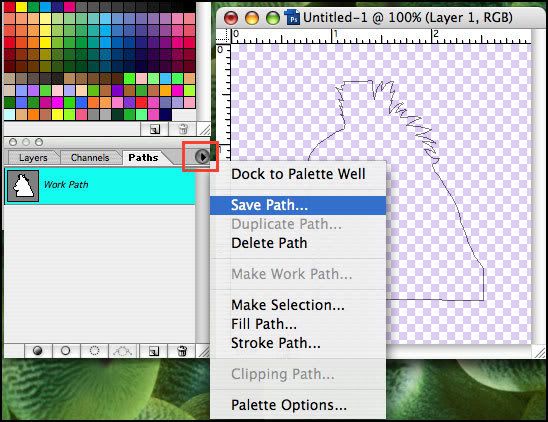 |
|
Jen
Creative Chick
Admin
Posts: 8,309
|
Post by Jen on Oct 1, 2009 13:21:44 GMT -6
I named my path In the Save Path window and then clicked OK. 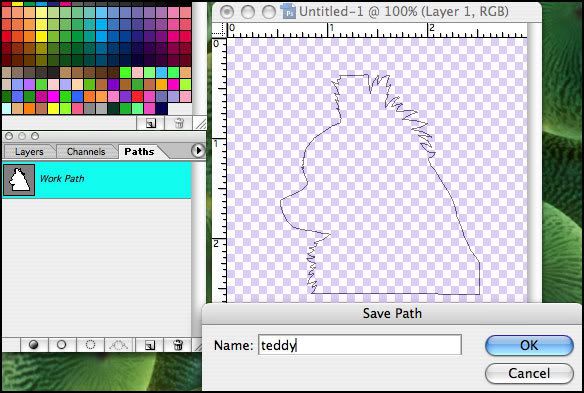 |
|
Jen
Creative Chick
Admin
Posts: 8,309
|
Post by Jen on Oct 1, 2009 13:22:07 GMT -6
With my path still highlighted, so showing in my file, I chose Edit>Define Custom Shape... 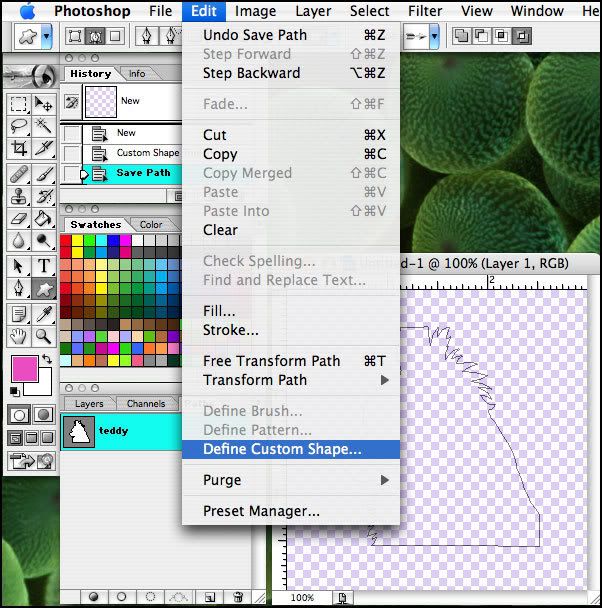 |
|
Jen
Creative Chick
Admin
Posts: 8,309
|
Post by Jen on Oct 1, 2009 13:22:31 GMT -6
I named my shape in the Shape Name window and then clicked OK. 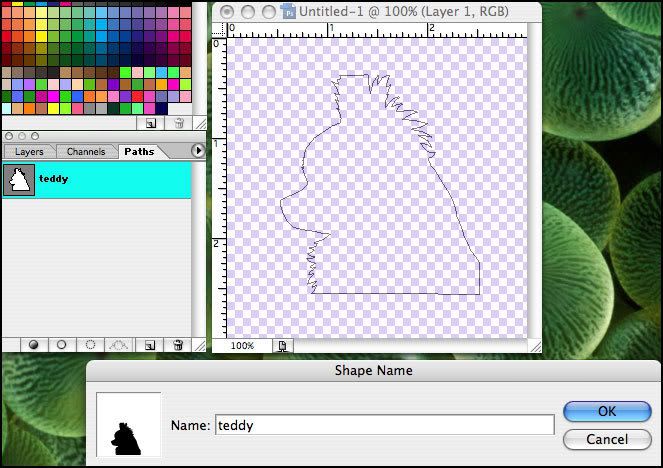 |
|
Jen
Creative Chick
Admin
Posts: 8,309
|
Post by Jen on Oct 1, 2009 13:23:13 GMT -6
And my new custom shape now appears in my custom shapes window. To open your custom shapes window first select the custom shape tool from the toolbox. Now click on the shape showing in the options bar, purple outline. If you let your cursor hover over a shape its name will appear. 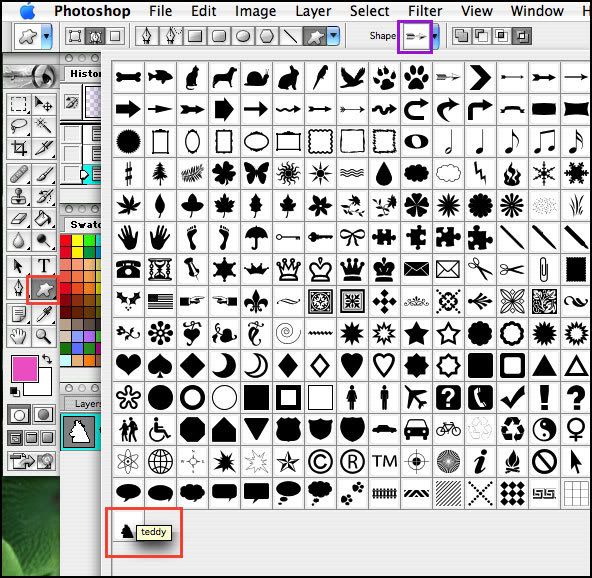 |
|
Jen
Creative Chick
Admin
Posts: 8,309
|
Post by Jen on Oct 1, 2009 13:23:59 GMT -6
And here is how my new custom shape looks... 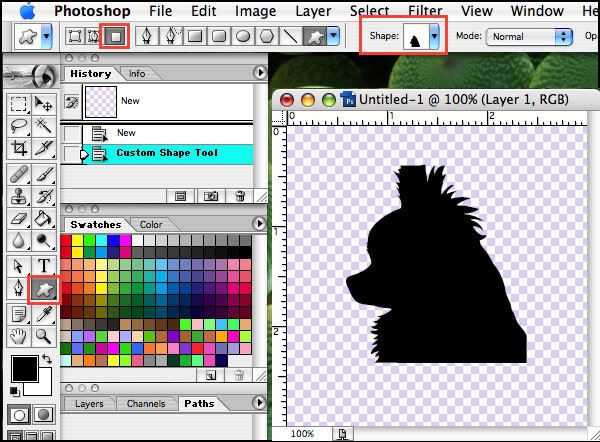 |
|


