Jen
Creative Chick  Admin
Admin
Posts: 8,309 
|
Post by Jen on Oct 1, 2009 13:53:25 GMT -6
Do you have a picture you'd like to use but you accidentally cut an ear or tail off? Depending on the picture you are using and what part was cut off you might find this tutorial helpful. In this tutorial I use The Clone Stamp Tool. I really like this picture of Woody but what I don't like is that I cut off one of his ears. But it's an easy fix. 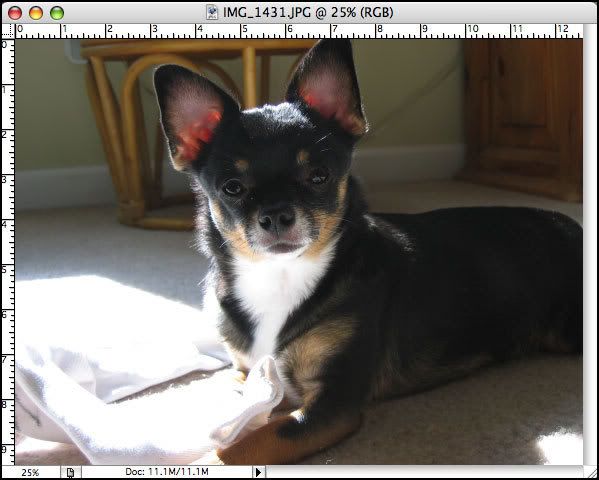 |
|
Jen
Creative Chick
Admin
Posts: 8,309
|
Post by Jen on Oct 1, 2009 13:53:52 GMT -6
First I took the lasso tool and traced around Woody. From the menu bar I chose Select>Modify>Smooth>1. With the same selection I then chose Select>Feather>1. Finally Layer>New>Layer via Copy and my background was gone. 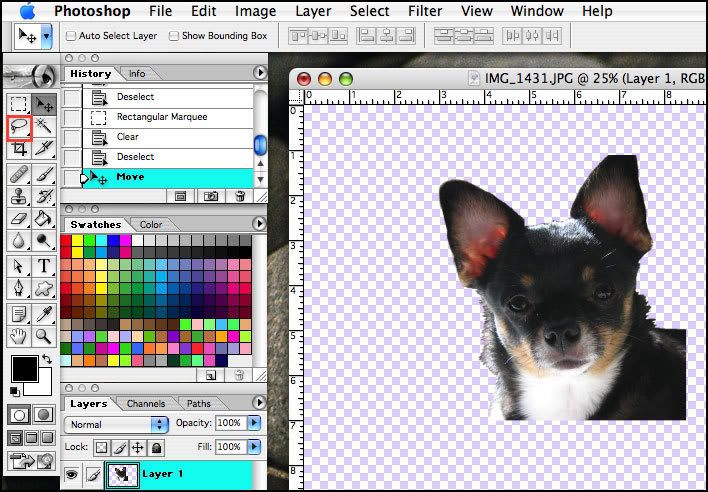 |
|
Jen
Creative Chick
Admin
Posts: 8,309
|
Post by Jen on Oct 1, 2009 13:54:18 GMT -6
With the lasso tool I made a selection around his ear. Then I chose Layer>New>Layer via Copy from the menu bar. 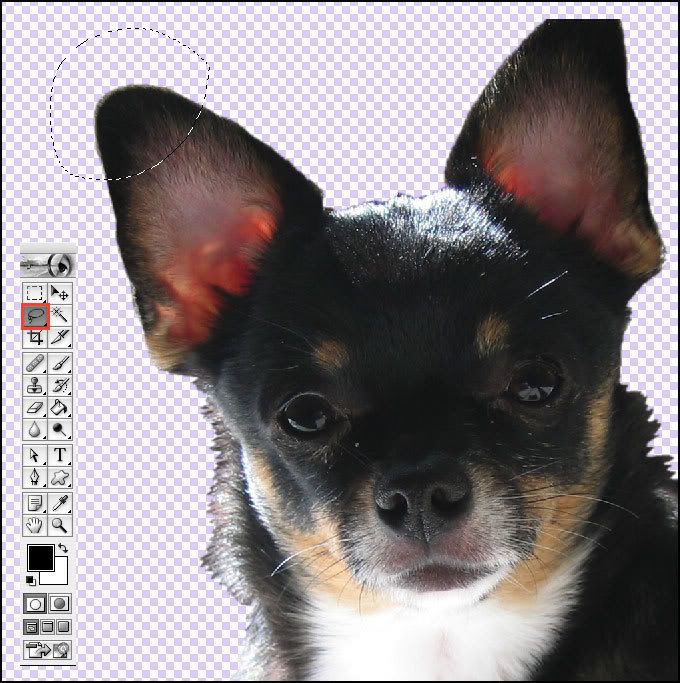 |
|
Jen
Creative Chick
Admin
Posts: 8,309
|
Post by Jen on Oct 1, 2009 13:54:50 GMT -6
I lowered the opacity for the tip of the ear's layer from the layers palette. Then I went to Edit>Transform>Flip Horizontal from the menu bar. I then took the move tool and moved the piece over. Next I chose Edit>Transform>Rotate. To rotate his ear I just grabbed a corner and turned it until it looked right. When you see the bounding box around the piece you are rotating you can click and drag from inside the box to move the entire piece if you need to. When I was happy with its placement I put the opacity of the layer back to 100%. 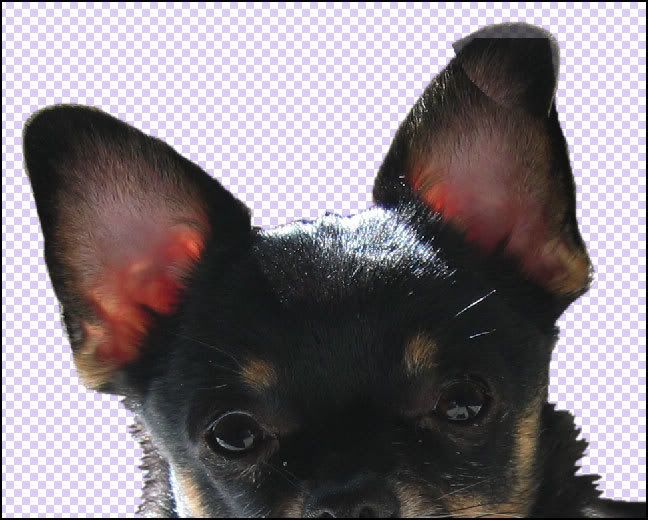 |
|
Jen
Creative Chick
Admin
Posts: 8,309
|
Post by Jen on Oct 1, 2009 13:56:30 GMT -6
I then linked and merged the two layers, the Woody picture and the tip of the ear. My edges were a little rough in a few places. 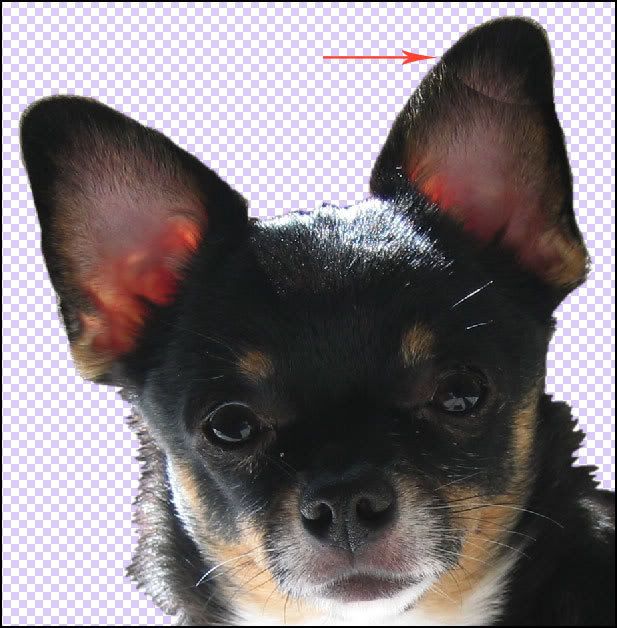 |
|
Jen
Creative Chick
Admin
Posts: 8,309
|
Post by Jen on Oct 1, 2009 13:57:10 GMT -6
I took the lasso tool and made a selection around the rough edges. Next I chose Select>Modify>Smooth>1. With the same selection, Select>Feather>1 and clicked delete. 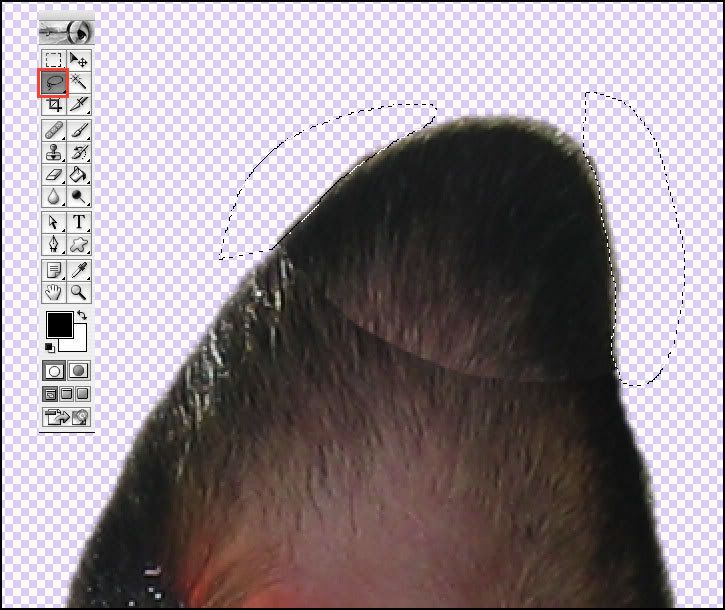 |
|
Jen
Creative Chick
Admin
Posts: 8,309
|
Post by Jen on Oct 1, 2009 13:57:36 GMT -6
I then clicked the lock in the layers palette that I outlined in red. This locks transparent pixels. I did this so when I use the clone stamp tool it won't go outside his ear. 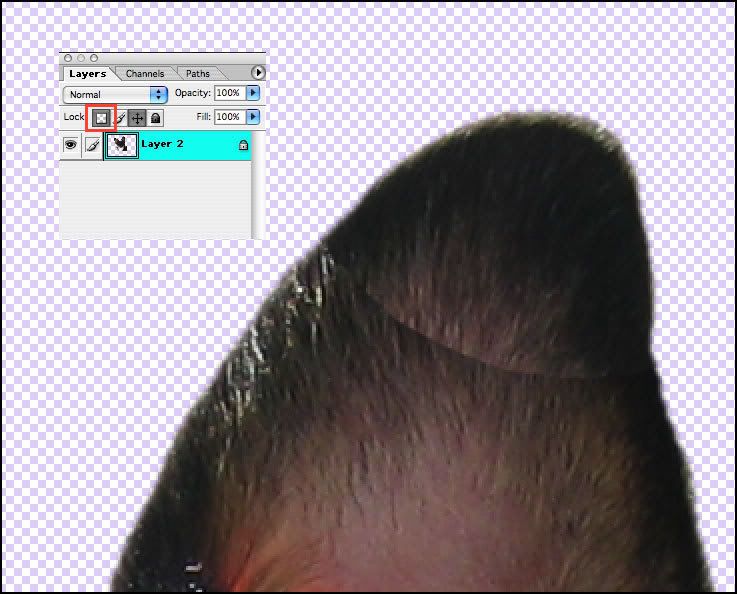 |
|
Jen
Creative Chick
Admin
Posts: 8,309
|
Post by Jen on Oct 1, 2009 13:57:59 GMT -6
I chose the clone stamp tool from the toolbox and then picked a fairly good sized soft brush from the brush palette. 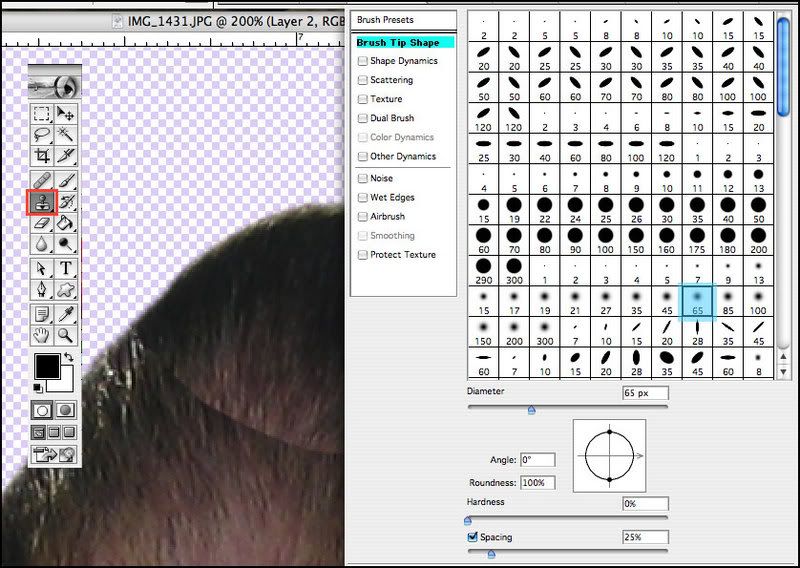 |
|
Jen
Creative Chick
Admin
Posts: 8,309
|
Post by Jen on Oct 1, 2009 13:58:24 GMT -6
These were my clone tool settings in the options bar. To use the clone stamp tool on my Mac I hold down the alt/option key, for Windows it's the ALT key, and my cursor changes to the circle with a cross, similar to what you see in the picture. Now I click down where I want the tool to clone from. Then I release the alt/option key and start painting and what appears is an exact clone of what appears where I first clicked down. The brush size determines how much of the area is cloned. For the ear I cloned from a few different places. I also just clicked down each time with the brush and didn't drag it around. 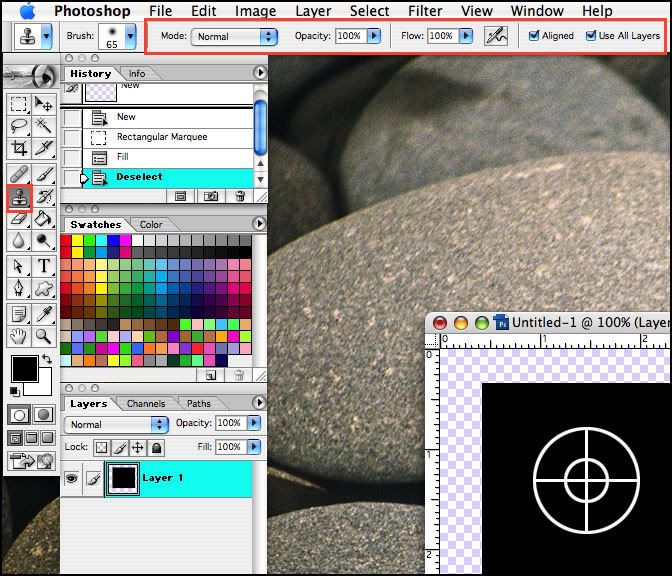 |
|
Jen
Creative Chick
Admin
Posts: 8,309
|
Post by Jen on Oct 1, 2009 13:58:48 GMT -6
Here's a close-up of the cloned ear... 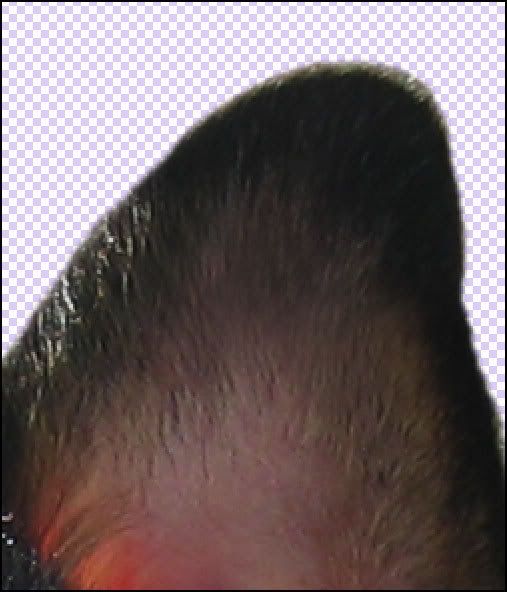 |
|


