Jen
Creative Chick  Admin
Admin
Posts: 8,309 
|
Post by Jen on Oct 1, 2009 21:47:24 GMT -6
Yet another way to remove backgrounds from your photos is to use the Extract filter.
|
|
Jen
Creative Chick
Admin
Posts: 8,309
|
Post by Jen on Oct 1, 2009 21:48:08 GMT -6
Open your picture and go to to the layers palette and make a copy of your picture. You do that by clicking and dragging it to the new layer icon. In the picture my pic of Teddy was on the Background yours might be on a layer. Now hide the original picture by clicking on its eye in the layers palette. 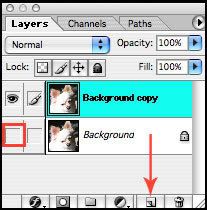 With the copy as the active layer choose Filter>Extract... from the menu bar and this is the window you'll see. To enlarge or reduce the window click and drag the bottom right corner, red arrow. If you hold your cursor over any of the tools on the left that aren't greyed out information about them will be displayed in the top field under the word Extract. 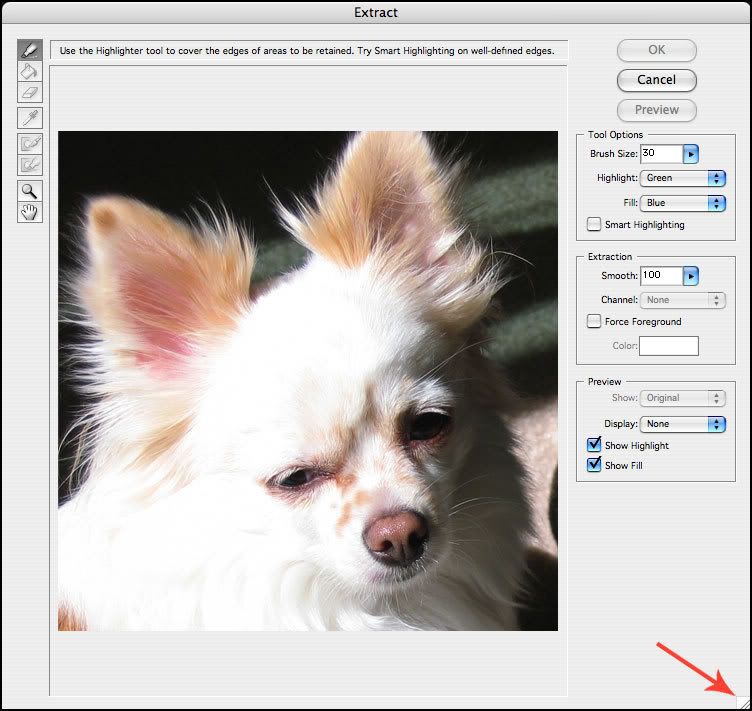 |
|
Jen
Creative Chick
Admin
Posts: 8,309
|
Post by Jen on Oct 1, 2009 21:48:42 GMT -6
Select the edge highlighter tool, red outline. You want to apply the highlight so it slightly overlaps both the foreground object, Teddy, and the background. You can stop and start at anytime when applying the highlight since it doesn't have to be applied in one stroke. You can set the Highlight color as well as the brush size in the Tool Options section, red arrows. Use a large brush to cover intricate edges, for example the fur around Teddy's ears. You can use the eraser, blue outline, to remove any of the highlight. Check the Smart Highlighting box if you're highlighting well defined/sharper edges. To change the Smoothing of the extracted object you can enter an amount in the Smooth field or drag the slider. The Photoshop help recommends starting with zero or a small amount to avoid unwanted blurring of details. I had mine set to 100% for this extraction. 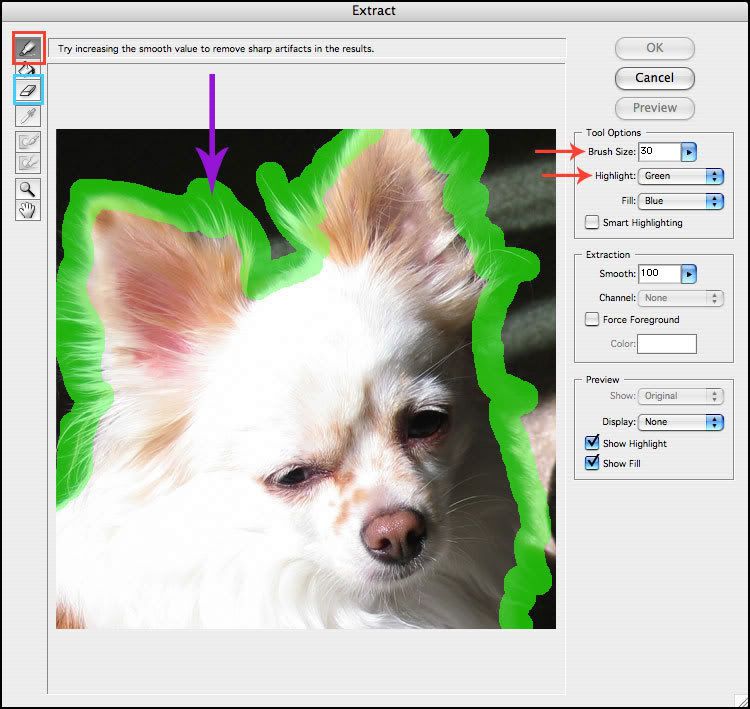 |
|
Jen
Creative Chick
Admin
Posts: 8,309
|
Post by Jen on Oct 1, 2009 21:49:09 GMT -6
Once you've applied the highlight to mark the edge, choose the paintbucket and click inside your highlight to fill it. If your entire picture has filled with the fill it means there is a gap somewhere in your highlight. Go back with the edge highlight tool and fill it in. You can change the color of the Fill in the Tool Options section. Use the zoom tool to magnify an area. To zoom out hold option for Macs and alt for Windows as you click in the picture. To move your view use the hand tool to click and drag on your picture. Once your highlight is properly filled click the preview button. 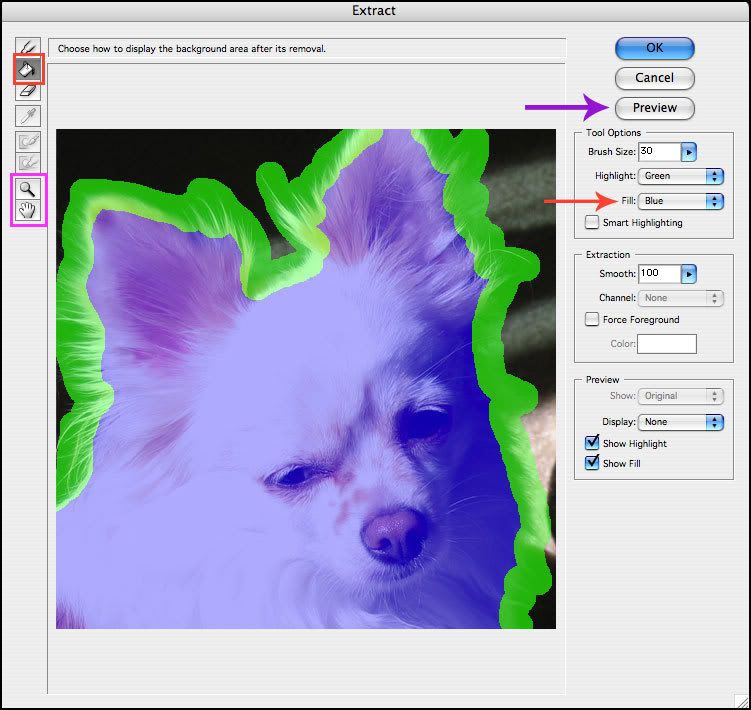 |
|
Jen
Creative Chick
Admin
Posts: 8,309
|
Post by Jen on Oct 1, 2009 21:49:36 GMT -6
Once you see the preview if you need to make any touch ups which include deleting areas you don't want, red arrows, or adding any sections back you use the Cleanup Tool and Edge Touchup Tool, red outline. If you look in the Preview section on the right you'll see you have a couple of options. You can go back to the original by choosing it in the Show pulldown. You can select what you want the extracted picture to show up against in the Display pulldown. You can also choose Show Highlight or Show Fill by checking their boxes. 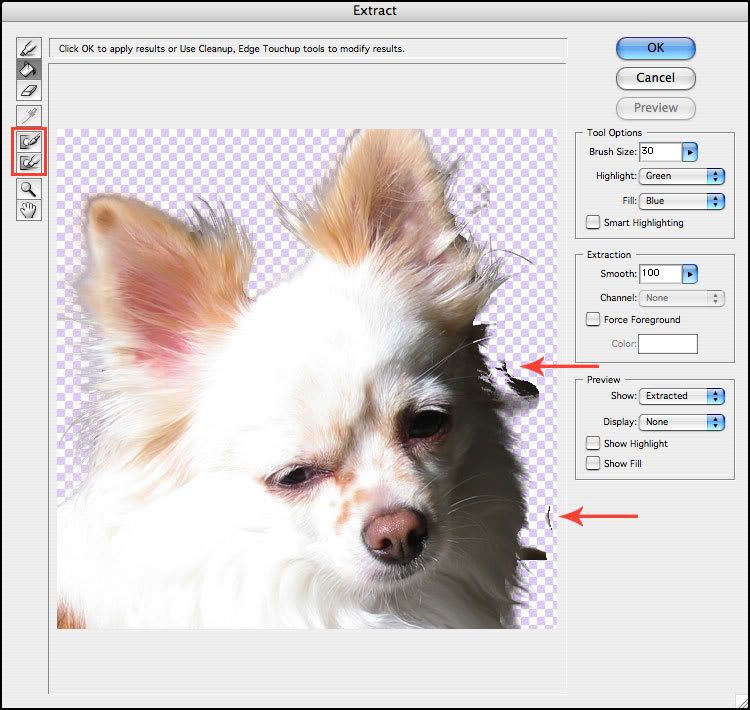 |
|
Jen
Creative Chick
Admin
Posts: 8,309
|
Post by Jen on Oct 1, 2009 21:50:04 GMT -6
I took the Cleanup Tool, red outline, and erased the sections I didn't want. If you hold the option key for Macs and the alt key for Windows when using this tool it will add back any sections you brush over. Change the size of the brush in the Tool Options section. The Edge Touchup Tool is under the previous tool and is used to edit the edge of the extracted object. With this tool you can sharpen the edges. Hold the command key for Macs and the control key for Windows to move the edge. I didn't use this tool with this picture of Teddy. 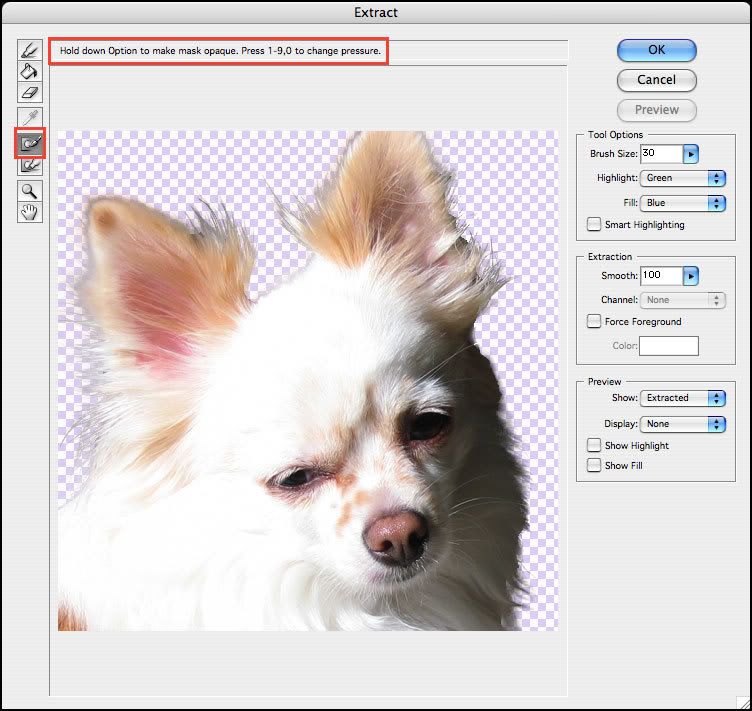 |
|
Jen
Creative Chick
Admin
Posts: 8,309
|
Post by Jen on Oct 1, 2009 21:50:39 GMT -6
And here's my picture of Teddy extracted from the background. You'll see with the Extract filter I was able to get all of Teddy's fine fur. Teddy is on one layer and on another layer I filled it with black. 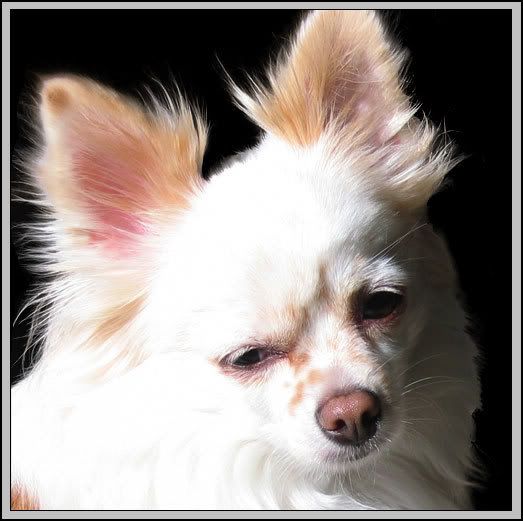 |
|


