Jen
Creative Chick  Admin
Admin
Posts: 8,309 
|
Post by Jen on Oct 2, 2009 19:57:11 GMT -6
Here's a simple avatar you can make.  |
|
Jen
Creative Chick
Admin
Posts: 8,309
|
Post by Jen on Oct 2, 2009 19:57:44 GMT -6
Start with a new file. 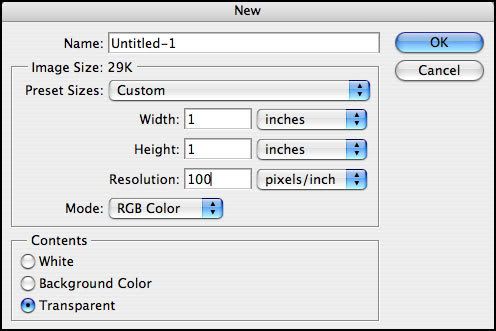 |
|
Jen
Creative Chick
Admin
Posts: 8,309
|
Post by Jen on Oct 2, 2009 19:58:32 GMT -6
This is what your file will look like. 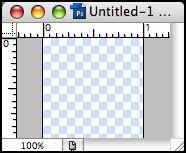 This is what your layers palette will look like. 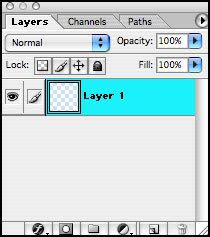 I like to extend my file so I have a grey border going all around. To do this just click on the corner with the diagonal lines and drag out. 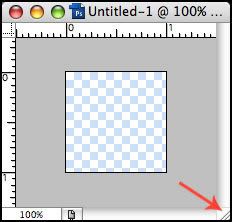 |
|
Jen
Creative Chick
Admin
Posts: 8,309
|
Post by Jen on Oct 2, 2009 19:58:59 GMT -6
Open one of the photos you'd like to use in your avatar. You want your photo to be the active file. You make a file the active file by clicking on it. If you have more than one file open at a time you can see which is the active file by looking at the title bar, red arrows on the right. Files that aren't active, Untitled-1 in the picture below, will be greyed out. The file that is active, my photo of Woody, won't be greyed out. You can also look in the layers palette. Whatever file is the active file its layers will show in this palette, red arrow on the left side.  |
|
Jen
Creative Chick
Admin
Posts: 8,309
|
Post by Jen on Oct 2, 2009 20:00:10 GMT -6
You now need to bring your photo into your avatar's file. Select the move tool.  With the photo file as the active file, hold the shift key then click down on your photo and drag it over your avatar's file then release. Holding the shift key centers the photo in the file you're dragging it into. If you don't hold the shift key you can still bring a photo into another file it just won't necessarily be centered. 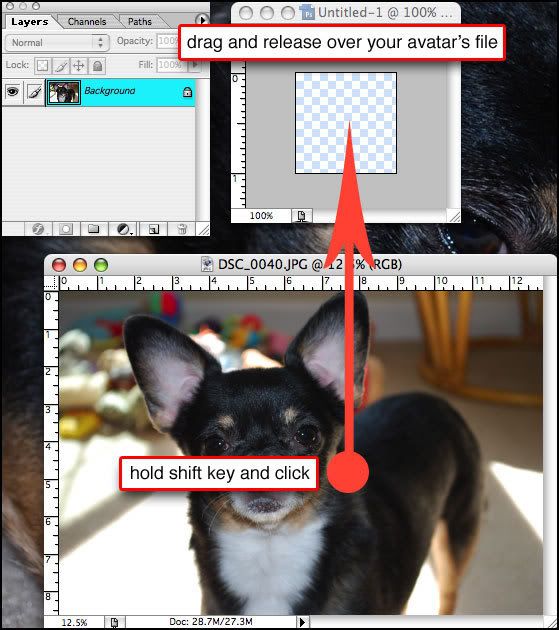 If you look at the picture below you can see the grey border that represents my photo as I'm dragging it. 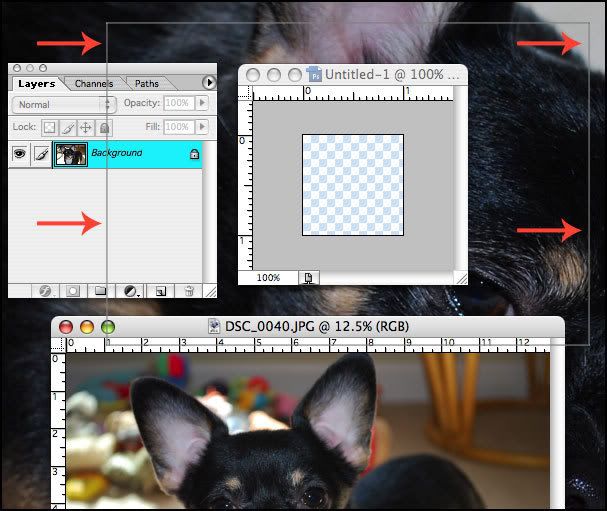 |
|
Jen
Creative Chick
Admin
Posts: 8,309
|
Post by Jen on Oct 2, 2009 20:00:40 GMT -6
When you're done if you go to your layers palette you'll see Layer 2 is automatically added in the palette. This is your photo. You can see that my picture is much too large for the avatar and will need to be reduced. 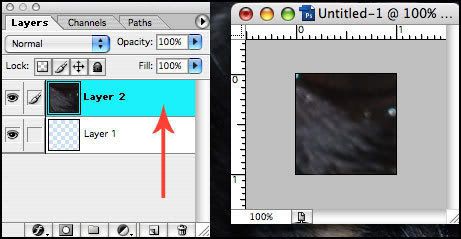 |
|
Jen
Creative Chick
Admin
Posts: 8,309
|
Post by Jen on Oct 2, 2009 20:01:03 GMT -6
Whether you need to reduce or enlarge your photo choose Edit>Transform>Scale. If you look in the options bar this is what you'll see. The only difference from the picture below is you'll have a 0 in the W and H fields. I wanted to reduce my picture by 50% so first I entered 50 in the W field, underlined in red. Then I clicked the link, underlined in purple. When you click the link whatever you enter in either the W or H field is automatically entered into the other field. So 50% was automatically put into the H field. If you don't enter the same amount in both fields your picture will not reduce/enlarge in proportion. To apply the reduction I clicked the check mark, underlined in pink. Because my picture was so large I needed to reduce it quite a few times.  |
|
Jen
Creative Chick
Admin
Posts: 8,309
|
Post by Jen on Oct 2, 2009 20:01:25 GMT -6
Reducing photos can often cause them to get a little blurry. If you needed to reduce your photo you can now sharpen it up a bit. Go to your layers palette. If Layer 2 (your photo's layer) is not highlighted then click on it. Whatever layer is highlighted is the active layer. Now choose Filter>Sharpen>Sharpen. 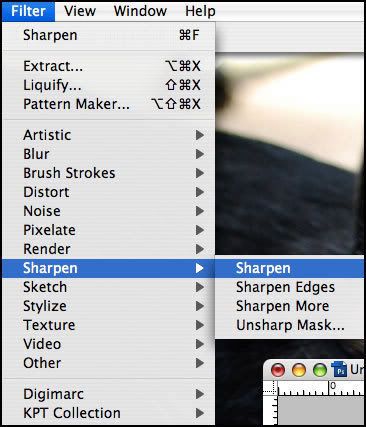 |
|
Jen
Creative Chick
Admin
Posts: 8,309
|
Post by Jen on Oct 2, 2009 20:01:48 GMT -6
Now you can rename your photo's layer. To do this double click on where it says Layer 2 and type in the new name. 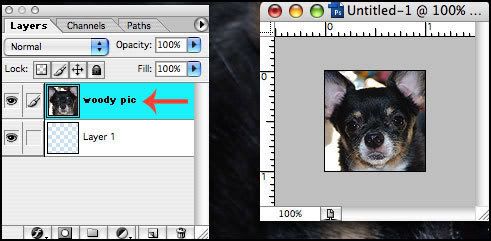 |
|
Jen
Creative Chick
Admin
Posts: 8,309
|
Post by Jen on Oct 2, 2009 20:02:25 GMT -6
You no longer need Layer 1 so you can delete it. To do this click on Layer 1 and drag it to the trash icon, red arrow, then release. 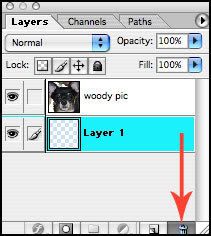 Here's what you'll end up with. 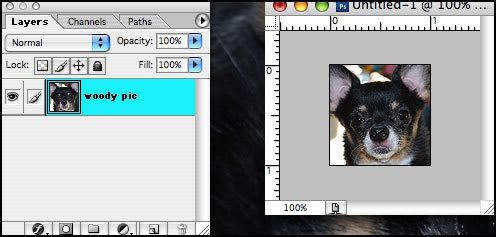 |
|


