Jen
Creative Chick  Admin
Admin
Posts: 8,309 
|
Post by Jen on Oct 2, 2009 20:18:44 GMT -6
Go to your file and click and drag to move the picture 2 layer. When lining your photos up you want to pick a part of your main subject that's stationary in both photos. I used Teddy's front legs. The only time you'd use what was in your background to line your photos up is if your main subject didn't have any stationary parts. For example if your main subject was running or walking. 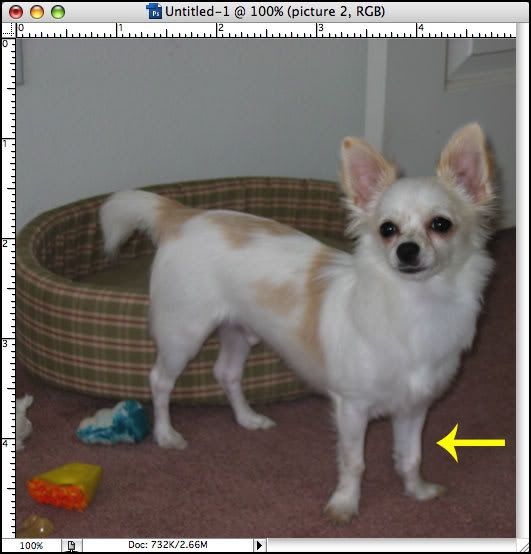 Don't be concerned if the background doesn't match up. You can see mine is a little off, blue arrows. After you have your two photos/layers lined up you now want to add the link back to the picture 1 layer by clicking in the empty box in the layers palette, green outline. 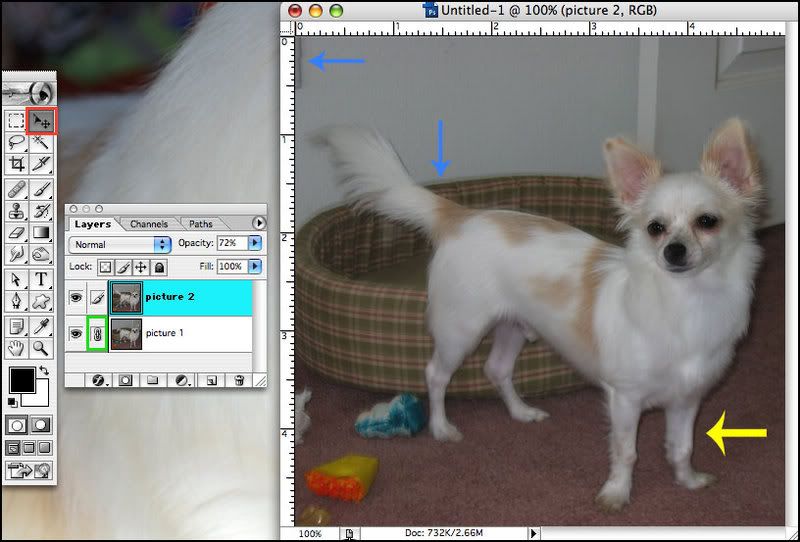 |
|
Jen
Creative Chick
Admin
Posts: 8,309
|
Post by Jen on Oct 2, 2009 20:19:08 GMT -6
Now change the picture 2 layer's opacity back to 100%. 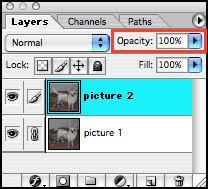 |
|
Jen
Creative Chick
Admin
Posts: 8,309
|
Post by Jen on Oct 2, 2009 20:19:36 GMT -6
Now you want to apply the lock position lock to both of your layers. This will prevent the layers from being accidentally moved during the animation stage. First click on the picture 1 layer then click the cross lock, red outline. When you do a lock icon will appear on its layer. Now click on the picture 2 layer then click the cross lock, red outline. When you do a lock icon will appear on its layer. 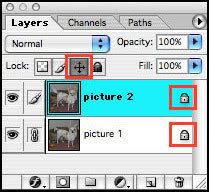 |
|
Jen
Creative Chick
Admin
Posts: 8,309
|
Post by Jen on Oct 2, 2009 20:21:35 GMT -6
Now go to ImageReady. Select the crop tool. In the options bar these are the settings you want to use.  Go to your file and click in the top left corner then drag at an angle towards the bottom right corner of your file. Release when you've reached the bottom corner. You'll see a bounding box is added around your file, purple arrow. 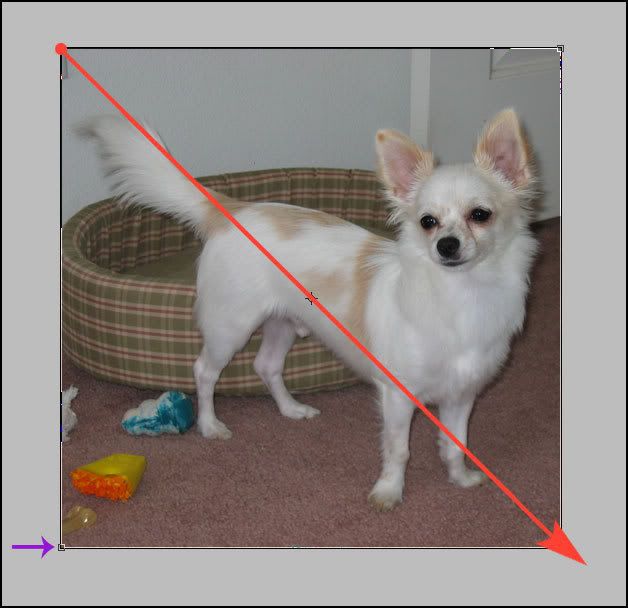 Now double click inside your file to apply the crop. And your file should now be 1" x 1".  |
|
Jen
Creative Chick
Admin
Posts: 8,309
|
Post by Jen on Oct 2, 2009 20:23:15 GMT -6
Now to animate your avatar. Click on the picture 2 layer in the layers palette. Click the eye on the picture 1 layer so it disappears. You have now hidden this layer. Click the add a frame button in the animation palette. 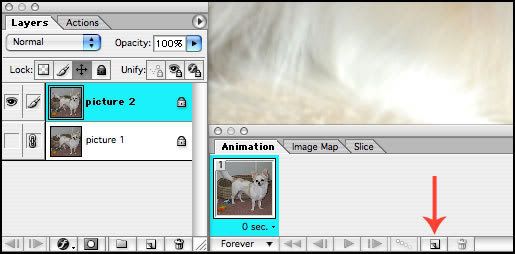 |
|
Jen
Creative Chick
Admin
Posts: 8,309
|
Post by Jen on Oct 2, 2009 20:25:09 GMT -6
Click the empty box where the eye was on the picture 1 layer so you see the eye again. Click the eye on the picture 2 layer so it disappears. You have now hidden this layer. 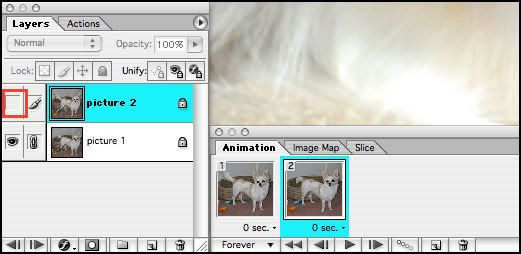 |
|
Jen
Creative Chick
Admin
Posts: 8,309
|
Post by Jen on Oct 2, 2009 20:26:09 GMT -6
Now to set the amount of time each photo will show for. Click on frame 2 in the animation palette, it will become highlighted just like a layer does when you click on it. Now click and hold the tiny arrow in the lower right corner of the frame next to where it says 0 sec. When you do a window will pop up with times you can choose from. You can set a custom time that doesn't appear on the list by selecting Other... I selected 0.2 Now click on frame 1. Again click and hold the tiny arrow in the lower right corner and choose the same time you selected for frame 2. The time you choose will be determined by what your action is. After playing the animation if things don't look right just go back to each frame and change the amount of time they show for. 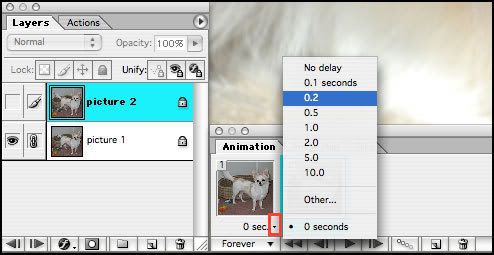 |
|
Jen
Creative Chick
Admin
Posts: 8,309
|
Post by Jen on Oct 2, 2009 20:26:42 GMT -6
To see the animation push the play button. Press the stop button to stop the animation. Again, if things don't look right go back to each frame and change the amount of time they show for. 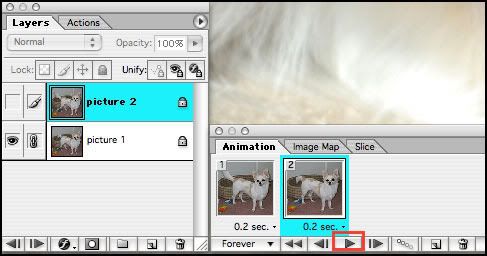 |
|
Jen
Creative Chick
Admin
Posts: 8,309
|
Post by Jen on Oct 2, 2009 20:27:35 GMT -6
Once things look right you're ready to save your avatar. Choose File>Save Optimized As... Name your file and you're done. 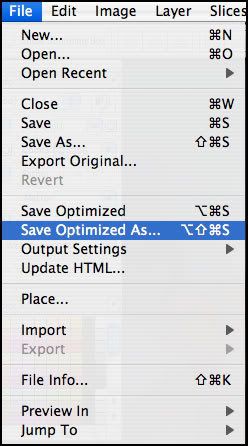 |
|


