Jen
Creative Chick  Admin
Admin
Posts: 8,309 
|
Post by Jen on Oct 2, 2009 20:12:41 GMT -6
I'm going to show you how you can make an animated avatar like the one below.  |
|
Jen
Creative Chick
Admin
Posts: 8,309
|
Post by Jen on Oct 2, 2009 20:13:13 GMT -6
In order for your avatar to look right you need to be working with the correct photos. The most important thing to remember when taking your pictures is you and your camera's position should never move. Allow your subject to do the moving. How you get your subject to start moving is up to you. When your subject starts moving begin taking pictures and continue taking them as fast as your camera will allow. Remember you and your camera are never moving. When you feel you've taken enough to capture the action stop. 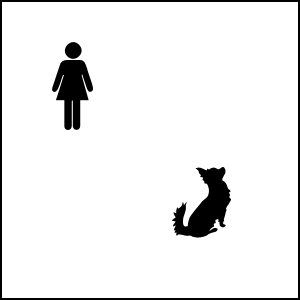 |
|
Jen
Creative Chick
Admin
Posts: 8,309
|
Post by Jen on Oct 2, 2009 20:13:48 GMT -6
These are the two pictures I'll be using. You can use as many photos as you want in your avatar but the more you use the more time you'll need to spend lining them up. I would recommend you stick with two for your first avatar since that's how many I'll be using in this tutorial. It does matter which photos you choose to use. You need to pick two photos that follow one another in the order of which they were taken. If you look in the title bar of my two photos they're IMG_0053 and IMG_0054. So once you pick your starting photo your other photo should be the one that came right after it in the action sequence. 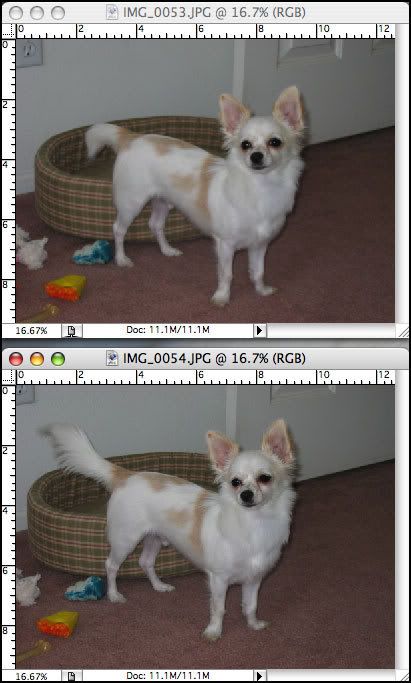 |
|
Jen
Creative Chick
Admin
Posts: 8,309
|
Post by Jen on Oct 2, 2009 20:14:21 GMT -6
Create a new file, Dimension: 5" x 5" Resolution: 100 Mode: RGB Color Contents Transparent Open a photo. You need to bring your photo into your empty file so first make sure your photo is the active file. Clicking on the file will make it the active file. You can see which file is active by looking in the title area, red arrow. If it isn't greyed out then it's the active file. You can also look in the layers palette. If you see the photo in the thumbnail, red arrow, this also tells you its the active file. Now hold the shift key while you click on the Background in the layers palette and then drag it over your empty file and release, purple dot and arrow. 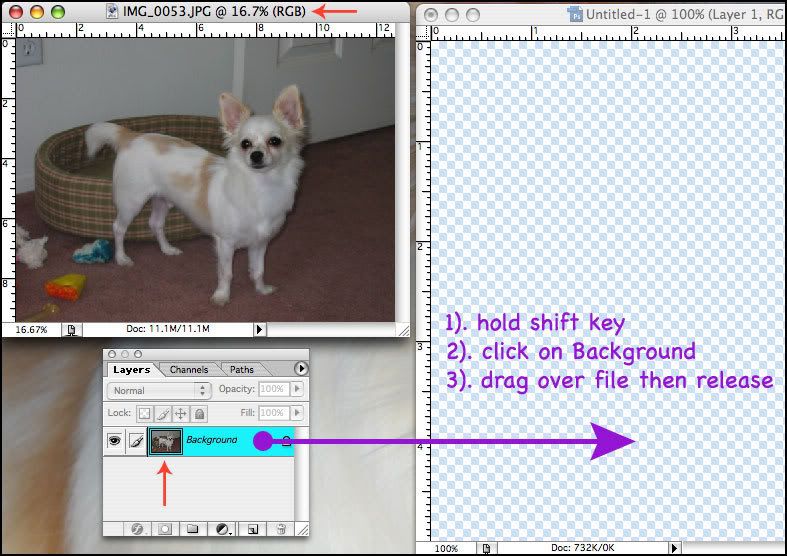 |
|
Jen
Creative Chick
Admin
Posts: 8,309
|
Post by Jen on Oct 2, 2009 20:14:50 GMT -6
Go to the layers palette and rename Layer 2 picture 1. When done click on Layer 1 and drag it to the trash can icon, black arrow. 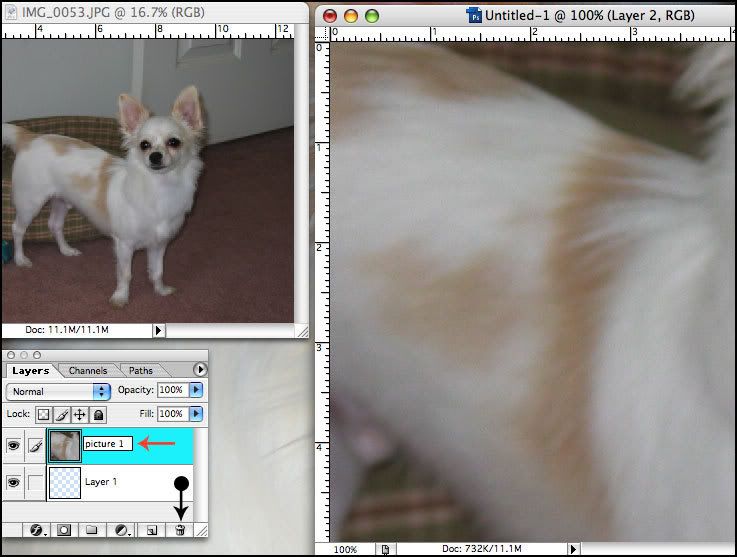 |
|
Jen
Creative Chick
Admin
Posts: 8,309
|
Post by Jen on Oct 2, 2009 20:15:13 GMT -6
Repeat the steps in Replies 3 & 4 for your second picture. Below is what you should end up with. 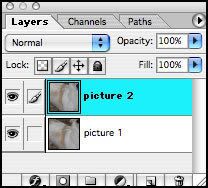 |
|
Jen
Creative Chick
Admin
Posts: 8,309
|
Post by Jen on Oct 2, 2009 20:15:52 GMT -6
If your photos fit okay and aren't cut off then proceed to Reply #8. But if your photos are too big for the file like mine are you now need to reduce their layers. In order to reduce your photos at the same time you need to link the two layers. Your active layer will be highlighted and have a brush icon in the box to the left of its name like the picture 2 layer below. In order to link your other photo to this layer click in the empty box to the left of its name, red outline, and a link icon will appear. 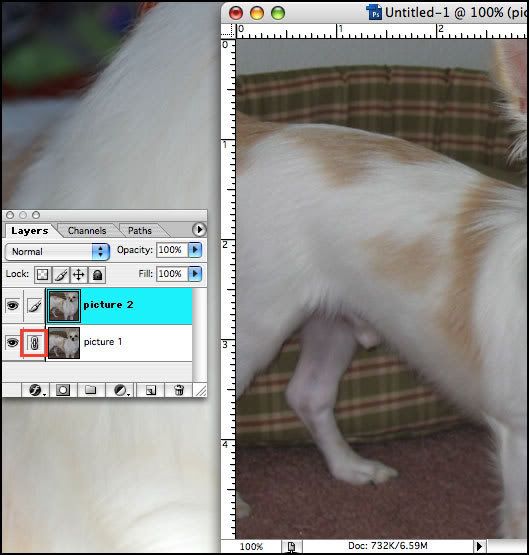 |
|
Jen
Creative Chick
Admin
Posts: 8,309
|
Post by Jen on Oct 2, 2009 20:16:38 GMT -6
Now choose Edit>Transform>Scale from the menu bar. In the options bar you'll see a W: and an H: field. This is where you enter the percentage you want to reduce your layers. If you click the link between the W and H your layers will reduce in proportion and you only need to enter an amount in one of the fields. To apply the reduction you click the check in the options bar or double click inside the bounding box in your file. 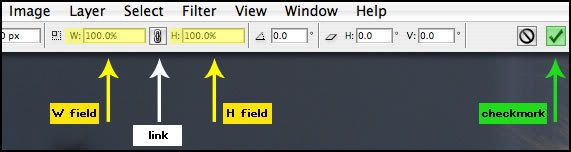 I entered 50 in the W field and then clicked the link between the W and H fields. The amount you enter will be determined by how much you need to reduce your photos. After you enter an amount you'll be able to see the change in your file before you apply it. I had to repeat this step a number of times before my photos were at the correct size. I reduced them 50%. Then 50% again. And finally 55%.  |
|
Jen
Creative Chick
Admin
Posts: 8,309
|
Post by Jen on Oct 2, 2009 20:17:22 GMT -6
Now you need to line your photos up. Click on your picture 2 layer in the layers palette and then reduce its opacity until you can see the layer below it. You can see I did move my camera a little when taking my pictures because they don't line up perfectly, this is totally normal. Unless you use a tripod to take your pictures you're going to have some normal movement especially if you're using a somewhat heavy camera.  |
|
Jen
Creative Chick
Admin
Posts: 8,309
|
Post by Jen on Oct 2, 2009 20:17:54 GMT -6
First select the move tool from the toolbox. Then go to your layers palette and click the link in the picture 1 layer so it disappears. If you didn't do this, when you moved the top layer it would also move this layer. The picture 2 layer should be the active layer and therefore highlighted. If it's not click on this layer in the layers palette. 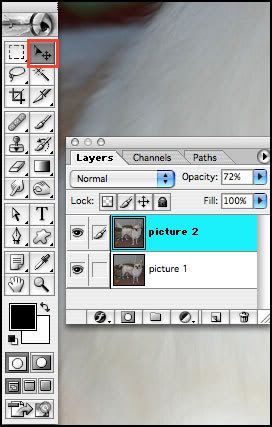 |
|


