Jen
Creative Chick  Admin
Admin
Posts: 8,309 
|
Post by Jen on Oct 4, 2009 10:20:39 GMT -6
When I first attempted pixel art it didn't come easy to me. I tried following tutorials but wasn't able to apply what they were explaining to what I wanted to make. It took a lot of practice before it clicked for me. In this tutorial I'm not going to show you how to make a specific character but instead show you some tips and how to start.
Pixel art is artwork that's created one pixel at a time. Because of this you can imagine how time consuming even the simplest characters are to make. When pixel artists make their art/characters available online in the form of smileys, dolls or whatever else this doesn't automatically give people the right to alter their work in any way. Not even something as minor as changing the color of a character's shirt. Pixel art is just like any other work an artist creates and should be treated as such.
|
|
Jen
Creative Chick
Admin
Posts: 8,309
|
Post by Jen on Oct 4, 2009 10:21:21 GMT -6
If you open any picture in Photoshop... 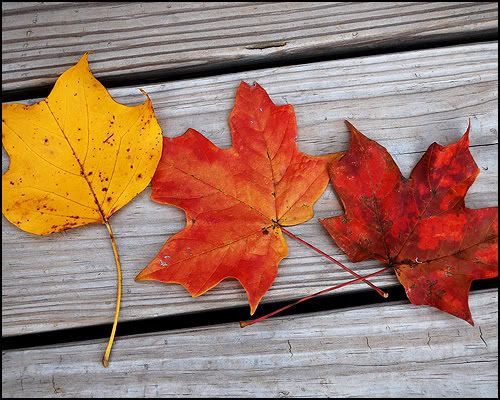 ..and then magnify the view you'll see that it's made up of lots of individual pixels. A pixel is one of the tiny colored squares. To get the picture below I magnified the view to 1600%. To do this you can continue to click down on your file with the zoom tool or drag the slider in the Navigator palette. To return to 100% just double click on the zoom tool's button in the toolbox. When using the zoom tool if you hold the option key for Macs and the alt key for Windows it will change the plus sign in the tool's icon to a minus sign. Now every time you click down on your file you'll reduce the view. 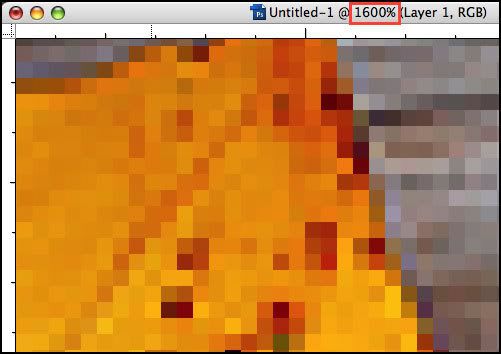 |
|
Jen
Creative Chick
Admin
Posts: 8,309
|
Post by Jen on Oct 4, 2009 10:22:26 GMT -6
Here's a cute bear at 100%. 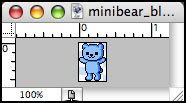 Same as with the leaves above if I use the slider in the Navigator palette to magnify the view... 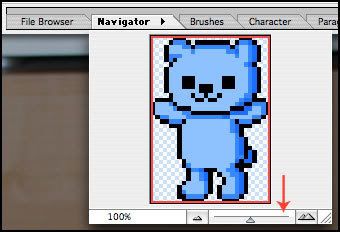 ...you can see all the pixels that make up this character. 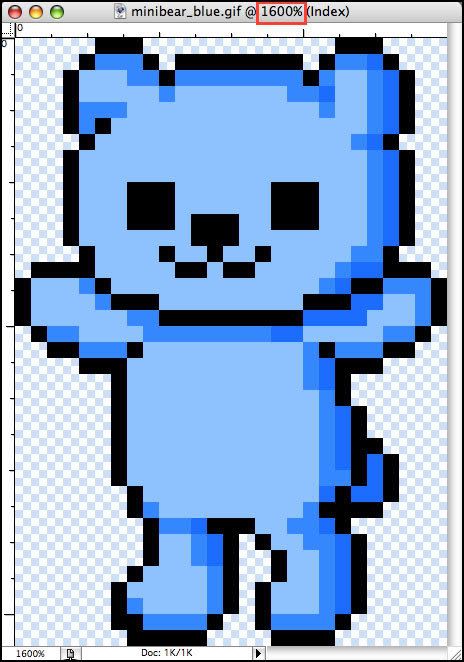 |
|
Jen
Creative Chick
Admin
Posts: 8,309
|
Post by Jen on Oct 4, 2009 10:23:11 GMT -6
As you work you'll find yourself changing your view all the time. I work at 1600% so I can see what I'm doing but as I'm making any changes I then have to reduce the view back to 100% so I can see how the character looks at actual size. If you look at the picture below the view is magnified to 1600%. The numbers are the size of the pencil I used. Below are pencil sizes 1 pixel, 2 pixel, 3 pixel, 4 pixel, 5 pixel, 8 pixel, 10 pixel and 20 pixel. You can see by pixel 4 things start to change. When creating pixel art you're going to be using your pencil at the 1 pixel size. If you want you can use the larger size pencils to create heads, bodies, eyes etc. Later in this tutorial I'll show you an easy way to use the larger pencil sizes to make circular outlines. 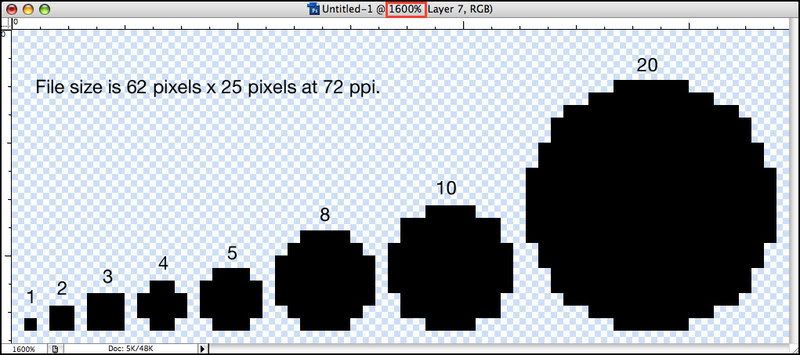 Now check out how the above picture looks at actual size (100% view).  |
|
Jen
Creative Chick
Admin
Posts: 8,309
|
Post by Jen on Oct 4, 2009 10:24:12 GMT -6
The main tool you'll be using to create your pixel art is the pencil.  To change the size of the pencil you can select one from the brushes palette or go to the options bar at the top and click on the blue arrow to the right of where it says Brush.  Now you can either enter the size in the box or drag the slider. 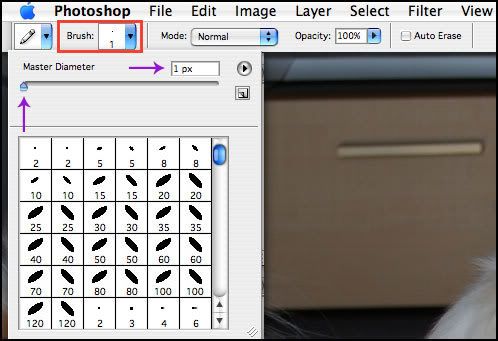 |
|
Jen
Creative Chick
Admin
Posts: 8,309
|
Post by Jen on Oct 4, 2009 10:24:50 GMT -6
The other tool you'll be using is the eraser.  In the options bar you're going to want to set the Mode for the eraser to Block. With the eraser set to Block the eraser will erase one pixel at a time. If you go to the brushes palette you'll see your choices are greyed out.  |
|
Jen
Creative Chick
Admin
Posts: 8,309
|
Post by Jen on Oct 4, 2009 10:26:18 GMT -6
When creating pixel art your image is going to be 72 ppi or 72 pixels per inch. The width and height will be determined by the size you want your pixel character to be. If you aren't sure what to make the width and height the easiest thing to do is find a character that's the size you want your pixel character to be and open it in Photoshop. When you do this is what you'll see in the layers palette. With Index you won't be able to do anything. 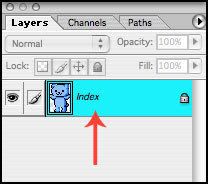 So go to Image>Mode>RGB Color. 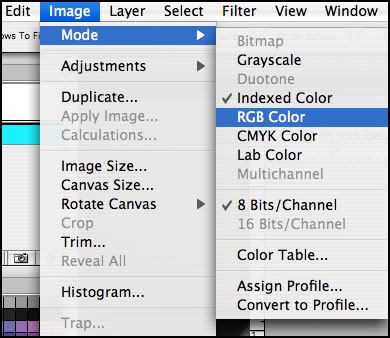 Now you have a layer. 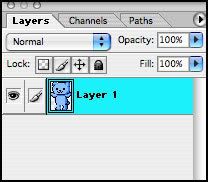 Add a new layer. 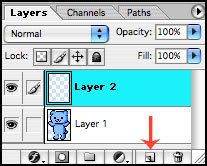 And finally delete Layer 1. 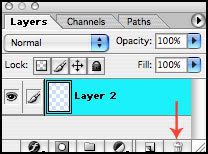 Now you have an empty file to work in. |
|
Jen
Creative Chick
Admin
Posts: 8,309
|
Post by Jen on Oct 4, 2009 10:27:29 GMT -6
Making A CharacterHere's my empty file at actual size (100% view).  This is the size of my file. 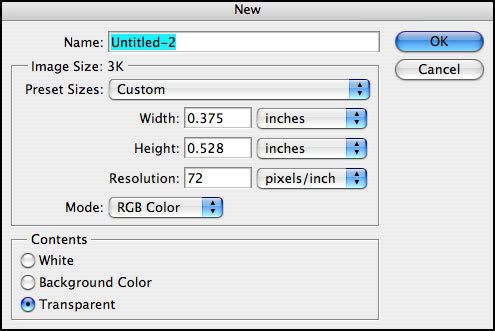
|
|
Jen
Creative Chick
Admin
Posts: 8,309
|
Post by Jen on Oct 4, 2009 10:28:09 GMT -6
First I magnify the view to 1600%. Then with the pencil tool set to 1 pixel I roughly sketch out my character. 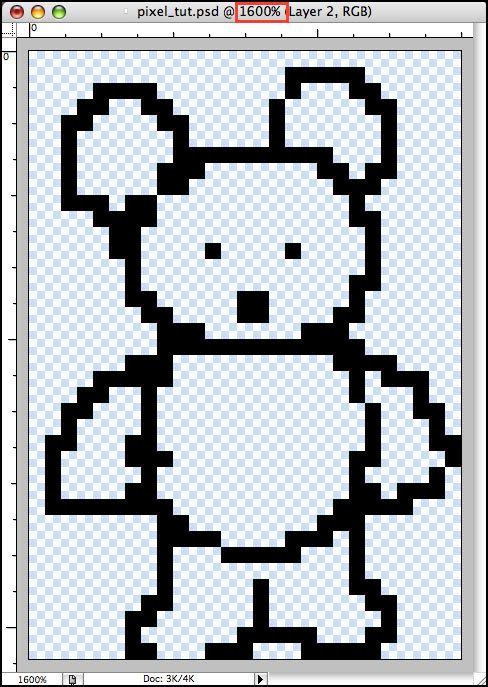 Here's how he looks with the view at 100% (actual size).  |
|
Jen
Creative Chick
Admin
Posts: 8,309
|
Post by Jen on Oct 4, 2009 10:28:58 GMT -6
Now I take the eraser tool and go in and clean up the lines. This is the part that takes practice, knowing which pixels to delete. You're shooting for a single pixel outline without any unneeded pixels that will cause your line to look jagged or clumpy. 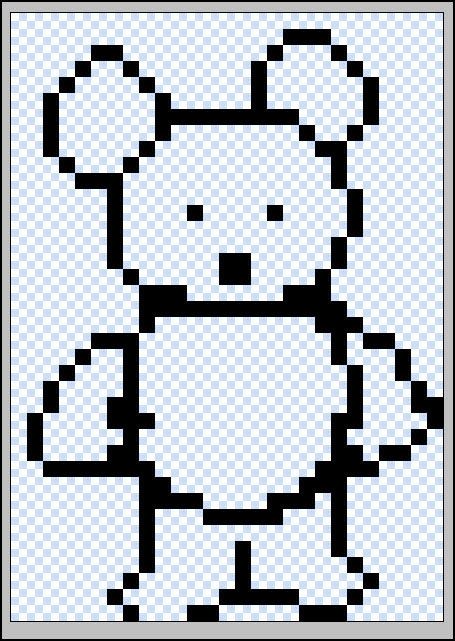 Here's how he looks with the view at 100% (actual size).  |
|


