Jen
Creative Chick  Admin
Admin
Posts: 8,311 
|
Post by Jen on Mar 20, 2011 19:54:51 GMT -6
Here's a simple pattern you can make then add to images.   |
|
Jen
Creative Chick
Admin
Posts: 8,311
|
Post by Jen on Mar 20, 2011 19:57:59 GMT -6
Start with a new file. 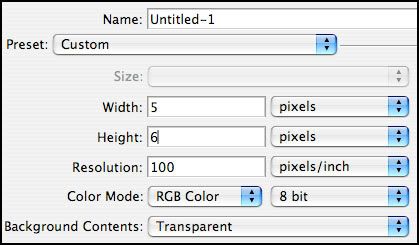 Your file will be very tiny. Select the zoom tool and click outside the file, drag across it and release. Now you'll be able to see what you're doing. 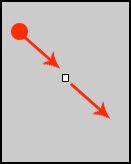 |
|
Jen
Creative Chick
Admin
Posts: 8,311
|
Post by Jen on Mar 20, 2011 20:12:29 GMT -6
Select the pencil tool and a 1 pixel hard round brush. Duplicate the pattern below using colors cdcdcd and 000000. White isn't part of the pattern. 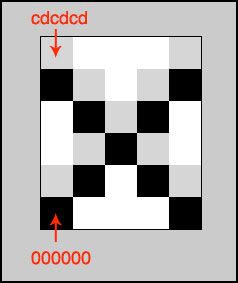 To make it easier to see the pattern I added a layer and filled it with white. Then I put it under the pattern's layer. 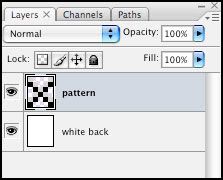 |
|
Jen
Creative Chick
Admin
Posts: 8,311
|
Post by Jen on Mar 20, 2011 20:32:57 GMT -6
Once your pattern is completed if you added a white layer you now need to hide it. 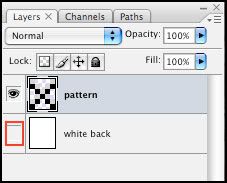 Go to Edit>Define Pattern... Name your pattern and click OK. When applying the pattern set the Blending Mode to Soft Light.  |
|


