Jen
Creative Chick  Admin
Admin
Posts: 8,309 
|
Post by Jen on Oct 4, 2009 13:43:19 GMT -6
Now link and merge the layers frame and frame pattern. 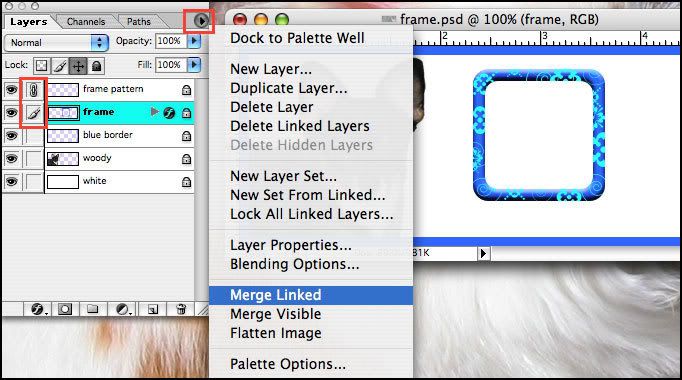 |
|
Jen
Creative Chick
Admin
Posts: 8,309
|
Post by Jen on Oct 4, 2009 13:43:52 GMT -6
Make a copy of the frame layer by dragging it to the new layer icon at the bottom of the layers palette. Use your move tool to move it to the right. Hold the shift key while you move it. Open a picture file and drag its layer over your siggy file and release. Make sure the layer is under your frame layers like you see in the picture. Reduce this picture until it fits in your frame. 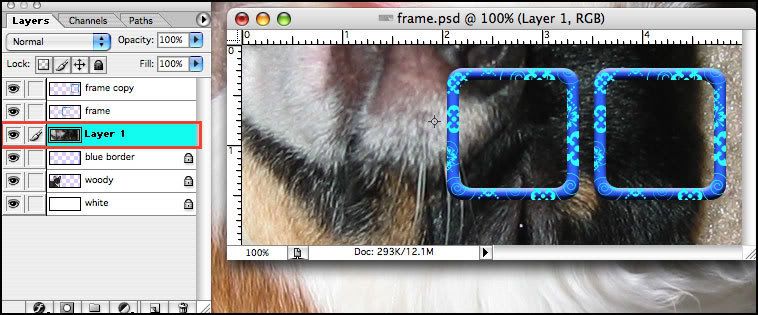 |
|
Jen
Creative Chick
Admin
Posts: 8,309
|
Post by Jen on Oct 4, 2009 13:44:24 GMT -6
Name the layers left frame and right frame. Click on the left frame's layer and take your magic wand tool and click inside the frame. You will get a selection like you see in the picture. Go to the menu bar and choose Select>Modify>Expand and choose 3. Now click on the picture's layer that you want in your frame and choose from the menu bar Layer>New>Layer via Copy. Throw out the original picture layer you made this new layer from. 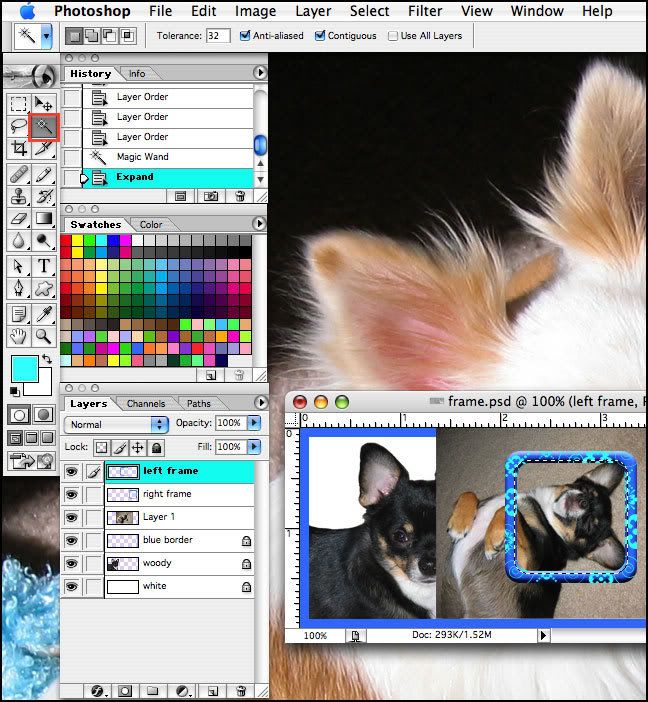 |
|
Jen
Creative Chick
Admin
Posts: 8,309
|
Post by Jen on Oct 4, 2009 13:45:02 GMT -6
Now add your right frame's picture. When you have your two frame pictures cut out you want to link and merge the left picture with the left frame and the right picture with the right frame. Should look like this so far. 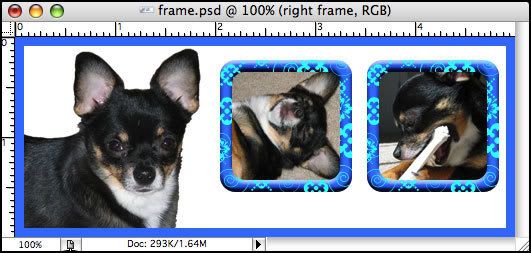 |
|
Jen
Creative Chick
Admin
Posts: 8,309
|
Post by Jen on Oct 4, 2009 13:45:35 GMT -6
Click on the left frame's layer and choose Edit>Transform>Rotate from the menu bar. Grab one of the corners and rotate your frame. Click the check in the options bar or whatever else you do to apply it. Rotate your second frame. 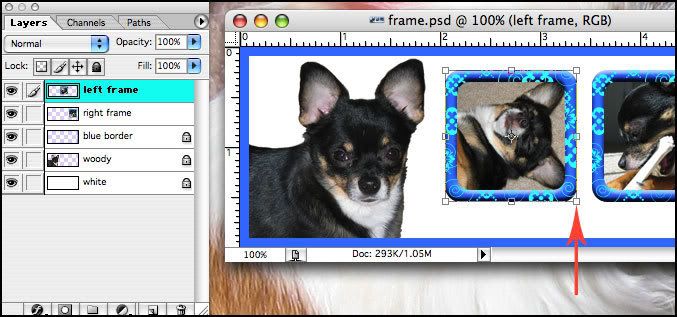 |
|
Jen
Creative Chick
Admin
Posts: 8,309
|
Post by Jen on Oct 4, 2009 13:46:42 GMT -6
Click on the layer of your big picture, so my Woody pic on the left, and apply this layer style to it. I went with a dark blue drop shadow instead of black. Apply that same layer style to the two fame layers. If you don't know how see the thread Adding A Layer Style To Other Layers. 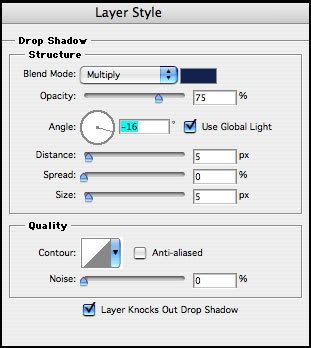 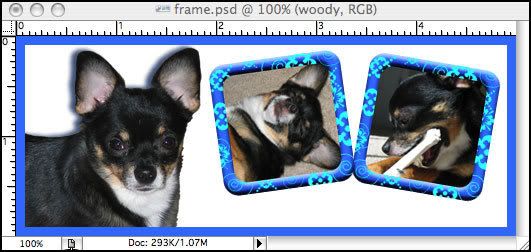 |
|
Jen
Creative Chick
Admin
Posts: 8,309
|
Post by Jen on Oct 4, 2009 13:47:13 GMT -6
Now take the type tool and write what you want. Look at the button I've outlined in purple in the options bar. When you are done typing click this button. 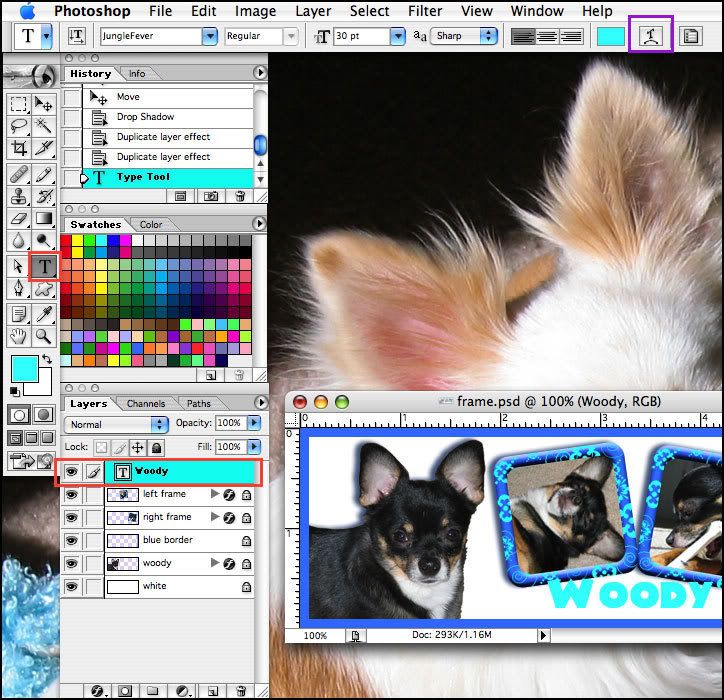 |
|
Jen
Creative Chick
Admin
Posts: 8,309
|
Post by Jen on Oct 4, 2009 13:47:39 GMT -6
Here's where you can warp your text. I chose the Arc for Woody's name and only adjusted the top slider. In the picture the sliders are greyed out, red arrows pointing to them. Once you choose a warp you will have access to the sliders. You can always go back and choose None if you decide you don't want to alter your text. Also, if you want to switch to a new warp you can do that as well. 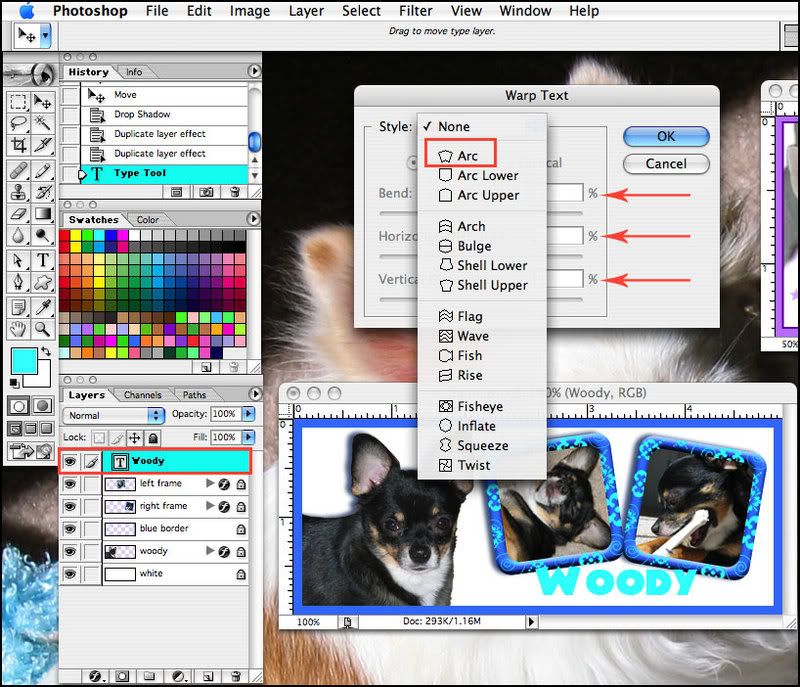 |
|
Jen
Creative Chick
Admin
Posts: 8,309
|
Post by Jen on Oct 4, 2009 13:48:28 GMT -6
To make the trim around your name make a new layer and name it word trim. Select your word. If you don't know how see the thread Select What's On A Layer. Now choose Select>Modify>Expand and choose 2. Pick the color you want to use. Make sure the word trim layer is the active layer, and on the menu bar choose Edit>Fill... and make sure foreground color is selected. Deselect the selection. Make a copy of the word trim layer and while holding the shift key take your move tool and move it down a bit. Link and merge the two word trim layers.  |
|
Jen
Creative Chick
Admin
Posts: 8,309
|
Post by Jen on Oct 4, 2009 13:49:09 GMT -6
Link and merge your big picture on the left with the two frames. 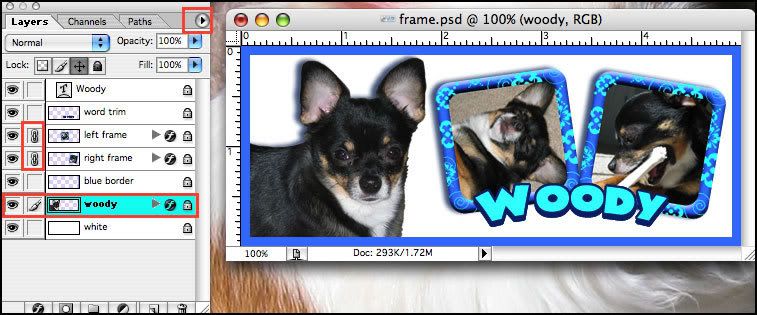 |
|


