Jen
Creative Chick  Admin
Admin
Posts: 8,309 
|
Post by Jen on Oct 4, 2009 14:10:19 GMT -6
Now add the Inner Glow effect. For the color use R:128 G:0 B:202 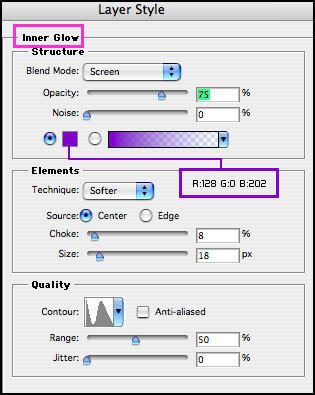 The contour used for this effect is one I made. Click on the Contour showing in the Layer Style window, red outline. In the Contour Editor window that pops up make the contour you see in the picture. Remember the thread Layer Effects & Styles goes into detail on how to do this. 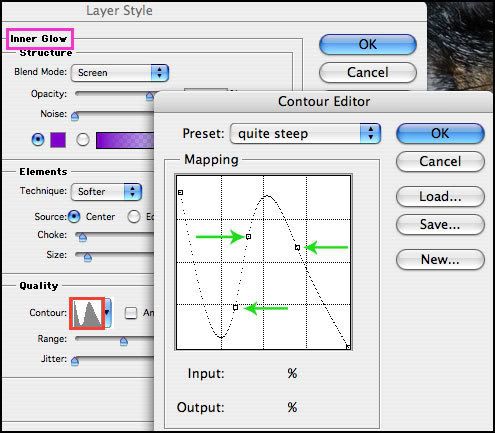 |
|
Jen
Creative Chick
Admin
Posts: 8,309
|
Post by Jen on Oct 4, 2009 14:10:54 GMT -6
Now add Bevel and Emboss. Use the Shallow Slope - Valley Contour. 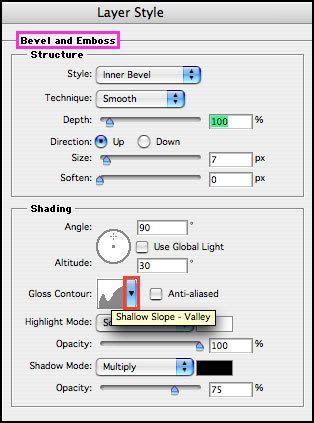 |
|
Jen
Creative Chick
Admin
Posts: 8,309
|
Post by Jen on Oct 4, 2009 14:11:51 GMT -6
Now add Gradient Overlay. To choose a gradient click the arrow to the right of the one showing in the Layer Style window, red outline. 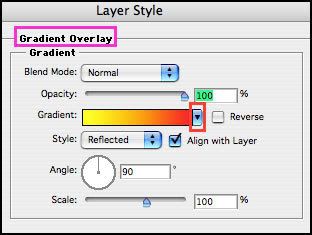 In the tiny window that pops up you'll see the gradient set you have loaded. Click through your gradients in this window and watch the frame change in your file. To see how to make your own gradients check out the tutorial Gradients. 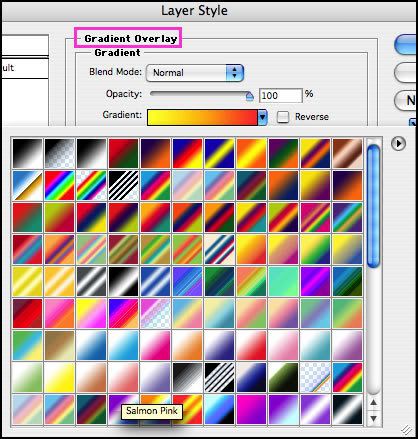 |
|
Jen
Creative Chick
Admin
Posts: 8,309
|
Post by Jen on Oct 4, 2009 14:12:54 GMT -6
The last effect you'll be adding is a Stroke. For the color use R:58 G:0 B:111 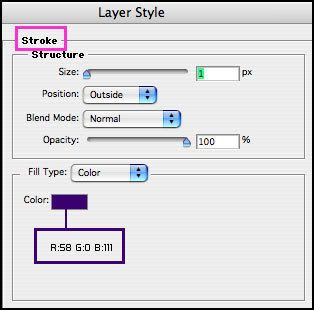 The effects you just added to the frame layer make up the Layer's Style. If you like this style and would like to have it available for future use see Reply #8 in the thread Preset Styles to see how to save this style. To use this style you'll just need to click on it in your Styles palette and all the effects will automatically be added to the layer. |
|
Jen
Creative Chick
Admin
Posts: 8,309
|
Post by Jen on Oct 4, 2009 14:13:34 GMT -6
Select the custom shape tool from the toolbox.  Use these settings in the options bar.  |
|
Jen
Creative Chick
Admin
Posts: 8,309
|
Post by Jen on Oct 4, 2009 14:14:10 GMT -6
With black as your foreground color click and drag to make additional frames. To have the smaller frames attach to the big one begin your click and drag slightly over the big frame. When done you should have something that looks like this, a large frame with a couple of smaller ones attached to it. 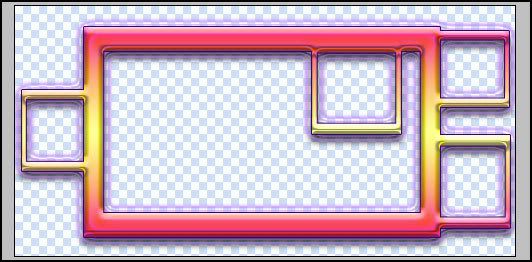 |
|
Jen
Creative Chick
Admin
Posts: 8,309
|
Post by Jen on Oct 4, 2009 14:15:00 GMT -6
Open the picture you want to put into the big frame and bring it into your signature file. Make sure Layer 1 is under your frame layer in the layers palette, purple arrow. Now Reduce/Enlarge Layer 1/your picture until it fits in the frame. You can use the move tool to position the picture within the frame. If you needed to reduce your picture you can choose Filter>Sharpen>Sharpen to sharpen it up a bit. 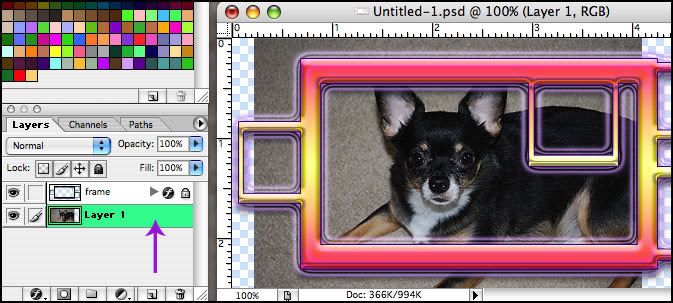 |
|
Jen
Creative Chick
Admin
Posts: 8,309
|
Post by Jen on Oct 4, 2009 14:15:22 GMT -6
Select the rectangular marquee tool from the toolbox and make a selection over the big frame, black arrow. With Layer 1 as the active layer in the layers palette choose Layer>New>Layer via Copy then deselect. 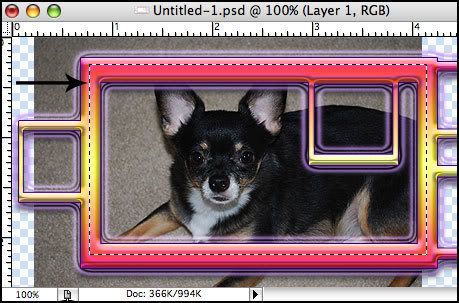 |
|
Jen
Creative Chick
Admin
Posts: 8,309
|
Post by Jen on Oct 4, 2009 14:15:43 GMT -6
Name Layer 2 picture 1. Drag Layer 1 to the trash, red arrow. 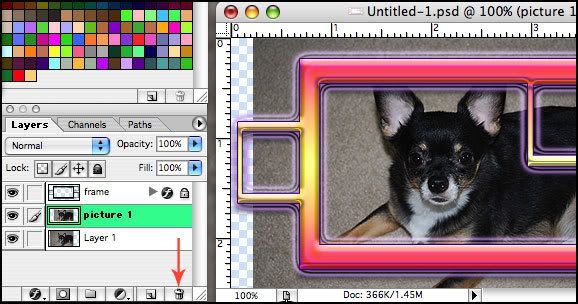 |
|
Jen
Creative Chick
Admin
Posts: 8,309
|
Post by Jen on Oct 4, 2009 14:16:09 GMT -6
Repeat these steps to put your other pictures into the smaller frames. When adding a picture to a frame that's inside the big frame make sure its layer is above picture 1's layer in the layers palette, red arrow. 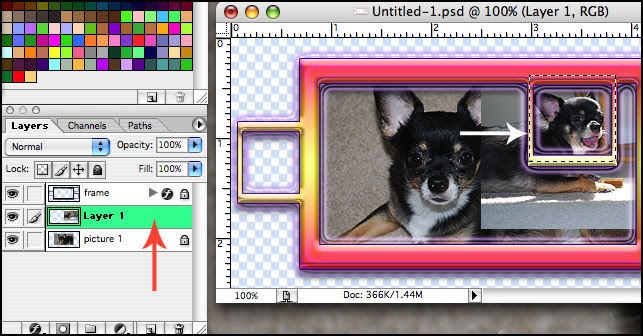 |
|


