Jen
Creative Chick  Admin
Admin
Posts: 8,309 
|
Post by Jen on Oct 8, 2009 14:21:11 GMT -6
With your frame layer as the active layer, so it's highlighted in the layers palette, make Layer 1 a selection. 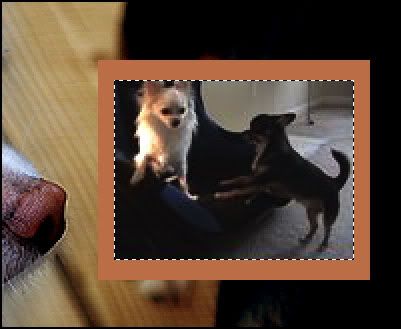 Choose delete then deselect. If you hide Layer 1 by clicking the eye on its layer below is what you should see.  Click the box where the eye was to show Layer 1 again.  |
|
Jen
Creative Chick
Admin
Posts: 8,309
|
Post by Jen on Oct 8, 2009 14:34:50 GMT -6
Click on the frame layer. Go to your styles palette and click through the selection until you see one you want to use for your frame.  |
|
Jen
Creative Chick
Admin
Posts: 8,309
|
Post by Jen on Oct 8, 2009 14:42:25 GMT -6
If your clip blends a little into your frame like mine did you can add a thin black trim line. Click on the frame layer. 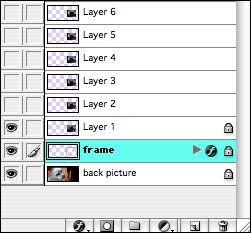 Select the magic wand. Go to your file and click down in the center of your frame. So where your clip is showing. 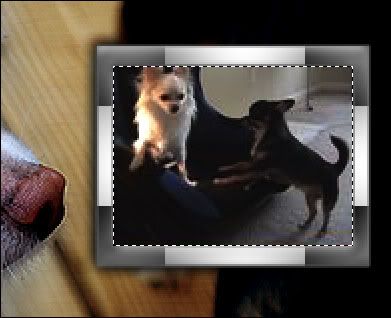 Add a new layer and make sure it's above your frame layer.  Now choose Edit>Stroke... from the menu bar. Use the settings below. 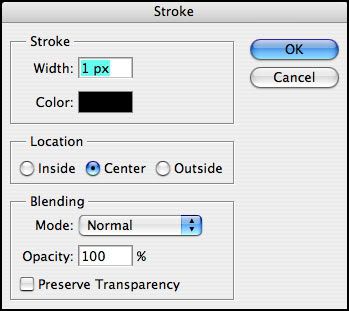 Deselect and name the layer frame line. 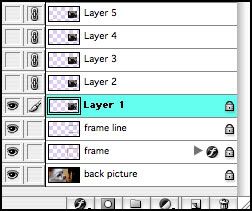 |
|
Jen
Creative Chick
Admin
Posts: 8,309
|
Post by Jen on Oct 8, 2009 14:46:40 GMT -6
Now go back to ImageReady to animate your signature. For my signature I was using Layers 1-19 for my video clip.  So I needed to add 18 more frames to the animation palette since I only had one frame. Add as many frames as you need for your clip by clicking on the add frame button. 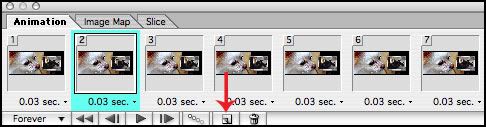 |
|
Jen
Creative Chick
Admin
Posts: 8,309
|
Post by Jen on Oct 8, 2009 14:58:13 GMT -6
In the layers palette your back picture, frame and frame line layers will always be showing. The only layers you'll be changing will be the ones used in your video clip. Go to the animation palette and click on frame 1. Go to the layers palette and make sure Layer 1 is showing and all of the other layers that make up your clip are not. Go to the animation palette and click on frame 2. Go to the layers palette and make sure Layer 2 is showing and all of the other layers that make up your clip are not. Go to the animation palette and click on frame 3. Go to the layers palette and make sure Layer 3 is showing and all of the other layers that make up your clip are not. Continue this step for all of the frames/layers that make up your clip. When you're done you should be able to click on any frame in the animation palette and then look in the layers palette and see the layer showing that shares the same number as the frame. A layer is showing when you see the eye on its layer. 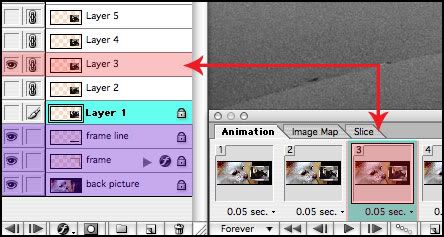 |
|
Jen
Creative Chick
Admin
Posts: 8,309
|
Post by Jen on Oct 8, 2009 15:12:50 GMT -6
Now push the play button to watch your clip. If you want to change the speed first click on frame 1 in the animation palette. Hold the shift key and then click on the last frame. All of the frames should be selected. Now click on the tiny arrow, red arrow in picture below, and choose a speed. 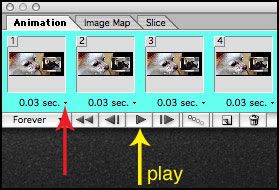 Choose File>Save Optimized As... name your file and you're done. |
|


