Jen
Creative Chick  Admin
Admin
Posts: 8,309 
|
City
Oct 14, 2009 13:56:58 GMT -6
Post by Jen on Oct 14, 2009 13:56:58 GMT -6
Now apply these two layer effects to the name layer/WOODY. 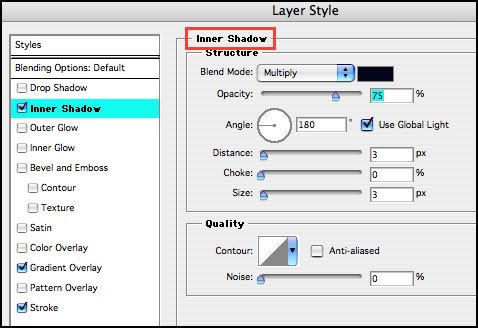 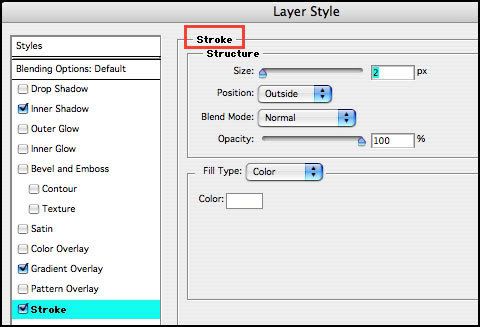 |
|
Jen
Creative Chick
Admin
Posts: 8,309
|
City
Oct 14, 2009 13:57:29 GMT -6
Post by Jen on Oct 14, 2009 13:57:29 GMT -6
Open your dog's picture and cut it out. I used the lasso tool to outline Woody then choose Select>Modify>Smooth>1 then Select>Feather...>1. Then Layer>New>Layer via Copy. I deselected and named the layer woody pic. Then I clicked and dragged this layer from the layers palette over my siggy and released. Reduce/Enlarge your picture and use the move tool to place it. Once it's where you want apply Filter>Sharpen>Sharpen. Apply an outer glow to this layer by clicking the f in a circle at the bottom of the layers palette. For the color click on the box I added a red outline to then go to your picture and click on the moon glow. 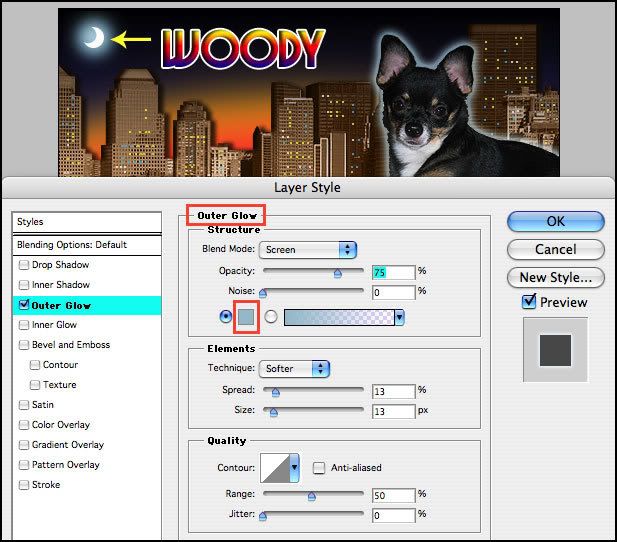 |
|
Jen
Creative Chick
Admin
Posts: 8,309
|
City
Oct 14, 2009 13:58:11 GMT -6
Post by Jen on Oct 14, 2009 13:58:11 GMT -6
Make a new layer and name it stars 100%. With the pencil tool select the one pixel round brush from the brushes palette and make your stars. 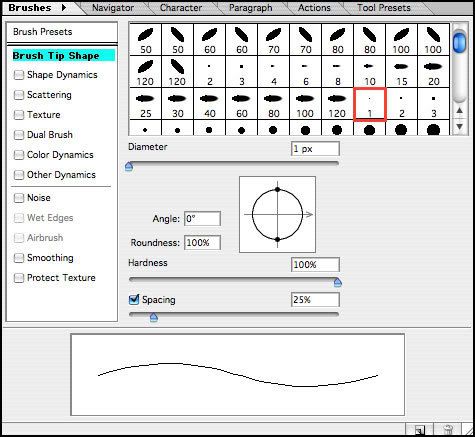 Make another layer and name it stars 40%. Lower the opacity of this layer to 40%. With the pencil tool make your distant stars. 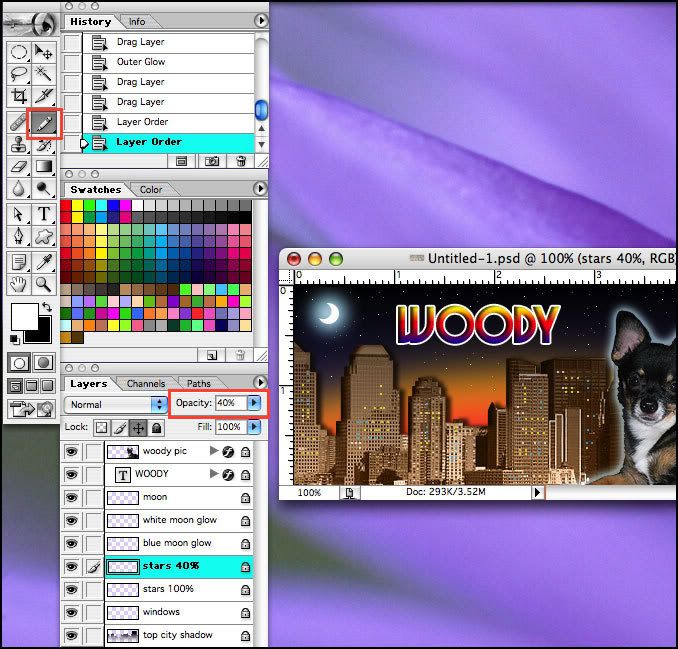 |
|
Jen
Creative Chick
Admin
Posts: 8,309
|
City
Oct 14, 2009 13:58:45 GMT -6
Post by Jen on Oct 14, 2009 13:58:45 GMT -6
Make a new layer and name it name shadow. Put this layer under your name/WOODY layer. Make your name/WOODY layer a selection. With black as your foreground color choose option + delete for Macs and alt + delete for Windows. Deselect. With the move tool while holding the shift key drag this layer down a little. You'll see after I had the shadow in place I linked this layer with my WOODY layer so I could move the two layers together. 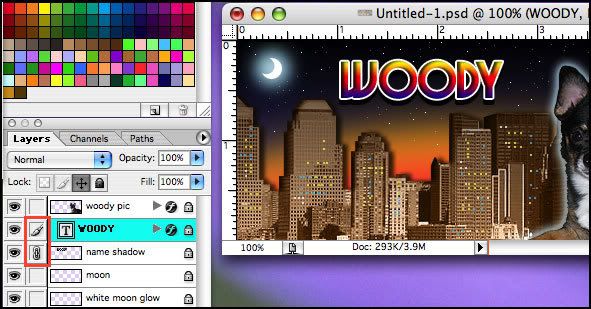 |
|
Jen
Creative Chick
Admin
Posts: 8,309
|
City
Oct 14, 2009 13:59:09 GMT -6
Post by Jen on Oct 14, 2009 13:59:09 GMT -6
To make the spotlights make a new layer. Take the polygonal lasso tool and make a selection like in the picture. In this picture I enlarged my view by clicking on the file with the zoom tool. To get back to 100% double click on the zoom tool's button in the toolbox. The zoom tool enlarges or reduces your view not the layers in your file. 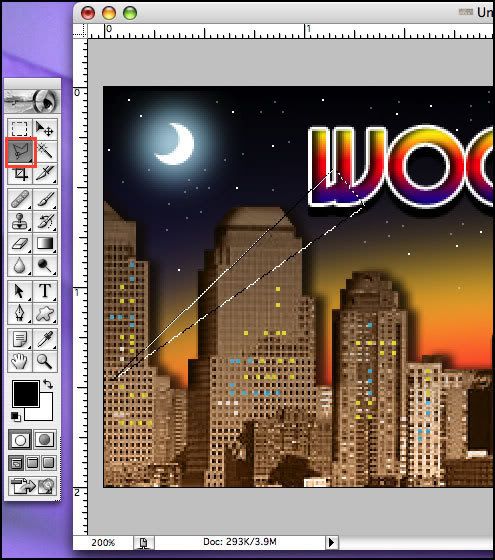 |
|
Jen
Creative Chick
Admin
Posts: 8,309
|
City
Oct 14, 2009 13:59:31 GMT -6
Post by Jen on Oct 14, 2009 13:59:31 GMT -6
Make white your foreground color. Choose option + delete for Macs and alt + delete for Windows to fill the selection. Deselect. Don't worry if any of your spotlight can be seen behind your name/WOODY, red arrow. 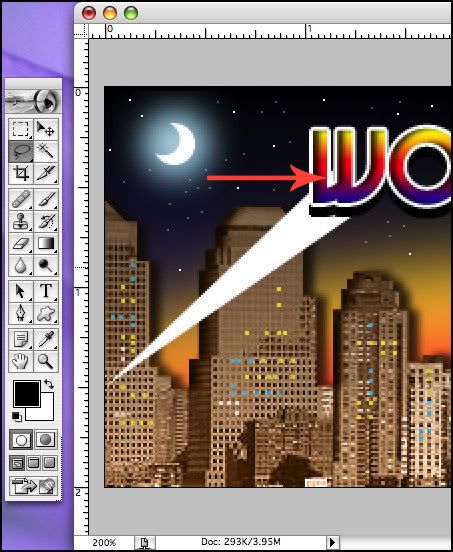 |
|
Jen
Creative Chick
Admin
Posts: 8,309
|
City
Oct 14, 2009 14:00:05 GMT -6
Post by Jen on Oct 14, 2009 14:00:05 GMT -6
Choose the gradient tool and click the grad in the options bar. Choose the Black, White gradient. Click the Quick Mask Mode button, purple outline. Click where you see the 1 then drag and release at the 2. 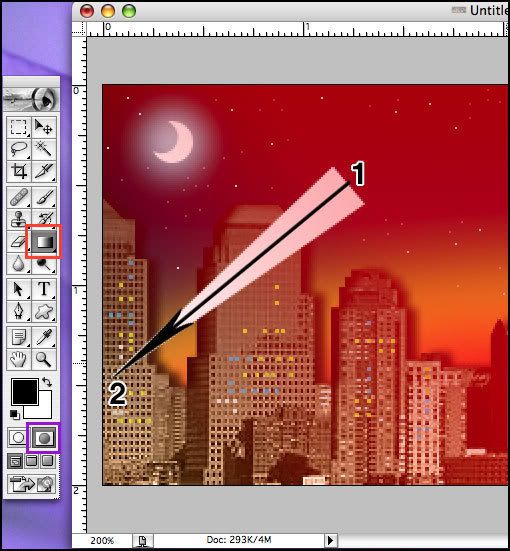 |
|
Jen
Creative Chick
Admin
Posts: 8,309
|
City
Oct 14, 2009 14:00:39 GMT -6
Post by Jen on Oct 14, 2009 14:00:39 GMT -6
To leave QMM click the button to the left of the Quick Mask Mode button. You should see a selection. With Layer 1 as the active layer choose Layer>New>Layer via Copy. Deselect and name this new layer left spotlight. Throw away Layer 1. Change the opacity to 70% and then make a copy of the left spotlight layer, name it right spotlight. Choose Edit>Transform>Flip Horizontal and then use your move tool to place the right spotlight. Now with the lasso tool go in and make a selection around any parts of your spotlights that you can see behind your name and delete them. 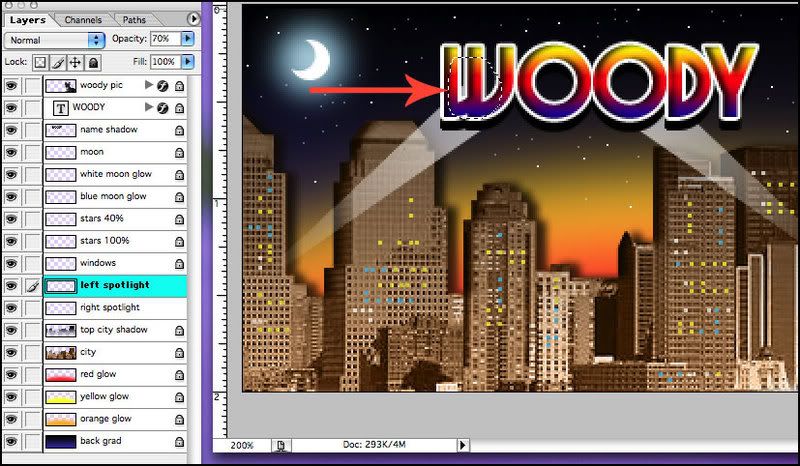 |
|
Jen
Creative Chick
Admin
Posts: 8,309
|
City
Oct 14, 2009 14:01:09 GMT -6
Post by Jen on Oct 14, 2009 14:01:09 GMT -6
For the trim make a new layer and put it at the top in the layers palette. Take your eyedropper and click in a dark area of your city, yellow ring. 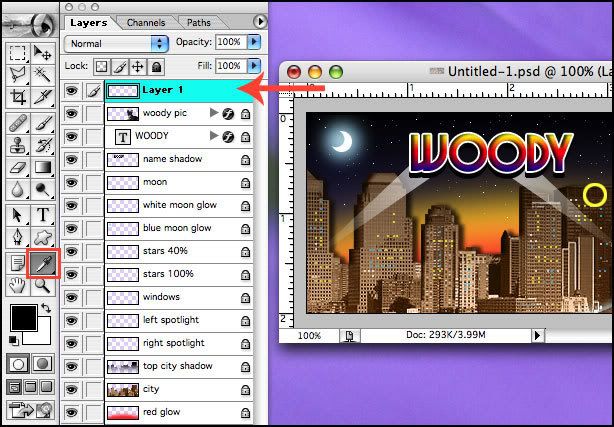 |
|
Jen
Creative Chick
Admin
Posts: 8,309
|
City
Oct 14, 2009 14:01:44 GMT -6
Post by Jen on Oct 14, 2009 14:01:44 GMT -6
Make a selection across your siggy with the rectangular marquee tool and fill it. Deselect. The reason I sometimes use this technique to make borders instead of using the pencil tool or adding a stroke is because a lot of times I'm not sure of the thickness I want until I see it. Making a border this way allows you to quickly see all the different thicknesses you could use. 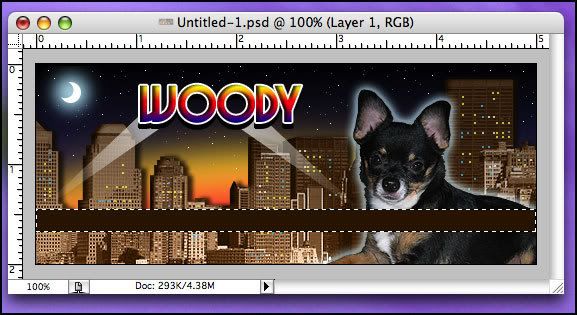 |
|


