Jen
Creative Chick  Admin
Admin
Posts: 8,311 
|
Post by Jen on Jan 19, 2012 16:55:29 GMT -6
Here's the graphic we'll be making.  |
|
Jen
Creative Chick
Admin
Posts: 8,311
|
Post by Jen on Jan 19, 2012 16:55:50 GMT -6
Start with a new file. 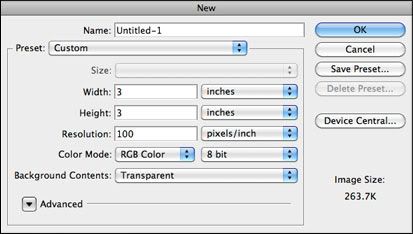 |
|
Jen
Creative Chick
Admin
Posts: 8,311
|
Post by Jen on Jan 19, 2012 17:04:05 GMT -6
Select the color you want the background to be. In the layers palette name Layer 1 background. In the toolbox select the Rounded Rectangle Tool. In the options bar enter the settings below.  Clicking the tiny arrow in the blue box will open the Rounded Rectangle Options window. Enter the settings below. 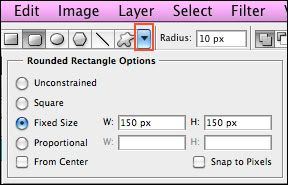 Now click down in your file. 
|
|
Jen
Creative Chick
Admin
Posts: 8,311
|
Post by Jen on Jan 19, 2012 17:08:53 GMT -6
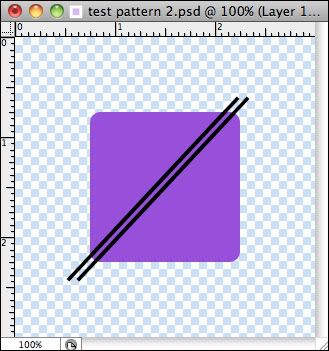
In the toolbox select the Rectangle Tool. In the options bar enter the settings below. Clicking the tiny arrow in the blue box will open the Rectangle Options window. 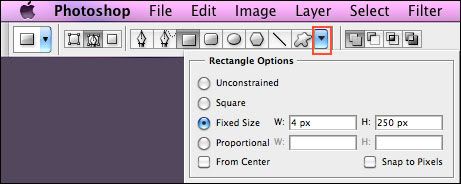 Click down in your file and you should see a path. 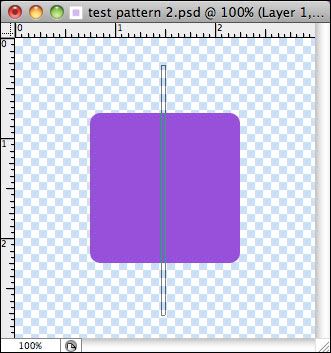 In the menu bar select Edit>Transform Path>Rotate. In the options bar enter 43 in the angle box.  Click the checkmark in the options bar to apply the rotation. Your path should now look like the one below.  If you ever need to move the path, first select the Path Selection Tool from the toolbox. Then click on the path in your file and reposition it.  |
|
Jen
Creative Chick
Admin
Posts: 8,311
|
Post by Jen on Jan 19, 2012 17:23:19 GMT -6
Go to the paths palette. You'll see a Work Path, your rectangle, has been created. Double click on the Work Path in the paths palette. 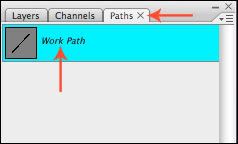 Name the path diagonal bar in the Save Path window. Click OK. 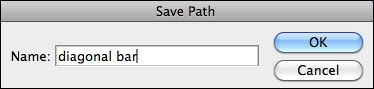 |
|
Jen
Creative Chick
Admin
Posts: 8,311
|
Post by Jen on Jan 19, 2012 17:28:39 GMT -6
Go to your layers palette and add a new layer. You don't need to name it. 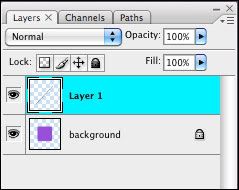 In the toolbox make black your foreground color. Now go back to your paths palette. At the bottom of the palette click on the Fill path with foreground color button. 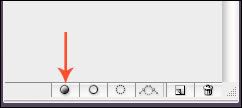 Now click anywhere below your diagonal bar path, orange section, to turn the path off. 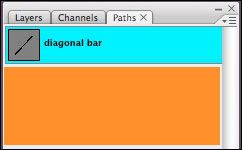 Your file should have one diagonal bar. 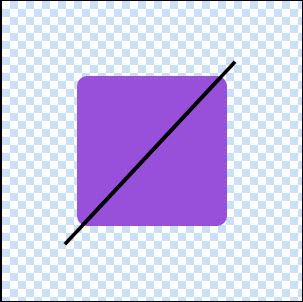 |
|
Jen
Creative Chick
Admin
Posts: 8,311
|
Post by Jen on Jan 19, 2012 19:57:21 GMT -6
|
|
Jen
Creative Chick
Admin
Posts: 8,311
|
Post by Jen on Jan 19, 2012 20:01:43 GMT -6
Make a copy of the bars 1 layer. With the move tool, click and drag the bars 1 copy to the left. Link and merge bars 1 and bars 1 copy then name the layer bars 2. 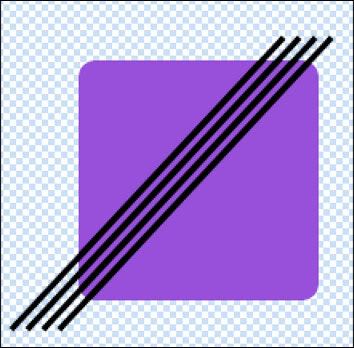 |
|
Jen
Creative Chick
Admin
Posts: 8,311
|
Post by Jen on Jan 19, 2012 20:08:35 GMT -6
Continue the steps in the above post until you have bars covering the left side of the background like below. 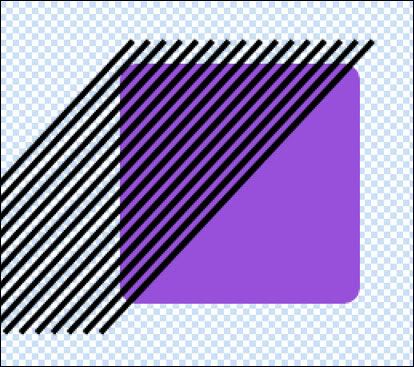 Make a final copy of the bars layer and move it to the right so that bars are covering all of your background. Link and merge the layers that contain bars then name the layer final bars. 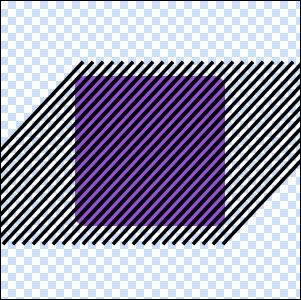 |
|
Jen
Creative Chick
Admin
Posts: 8,311
|
Post by Jen on Jan 19, 2012 20:25:46 GMT -6
In the layers palette make the background layer a selection. 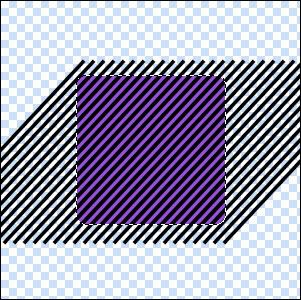 Click on the final bars layer in the layers palette. Go to the menu bar and choose Layer>New>Layer via Copy. Delete the final bars layer. Name the final bars copy diagonal pattern. In the layers palette, lower the opacity of the diagonal pattern layer to 20%. 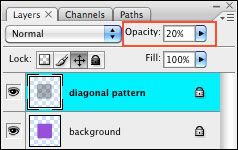 Your pattern should look like the one below. 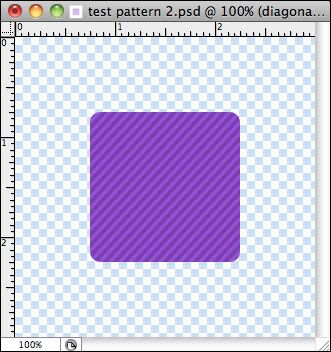 |
|