Jen
Creative Chick  Admin
Admin
Posts: 8,309 
|
Post by Jen on Oct 1, 2009 0:57:34 GMT -6
You can use the Custom Shape Tool to make shapes, paths and selections.  After you select the custom shape tool in the toolbox you can then choose a shape. Click on the shape showing in the options bar.  When you do a window will pop up with the shapes you currently have loaded. To see a shape's name let your cursor hover over it. 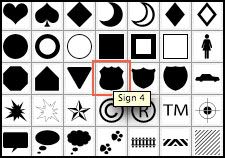 To see the other shapes available to you click the arrow in the top right corner. 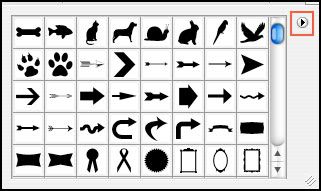 In the options window the additional shapes available will be listed at the bottom. Click on a set to add it to or replace the set you currently have loaded. 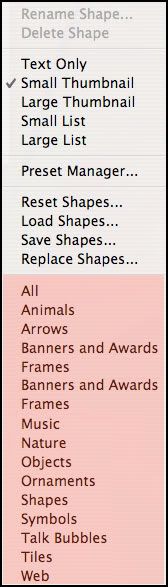 |
|
Jen
Creative Chick
Admin
Posts: 8,309
|
Post by Jen on Oct 1, 2009 0:58:02 GMT -6
After you've picked your shape you need to choose how it will appear. In the options bar you have three settings to choose from. If you select Shape Layers, when you click and drag your shape is automatically filled with the foreground color and the shape's outline is saved in a vector mask that's linked to the layer.  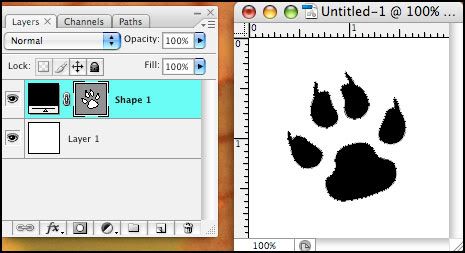 |
|
Jen
Creative Chick
Admin
Posts: 8,309
|
Post by Jen on Oct 1, 2009 0:58:27 GMT -6
If you choose Paths, when you click and drag a Work Path of your shape is created.  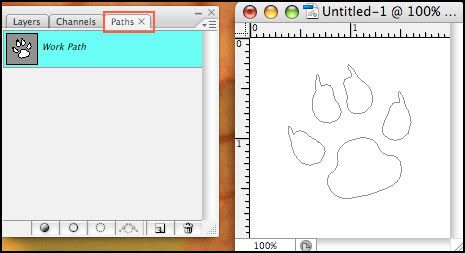 |
|
Jen
Creative Chick
Admin
Posts: 8,309
|
Post by Jen on Oct 1, 2009 0:58:53 GMT -6
If you choose Fill Pixels, when you click and drag your shape is filled with the foreground color.  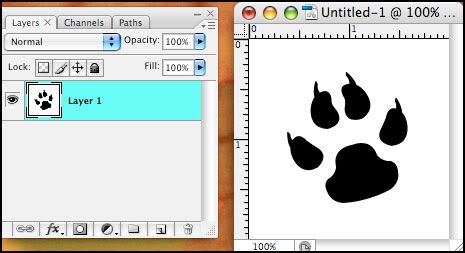 |
|
Jen
Creative Chick
Admin
Posts: 8,309
|
Post by Jen on Oct 1, 2009 0:59:26 GMT -6
To use the custom shape tool just click and drag. If you hold the shift key while you do your shape will be in proportion. 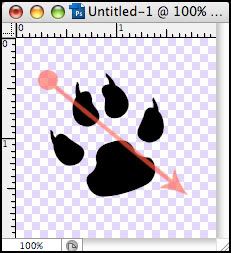 |
|


