Jen
Creative Chick  Admin
Admin
Posts: 8,309 
|
Post by Jen on Oct 1, 2009 21:39:06 GMT -6
This is a very simple technique that you might have seen in people's signatures.  |
|
Jen
Creative Chick
Admin
Posts: 8,309
|
Post by Jen on Oct 1, 2009 21:39:43 GMT -6
In Photoshop I made my signature and then linked and merged all the layers except the name/PePe layers. I named this layer no words. I did this so I had fewer layers to work with in ImageReady. I made four lite name layers and four dark name layers. 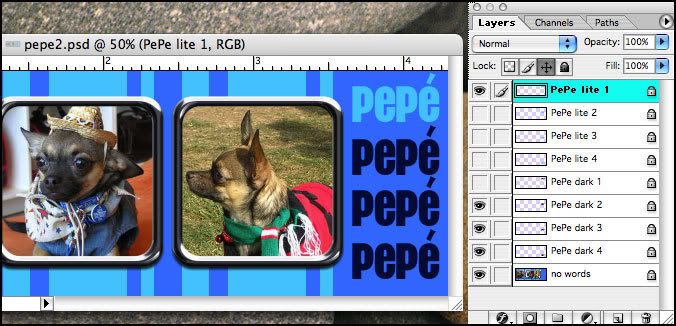 |
|
Jen
Creative Chick
Admin
Posts: 8,309
|
Post by Jen on Oct 1, 2009 21:40:54 GMT -6
The settings I used when working in ImageReady can be found here. For frame 1: showing: lite name 1 and dark name 2, 3 & 4. Hidden: lite name 2, 3 & 4 and dark name 1. Click on the tiny arrow located at the bottom of frame 1 and choose 0.2 sec. 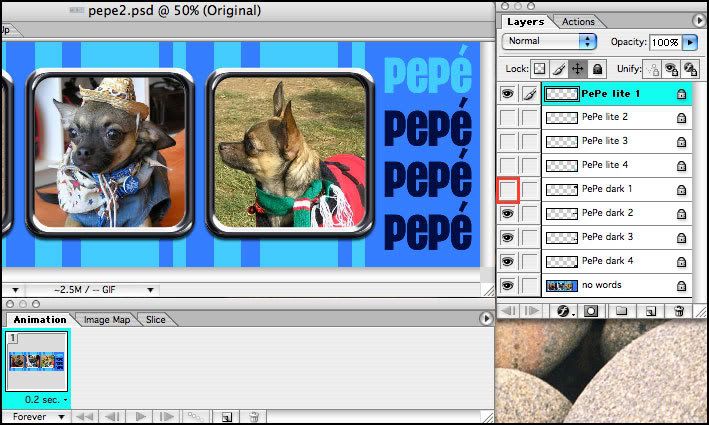 |
|
Jen
Creative Chick
Admin
Posts: 8,309
|
Post by Jen on Oct 1, 2009 21:41:23 GMT -6
Add another frame. To do this click the button I have added a purple outline to. For frame 2: showing: lite name 2 and dark name 1, 3 & 4. Hidden: lite name 1, 3 & 4 and dark name 2. 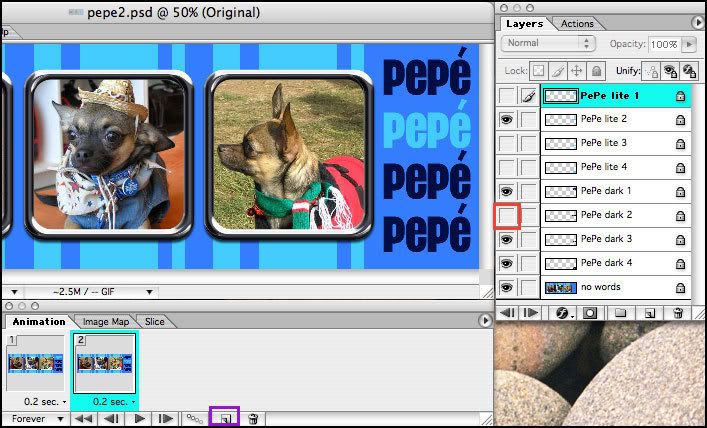 |
|
Jen
Creative Chick
Admin
Posts: 8,309
|
Post by Jen on Oct 1, 2009 21:41:46 GMT -6
Add another frame. For frame 3: showing: lite name 3 and dark name 1, 2 & 4. Hidden: lite name 1, 2 & 4 and dark name 3. 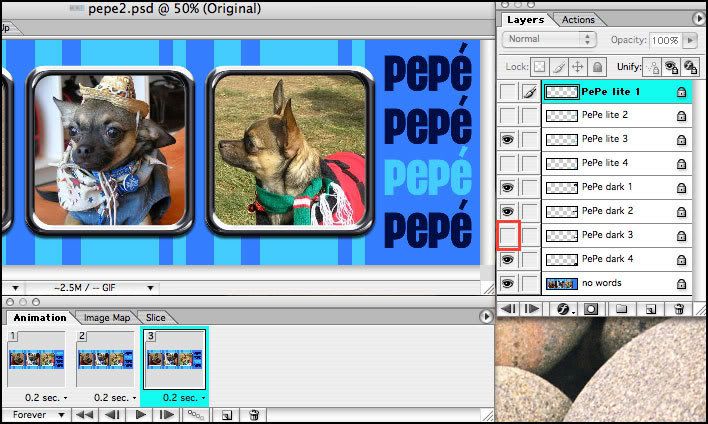 |
|
Jen
Creative Chick
Admin
Posts: 8,309
|
Post by Jen on Oct 1, 2009 21:42:11 GMT -6
Add another frame. For frame 4: showing: lite name 4 and dark name 1, 2 & 3. Hidden: lite name 1, 2 & 3 and dark name 4. Now click on the tiny arrow that I added a purple outline to and choose Optimize Animation... Make sure both boxes are checked in the pop up window and click ok. Now choose from the menu bar File>Save Optimized As... name your file and you're done. 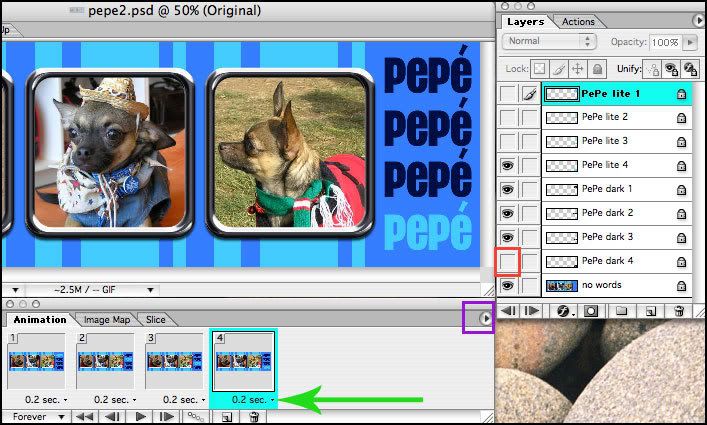 |
|


