Jen
Creative Chick  Admin
Admin
Posts: 8,309 
|
Post by Jen on Oct 1, 2009 22:03:19 GMT -6
Make your button layer a selection. Click on the paw layer so it's the active layer and choose Filter>Distort>Spherize... 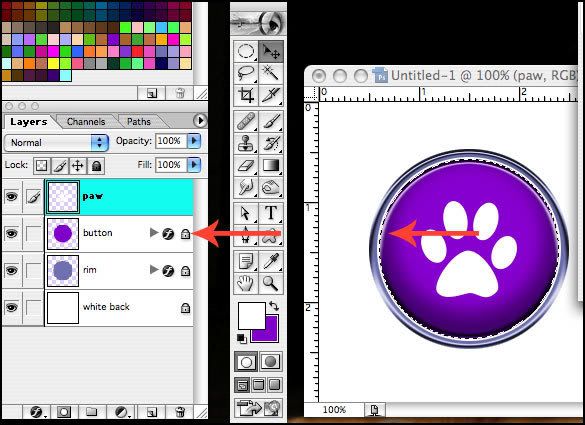 These are the settings I used. If you aren't using a paw print for your button you might want to decrease or increase the Amount after you see how your image looks at this setting. 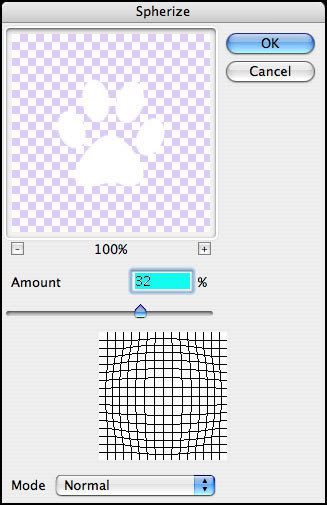 |
|
Jen
Creative Chick
Admin
Posts: 8,309
|
Post by Jen on Oct 1, 2009 22:03:41 GMT -6
Make a new layer and name it shine. Put this layer at the top in the layers palette. With the elliptical marquee tool make a selection. 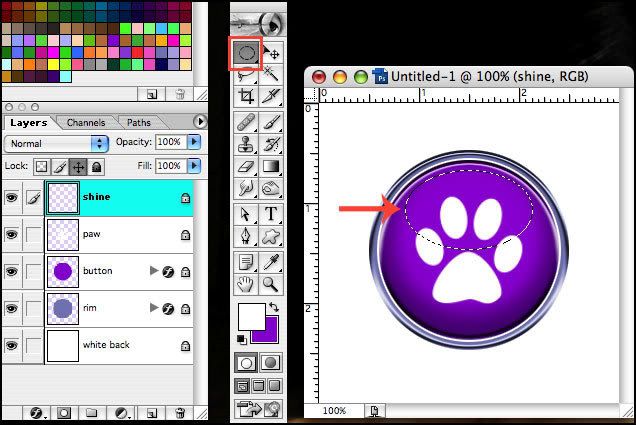 |
|
Jen
Creative Chick
Admin
Posts: 8,309
|
Post by Jen on Oct 1, 2009 22:04:43 GMT -6
From the toolbox select the gradient tool. In the options bar click on the gradient that's showing and from the pop up window choose the Black, White gradient.  Now click at the bottom of the selection and while holding the shift key drag to the top of the selection and release. Deselect. 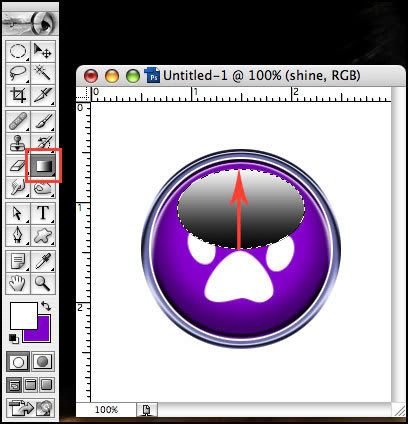 Change the blending mode for the shine layer to Screen. ![]() i128.photobucket.com/albums/p177/smileys_2007/but21.jpg i128.photobucket.com/albums/p177/smileys_2007/but21.jpg![]() |
|
Jen
Creative Chick
Admin
Posts: 8,309
|
Post by Jen on Oct 1, 2009 22:05:07 GMT -6
To add the drop shadow link and merge the layers shine, paw, button and rim. 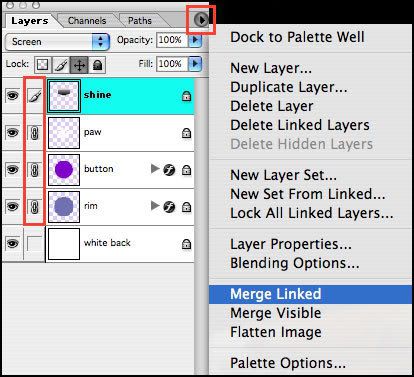 |
|
Jen
Creative Chick
Admin
Posts: 8,309
|
Post by Jen on Oct 1, 2009 22:05:34 GMT -6
Apply this drop shadow to the layer your button is on. 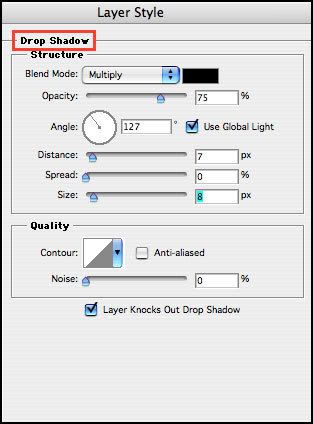 |
|
Jen
Creative Chick
Admin
Posts: 8,309
|
Post by Jen on Oct 1, 2009 22:06:11 GMT -6
Click on the eye in the layers palette to hide the white back layer. 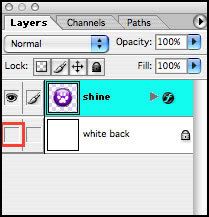 |
|
Jen
Creative Chick
Admin
Posts: 8,309
|
Post by Jen on Oct 1, 2009 22:07:49 GMT -6
Take the crop tool and drag it around your button. You'll see a bounding box is put around your button. Make sure you don't crop any of the drop shadow. Click the check in the options bar or double click inside the bounding box to apply it. And you're done. To save this button use the save as a PNG-24 setting found here, Transparent background without a matte. 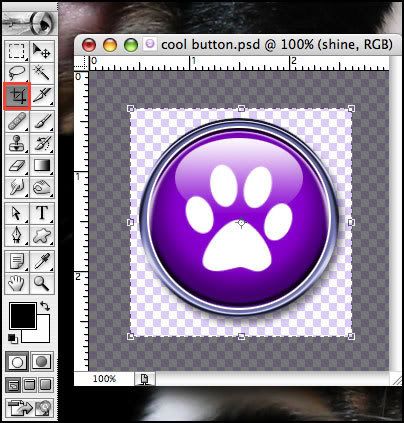 |
|


