Jen
Creative Chick  Admin
Admin
Posts: 8,309 
|
Post by Jen on Oct 3, 2009 23:34:34 GMT -6
Open one of your pictures and click and drag the Background from the layers palette over your siggy file and release. Make sure this layer is below your black shapes layer in the layers palette. Reduce or enlarge your picture. You can use the move tool to position it. Once at the size you want click on your black shapes layer and with the magic wand click inside the oval where your picture will go. Choose Select>Modify>Expand>3. Now click on your picture's layer and choose Layer>New>Layer via Copy. Deselect. Throw away the original picture layer. I named my layer left TED pic. To this layer apply Filter>Sharpen>Sharpen. Repeat these steps for your second picture. When you have both pictures in place select your brush tool and change the Mode in the options bar to Color. Make black your foreground color. Click on one of your picture's layers and apply the Lock transparent pixels to it, purple outline. Now paint over your picture to change it to black and white. Repeat these steps for your second picture. 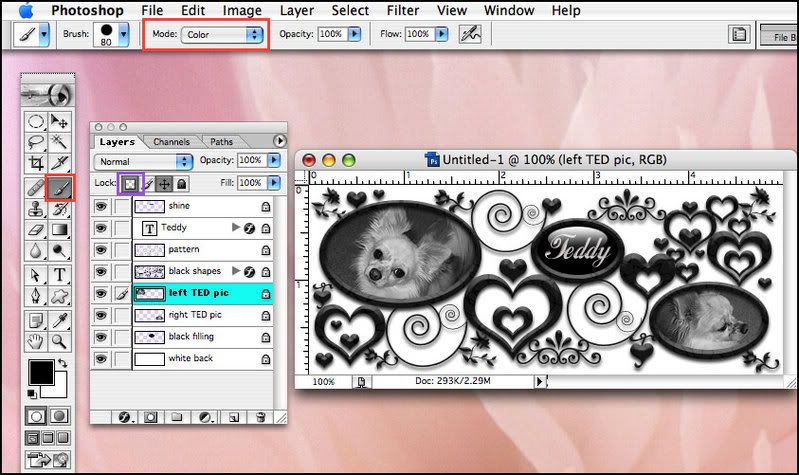 |
|
Jen
Creative Chick
Admin
Posts: 8,309
|
Post by Jen on Oct 3, 2009 23:34:57 GMT -6
Click on your black shapes layer and with the magic wand click inside one of the ovals then hold the shift key and click in the second oval so they are both selected. Choose Select>Contract>2. 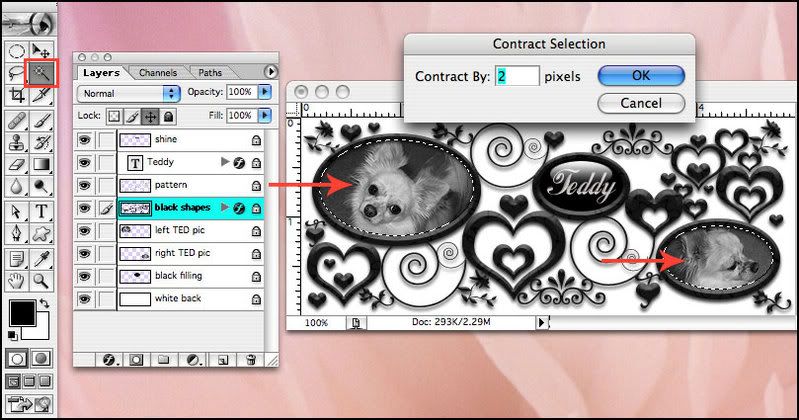 |
|
Jen
Creative Chick
Admin
Posts: 8,309
|
Post by Jen on Oct 3, 2009 23:35:22 GMT -6
Choose Select>Inverse. I added a red layer to show you what is now selected after you inverted the selection. 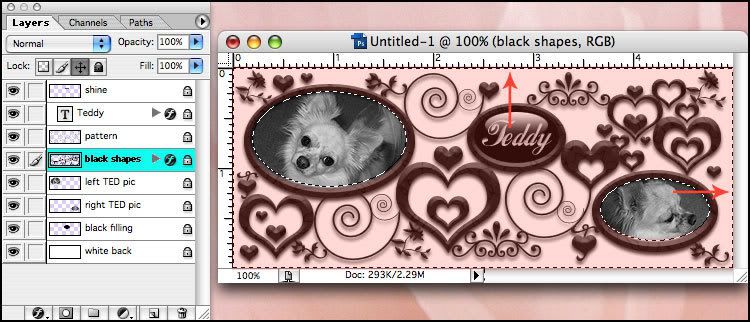 |
|
Jen
Creative Chick
Admin
Posts: 8,309
|
Post by Jen on Oct 3, 2009 23:35:46 GMT -6
Make a new layer and then choose option + delete for Macs and alt + delete for Windows. Deselect. 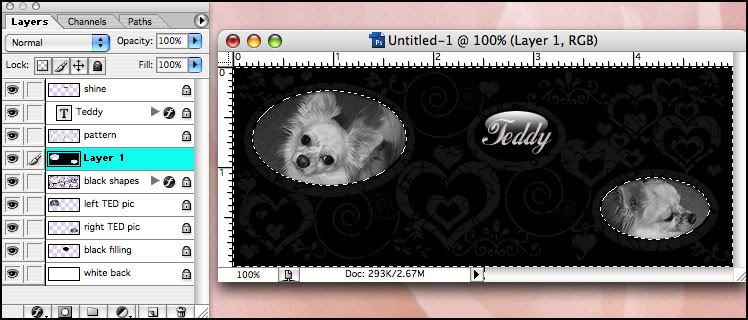 |
|
Jen
Creative Chick
Admin
Posts: 8,309
|
Post by Jen on Oct 3, 2009 23:36:09 GMT -6
Click on the black shapes layer and with the magic wand click inside one of the ovals then hold the shift key and click in the other oval. Choose Select>Modify>Expand>3. Click on Layer 1 and choose Layer>New Layer via Copy. Deselect. Name this new layer inner dark and throw away Layer 1. 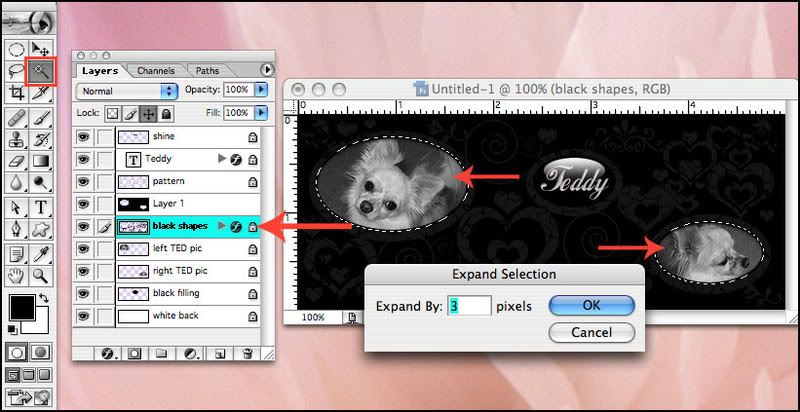 |
|
Jen
Creative Chick
Admin
Posts: 8,309
|
Post by Jen on Oct 3, 2009 23:36:54 GMT -6
Click on the inner dark layer and apply Filter>Blur>Gaussian Blur with this setting. 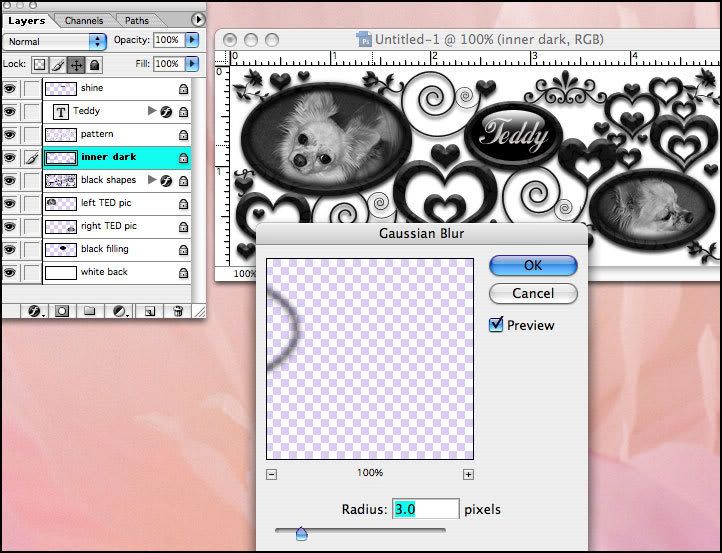 |
|
Jen
Creative Chick
Admin
Posts: 8,309
|
Post by Jen on Oct 3, 2009 23:40:02 GMT -6
The inner dark layer needs to be under the black shapes layer and above the picture layers in the layers palette. The picture below shows the order your layers should be in. 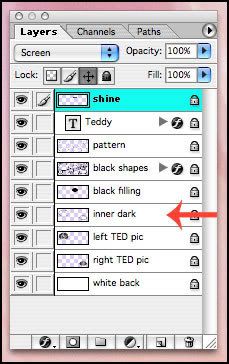 You can now throw away or hide the white back layer. To hide the layer click on the eye in the layers palette. And you're done. To save this signature use the save as a PNG-24 setting found here, Transparent background without a matte. |
|


