Jen
Creative Chick  Admin
Admin
Posts: 8,309 
|
Post by Jen on Oct 4, 2009 10:41:57 GMT -6
Take the type tool and write your name(s). Use the move tool to position your names.  |
|
Jen
Creative Chick
Admin
Posts: 8,309
|
Post by Jen on Oct 4, 2009 10:42:36 GMT -6
Make your name a selection, so my Teddy and Woody layer. Choose Select>Modify>Expand>1. I choose 1 since I used a thin font if you use a wider font you might want to expand the selection by 2. Make a new layer and name it name shadow. Place this layer under your name's layer. With black as the foreground color choose option + delete for Macs and alt + delete for Windows. Deselect. 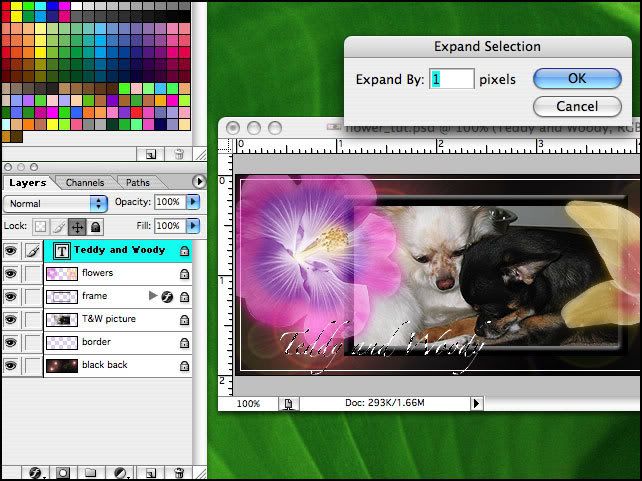 |
|
Jen
Creative Chick
Admin
Posts: 8,309
|
Post by Jen on Oct 4, 2009 10:44:04 GMT -6
To the name shadow layer apply Filter>Blur>Gaussian Blur with this setting. You'll see I linked the name shadow layer with my Teddy and Woody layer so if I wanted to move my names the two layers would move together. 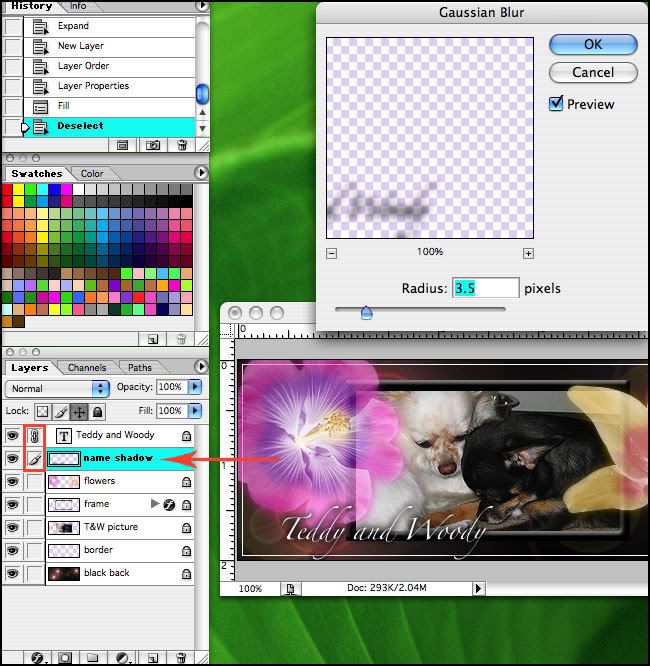 And you're done. To save this signature use the save as a jpg in Photoshop setting found here, My settings. |
|


