Jen
Creative Chick  Admin
Admin
Posts: 8,309 
|
Post by Jen on Oct 4, 2009 10:51:55 GMT -6
For the names' reflection you're going to repeat what you did to make the frame's reflection. Choose the gradient tool and select the Black, White grad. Now click on the Quick Mask Mode button then click and drag where the yellow arrow is. 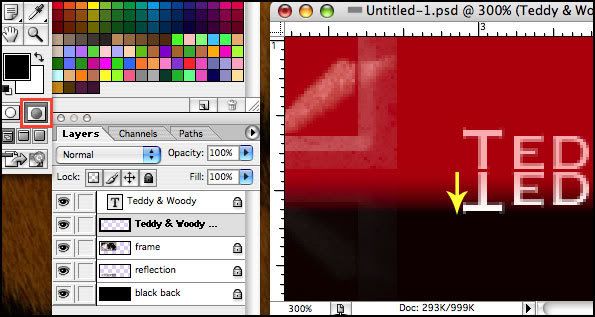 |
|
Jen
Creative Chick
Admin
Posts: 8,309
|
Post by Jen on Oct 4, 2009 10:52:22 GMT -6
Click the button to leave QMM and choose Layer>New>Layer via Copy then deselect. Name Layer 1 name reflection. Change this layer's opacity to 20%. You can throw out your name(s) copy layer. 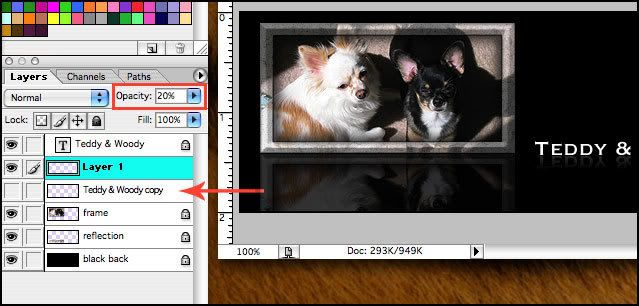 |
|
Jen
Creative Chick
Admin
Posts: 8,309
|
Post by Jen on Oct 4, 2009 10:55:20 GMT -6
Make a new layer and fill it with black. Name this layer lens flare. Put this layer above the black back layer in the layers palette. Choose Filter>Render>Lens Flare... with these settings. To move the flare click on the cross in the flare and drag it where you want. Click OK when done. 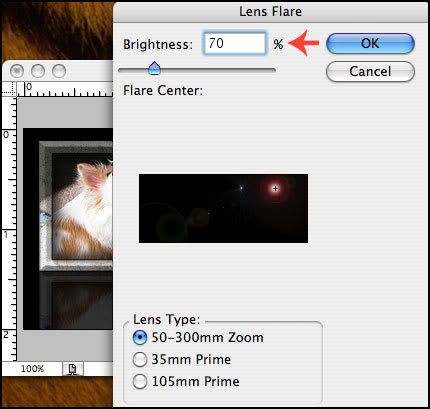 You don't want the flare to show through your frame's refelection so take the rectangular marquee tool and make a selection starting at the top left corner of your siggy and dragging to the right side of your frame. Your entire frame and its reflection should be included in this selection. Now with the lens flare layer as the active layer click delete then deselect. And you're done. To save this signature use the save as a jpg in Photoshop setting found here, My settings. |
|


