Jen
Creative Chick  Admin
Admin
Posts: 8,309 
|
Post by Jen on Oct 4, 2009 13:07:06 GMT -6
To enlarge the view I took the Zoom tool, green outline, and clicked down on my file. Each time you click down you'll enlarge your view. To get the view back to 100% double click on the Zoom tool in the toolbox. Click on your frame layer in the layers palette then choose the Burn Tool, red outline. To get the frame to pop a little I want to darken some of the shadows that are already in certain sections of my frame, yellow arrows, and create shadows where there aren't any. When using the Burn tool you want to click, drag and release, click, drag and release. If using a tablet you want to brush, lift your pen, brush, lift your pen. If you don't release the mouse or lift your pen between strokes you'll get a muted color. 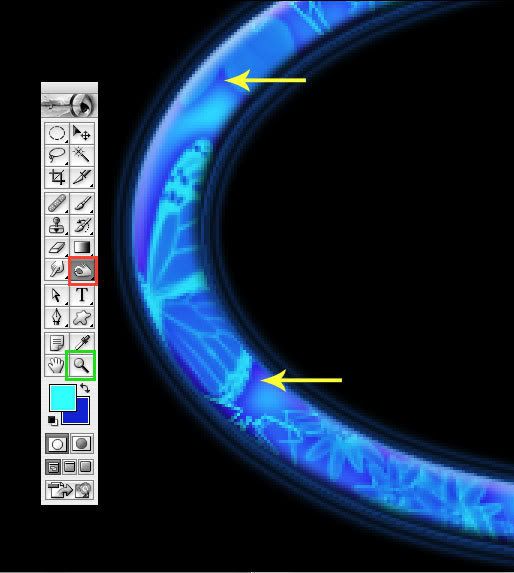 With the Burn Tool selected go to your brushes palette and select this brush. If you don't have it choose a round brush and change the settings to the ones you see. 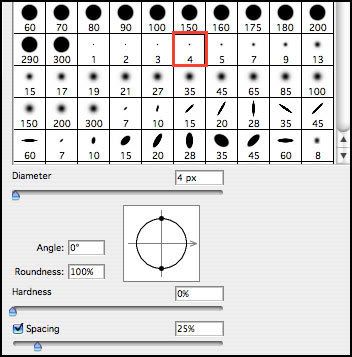 These are the settings you want in the options bar. For a harder line don't click on the airbrush icon.  |
|
Jen
Creative Chick
Admin
Posts: 8,309
|
Post by Jen on Oct 4, 2009 13:07:33 GMT -6
Here's how my frame looks after I darkened the shadows and added some new ones. 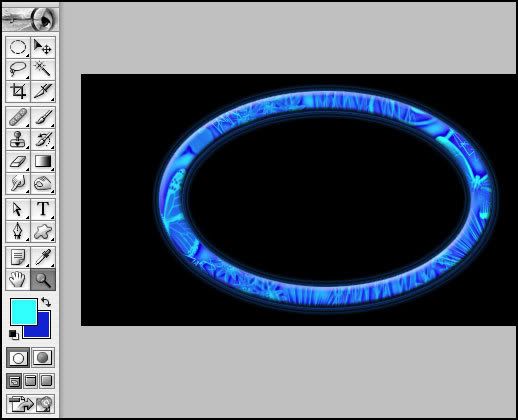 |
|
Jen
Creative Chick
Admin
Posts: 8,309
|
Post by Jen on Oct 4, 2009 13:08:26 GMT -6
To lighten some of the sections use the Dodge Tool. The areas I lightened were light to begin with, yellow arrow, and were in the background section of my frame. I didn't lighten any of the brushes. When using the Dodge Tool you use it the same as the Burn Tool you want to click, drag and release, click, drag and release. If using a tablet you want to brush, lift your pen, brush, lift your pen. If you don't release the mouse or lift your pen between strokes again you'll get a muted color. 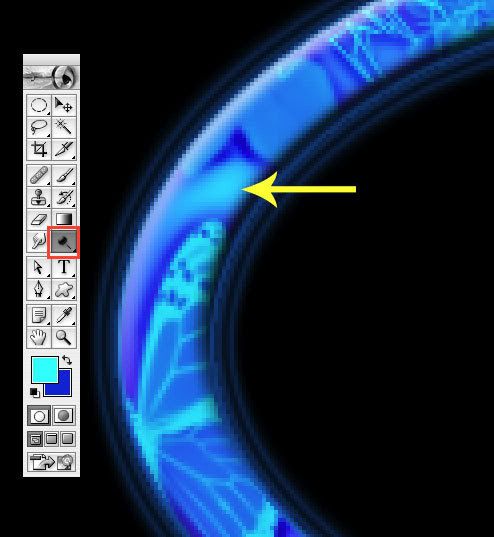 With the Dodge Tool selected go to your brushes palette and select this brush. If you don't have it choose a round brush and change the settings to the ones you see. I also used this brush with the Diameter set to 7. The brush size you use is really personal choice. These are the settings you want in the options bar. For a harder line don't click on the airbrush icon.  |
|
Jen
Creative Chick
Admin
Posts: 8,309
|
Post by Jen on Oct 4, 2009 13:08:59 GMT -6
This is after I've gone over some areas with the Dodge tool. 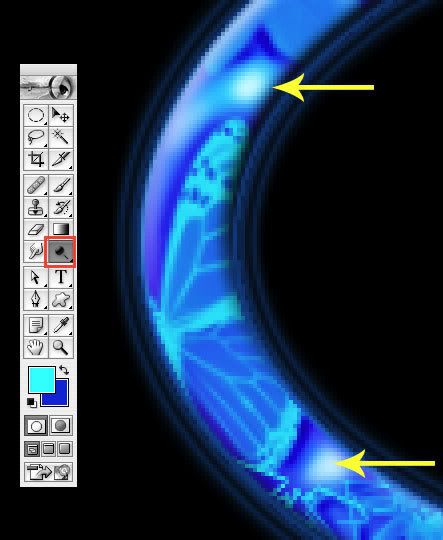 |
|
Jen
Creative Chick
Admin
Posts: 8,309
|
Post by Jen on Oct 4, 2009 13:09:50 GMT -6
Here's my frame after using the Burn and Dodge tools. 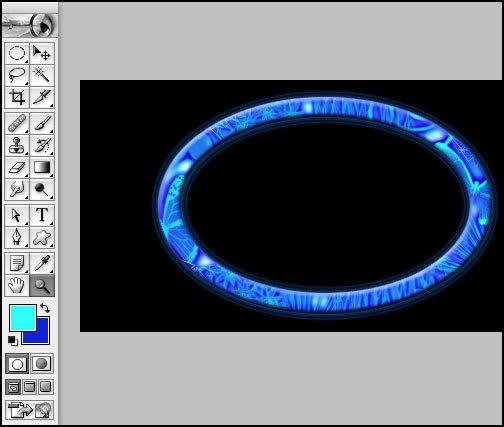 Here's an enlarged view. 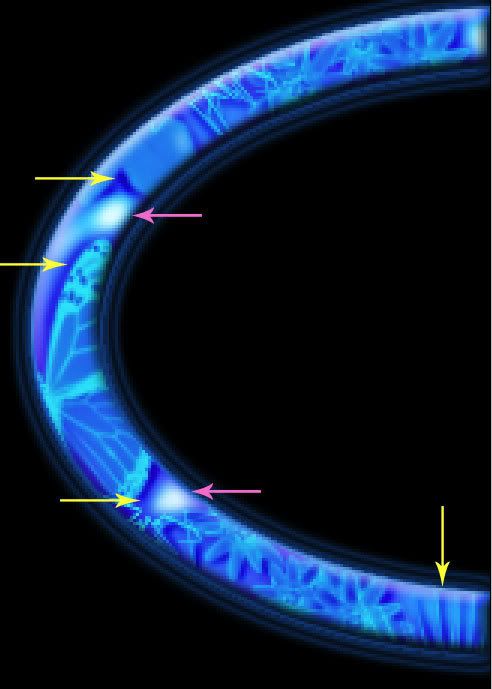 This was just a quick explanation of these two tools. To really get your frames to pop you can spend a lot of time darkening and lightening your entire frame including the individual brushes. |
|
Jen
Creative Chick
Admin
Posts: 8,309
|
Post by Jen on Oct 4, 2009 13:10:50 GMT -6
With the type tool add your name(s). Use the move tool to place it where you want. 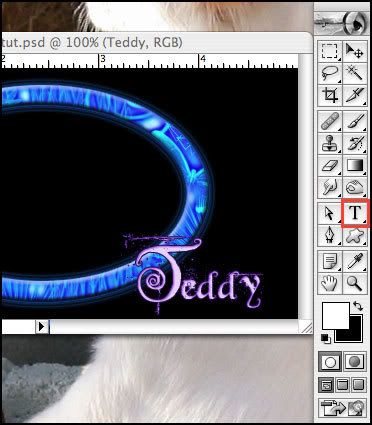 I added these two effects to the name layer. 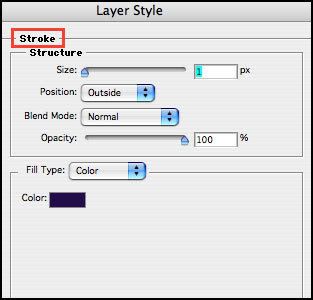 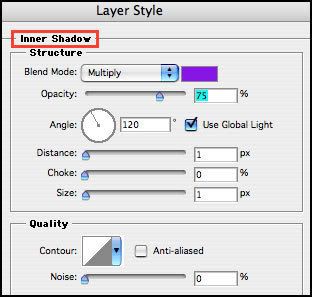 |
|
Jen
Creative Chick
Admin
Posts: 8,309
|
Post by Jen on Oct 4, 2009 13:11:26 GMT -6
With white as your foreground color add your brushes. Put all the brushes that will have the same neon glow color combination and settings on the same layer. My two big butterflies are on one layer. 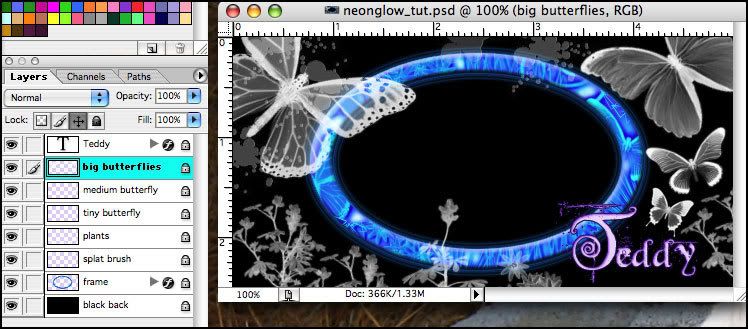 |
|
Jen
Creative Chick
Admin
Posts: 8,309
|
Post by Jen on Oct 4, 2009 13:11:58 GMT -6
Click on one of your brushes' layer. I'm doing the big butterflies layer. Now click on the foreground color in your toolbox. Choose your color. I used R:0 G:255 B:255. Click on the background color in the toolbox and choose a color. Mine was R:255 G:50 B:205. Now choose Filter>Artistic>Neon Glow. If you move the two sliders you'll see in the preview how changing the settings determines how the three colors are used to make the glow. The settings I used were Size:11 Brightness:29. Click on the color box to choose your glow. I used R:144 G:0 B:255. Click OK when done. When you see your glow if you aren't happy you can click one step back in the history palette and adjust the colors and/or settings then apply the neon glow all over again. 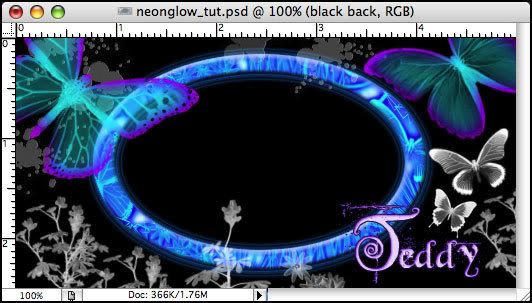 |
|
Jen
Creative Chick
Admin
Posts: 8,309
|
Post by Jen on Oct 4, 2009 13:12:20 GMT -6
Here's a good example to show you how the Size and Brightness settings really make a difference when it comes to the size of the brush the neon glow is being applied to. I used the exact same neon glow colors and settings on the tiny butterfly layer that I had used on the big butterflies layer and because of the size difference the glow looks totally different. 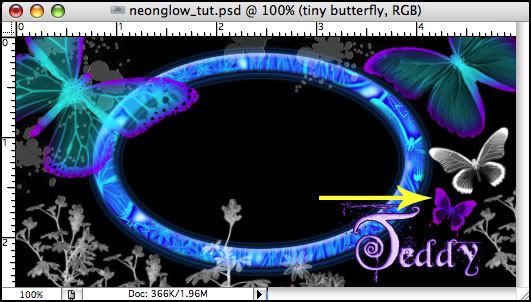 |
|
Jen
Creative Chick
Admin
Posts: 8,309
|
Post by Jen on Oct 4, 2009 13:13:10 GMT -6
I clicked on the medium butterfly layer and used R:255 G:255 B:51 for the foreground color and R:93 G:22 B:17 as the background color. The neon glow's Size was 5 and the Brightness 32. My glow's color was R:255 G:96 B:0. 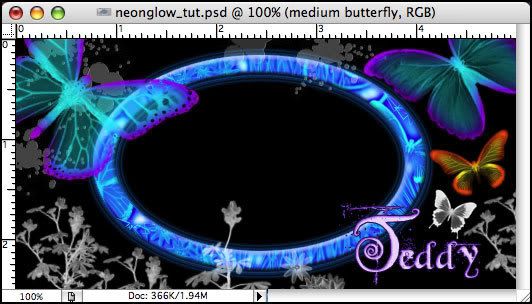 |
|


