Jen
Creative Chick  Admin
Admin
Posts: 8,309 
|
Post by Jen on Oct 14, 2009 14:17:46 GMT -6
This is a photo I took that I used for my background. 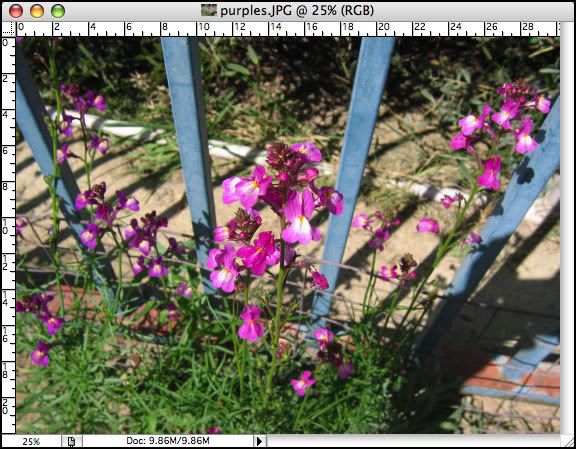 |
|
Jen
Creative Chick
Admin
Posts: 8,309
|
Post by Jen on Oct 14, 2009 14:18:21 GMT -6
I made a new file 5" x 2" at 100 ppi with a transparent background. Then I dragged the flowers' layer over my siggy file and released. I named this layer picture. I chose Edit>Transform>Scale to reduce the flowers to the size I wanted. After I used the move tool to place them on the right side I took the crop tool and dragged it around the entire picture and clicked the check in the options bar to apply it. I didn't want the bars to be seen so I made a selection with the lasso tool of the parts I wanted to be out of focus. 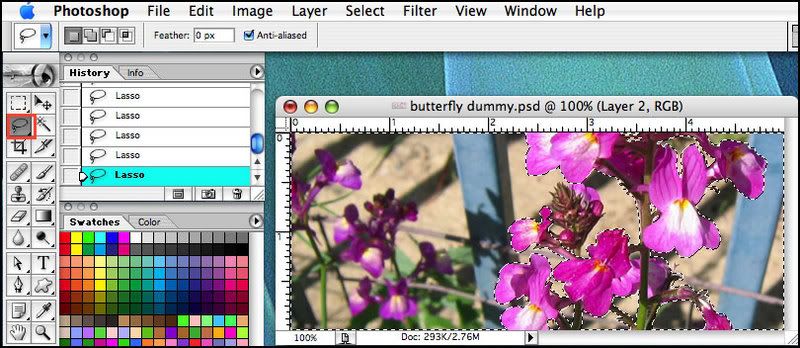 |
|
Jen
Creative Chick
Admin
Posts: 8,309
|
Post by Jen on Oct 14, 2009 14:18:48 GMT -6
Then I chose Filter>Blur>Gaussian Blur with this setting... 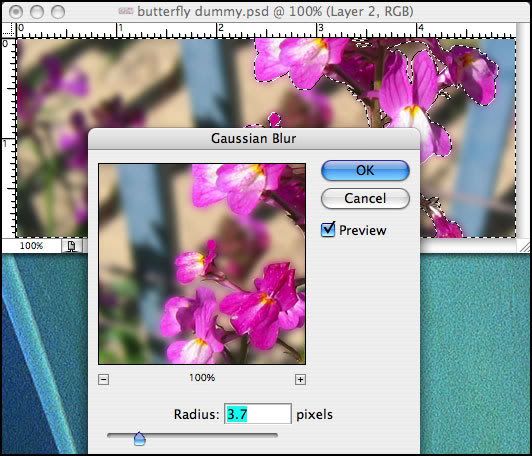 |
|
Jen
Creative Chick
Admin
Posts: 8,309
|
Post by Jen on Oct 14, 2009 14:19:15 GMT -6
Then I hid the flower layer and made a new layer and named it border. I took the rectangular marquee tool and made a selection. Then I chose Select>Inverse. I picked a color that went well with my flowers and filled the selection. You choose Edit>Fill... and make sure foreground color is selected to fill the selection.  |
|
Jen
Creative Chick
Admin
Posts: 8,309
|
Post by Jen on Oct 14, 2009 14:19:45 GMT -6
Then I took the eraser tool and set the mode to brush in the options bar. I picked a small round feathered brush from the brush palette and erased all the parts of the border that was covering the flowers.  |
|
Jen
Creative Chick
Admin
Posts: 8,309
|
Post by Jen on Oct 14, 2009 14:20:34 GMT -6
Then I made a new layer and placed it under the picture layer and filled it with a color that worked well with my flowers. I named this new layer pink. 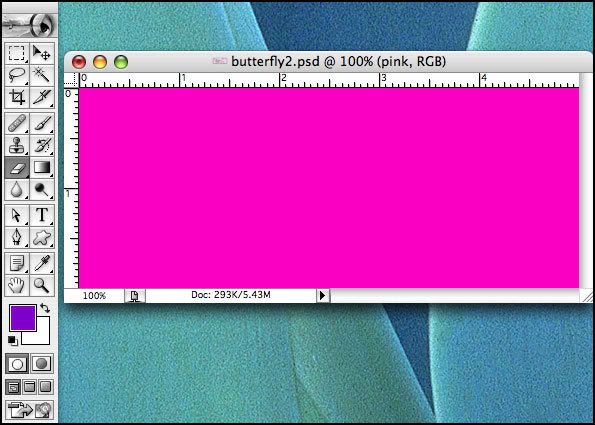 |
|
Jen
Creative Chick
Admin
Posts: 8,309
|
Post by Jen on Oct 14, 2009 14:21:29 GMT -6
I made another layer and filled it with white. This picture shows the order my layers are in and the opacity for each layer. The pink and white layers are hidden in this picture. 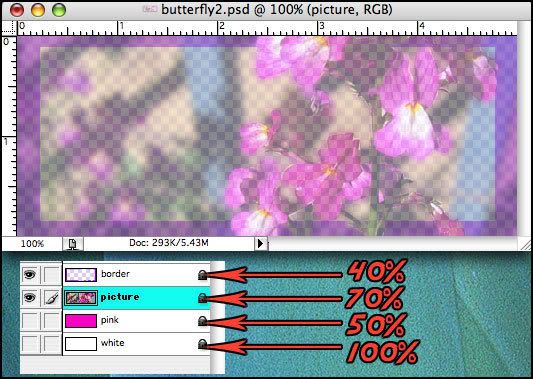 |
|
Jen
Creative Chick
Admin
Posts: 8,309
|
Post by Jen on Oct 14, 2009 14:21:51 GMT -6
Depending on what pictures you use will determine where you place your shapes. To make the swirls I used the custom shape tool and then stroked the paths with a brush. 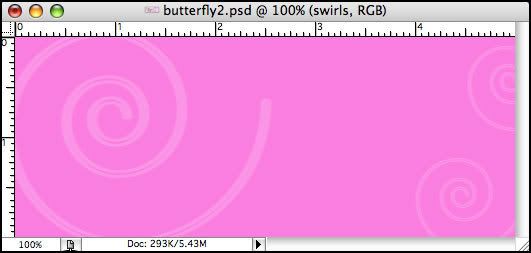 |
|
Jen
Creative Chick
Admin
Posts: 8,309
|
Post by Jen on Oct 14, 2009 14:22:16 GMT -6
These are the settings I used to create the swirls. After I had the large swirl's work path created I clicked the arrow in the top right corner of the paths palette and chose Save Path... then I named and saved the path as swirl. 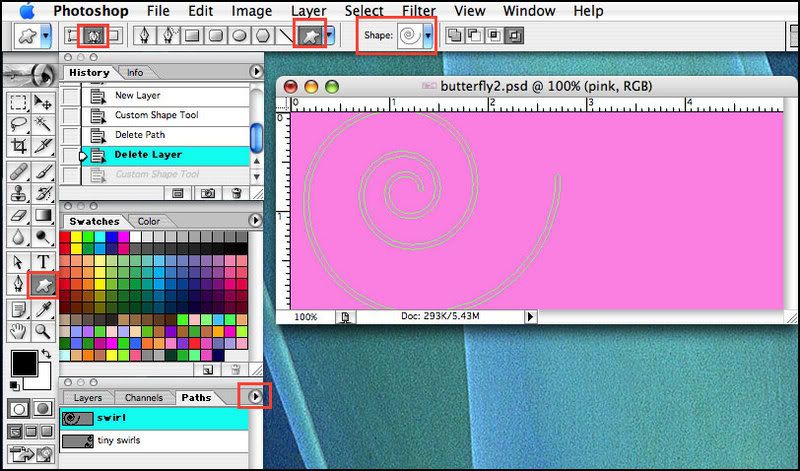 |
|
Jen
Creative Chick
Admin
Posts: 8,309
|
Post by Jen on Oct 14, 2009 14:22:55 GMT -6
Now I made a new layer and named it swirls. I chose the brush tool from the toolbox and picked this brush from the brush palette. I did make this brush so you won't see it but you can make it using the settings you see at the bottom. 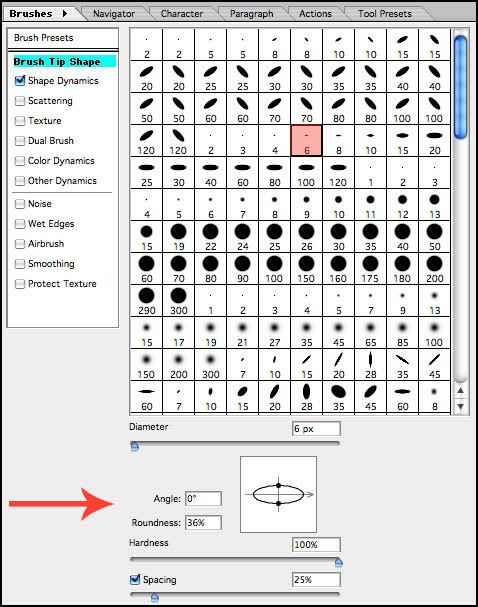 |
|


