Jen
Creative Chick  Admin
Admin
Posts: 8,309 
|
Post by Jen on Oct 25, 2011 13:53:09 GMT -6
With the history brush you can make some interesting signatures using different brushes. This is the image I started with.  |
|
Jen
Creative Chick
Admin
Posts: 8,309
|
Post by Jen on Oct 25, 2011 13:53:36 GMT -6
Open the image you'd like to use as your signature. Add a new layer. Place the layer under your picture's layer. Name the layer back color. Now fill the layer with the color you'd like the background of your signature to be. 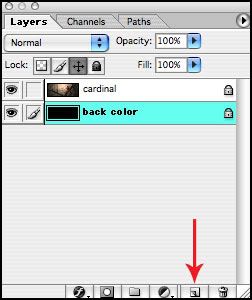 If you look in the history palette you'll see it kept track of everything you did. 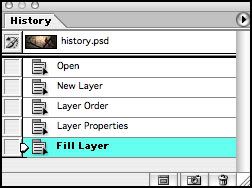 |
|
Jen
Creative Chick
Admin
Posts: 8,309
|
Post by Jen on Oct 25, 2011 13:54:18 GMT -6
Click on your picture's layer so it's the active layer. Make your picture's layer a selection. Choose delete. 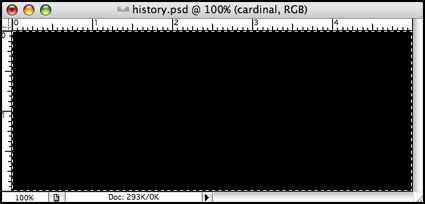 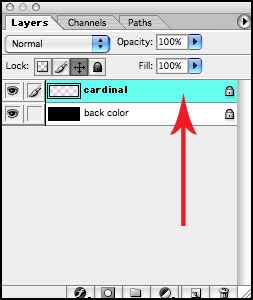 You'll see the history palette continues to keep track of what you've done. 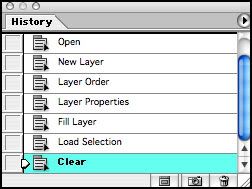 Deselect Deselect. |
|
Jen
Creative Chick
Admin
Posts: 8,309
|
Post by Jen on Oct 25, 2011 13:55:15 GMT -6
Select the history brush.  Go to the history palette and check the box next to where it says Load Selection. This is the state we'll be brushing back too. 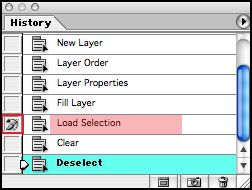 |
|
Jen
Creative Chick
Admin
Posts: 8,309
|
Post by Jen on Oct 25, 2011 13:55:44 GMT -6
Go to your brushes palette and choose a brush. Now go to your file and click down. It doesn't matter what color you use since you're only using brushes to bring the image back. 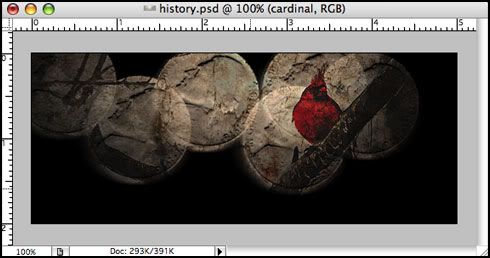 You can use whatever brushes you want. 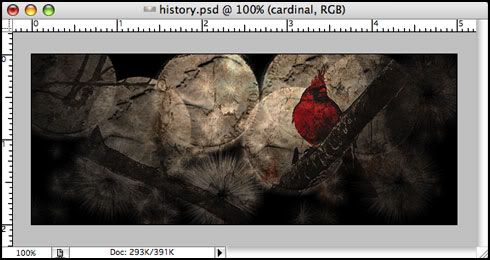 |
|
Jen
Creative Chick
Admin
Posts: 8,309
|
Post by Jen on Oct 25, 2011 13:56:21 GMT -6
If you aren't happy with how it's coming out and would like to start over go to the history palette and click on the Load Selection state so it's highlighted. 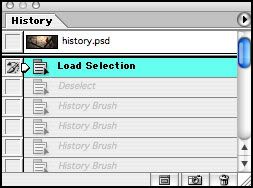 Choose delete and then deselect. 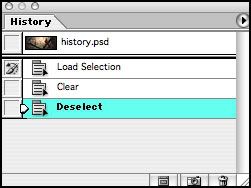 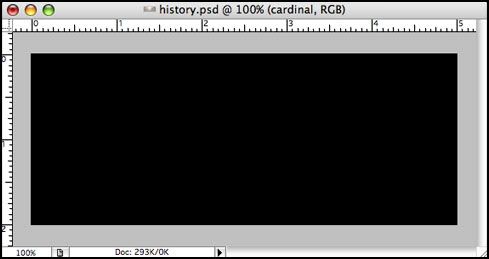 Make sure your picture's layer is the active layer and then begin again. 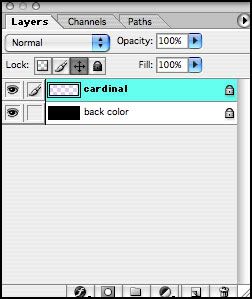 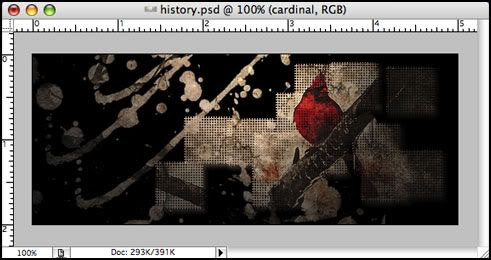 To save this signature use the save as a jpg in Photoshop setting found here, My settings. |
|


