Jen
Creative Chick  Admin
Admin
Posts: 8,309 
|
Post by Jen on Oct 2, 2009 22:17:57 GMT -6
Here's the button we'll be making. 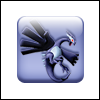 |
|
Jen
Creative Chick
Admin
Posts: 8,309
|
Post by Jen on Oct 2, 2009 22:18:34 GMT -6
Make a new file 2" x 2" at 100 ppi with a transparent background. Fill the layer with whatever color you want and name it back color. Add a new layer and name it button. On the button layer use the rounded rectangle tool with the settings below to make your button's shape. The color doesn't matter.   |
|
Jen
Creative Chick
Admin
Posts: 8,309
|
Post by Jen on Oct 2, 2009 22:19:06 GMT -6
You're now going to apply a gradient overlay to your button. I used a dark purple and a light purple. One was set as my foreground color and the other my background color in the toolbox. At the bottom of the layers palette click on the tiny f in a circle and select the gradient overlay effect. Choose the Foreground to Background gradient. With the Layer Style window open If you need to adjust the gradient go to your file and drag until you're happy with how it looks.   |
|
Jen
Creative Chick
Admin
Posts: 8,309
|
Post by Jen on Oct 2, 2009 22:19:40 GMT -6
Bring your character into your button's file and name its layer character. Reduce the character until it fits on the button. If it looks a bit blurry after reducing it make a copy of the layer and apply Filter>Sharpen>Sharpen. Adjust the opacity until it looks right and then link and merge the copy with the original layer. 
|
|
Jen
Creative Chick
Admin
Posts: 8,309
|
Post by Jen on Oct 2, 2009 22:20:11 GMT -6
Apply a drop shadow effect to the character. For the color click on the color box in the Layer Style window and then go to your file and click down on a dark purple in the button. Now drag the white ring in the Color Picker window to a slightly darker purple.   |
|
Jen
Creative Chick
Admin
Posts: 8,309
|
Post by Jen on Oct 2, 2009 22:20:54 GMT -6
Link and merge the character and button layers so you have one layer named button. Add a new layer and name it shine. Place it above your button layer. Take the rounded rectangle tool and using the settings below, drag to make your shine's path.   Go to the bottom of your paths palette and click on the Load path as a selection button. Select the gradient tool and click the gradient showing in the options bar. Choose the Black, White gradient. If you let your cursor hover over a gradient its name will appear. With the shine layer as the active layer go to the selection. Click at the bottom of the selection then drag to the top and release. Set the blending mode for this layer to screen. |
|
Jen
Creative Chick
Admin
Posts: 8,309
|
Post by Jen on Oct 2, 2009 22:21:25 GMT -6
Apply an inner shadow to the button layer with these settings. Like you did with your character's drop shadow above, for the color click on the dark purple in your button then drag the white ring in the Color Picker window to a slightly darker purple.  |
|
Jen
Creative Chick
Admin
Posts: 8,309
|
Post by Jen on Oct 2, 2009 22:21:55 GMT -6
Now apply the bevel and emboss effect using these settings. Some of the adjustments you can make are changing the colors used for this effect. I changed the black to a dark purple.  Crop the button. Hide the back color layer by clicking the eye on its layer. And you're done. To save this button use the save as a PNG-24 setting found here, Transparent background without a matte. |
|


