Jen
Creative Chick  Admin
Admin
Posts: 8,311 
|
Userbar
Feb 2, 2011 14:08:42 GMT -6
Post by Jen on Feb 2, 2011 14:08:42 GMT -6
This tutorial will show you how to make a simple userbar. For the text I used a pixel/bitmap font from www.dafont.com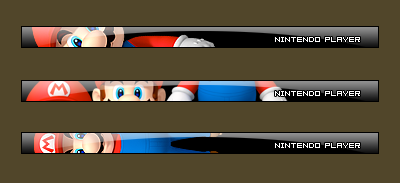 |
|
Jen
Creative Chick
Admin
Posts: 8,311
|
Userbar
Feb 2, 2011 14:09:04 GMT -6
Post by Jen on Feb 2, 2011 14:09:04 GMT -6
Start with a new file. The userbar in this tutorial is the following size,  |
|
Jen
Creative Chick
Admin
Posts: 8,311
|
Userbar
Feb 2, 2011 14:09:36 GMT -6
Post by Jen on Feb 2, 2011 14:09:36 GMT -6
Name Layer 1 black. Now fill this layer with black. Add a new layer and name it white. Select the gradient tool. Click the gradient showing in the options bar and choose the Black, White gradient. Starting at the bottom click and drag towards the top of your bar. 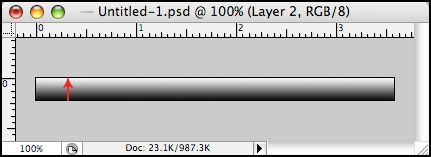
|
|
Jen
Creative Chick
Admin
Posts: 8,311
|
Userbar
Feb 2, 2011 14:13:02 GMT -6
Post by Jen on Feb 2, 2011 14:13:02 GMT -6
Change the blending mode for the white layer to Screen. 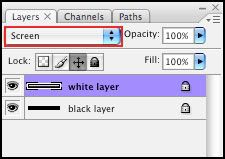 You can adjust the white layer's opacity now or wait until after you've added an image to the bar. 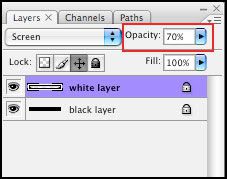 |
|
Jen
Creative Chick
Admin
Posts: 8,311
|
Userbar
Feb 2, 2011 14:13:34 GMT -6
Post by Jen on Feb 2, 2011 14:13:34 GMT -6
With the elliptical marquee tool make a selection like you see in the photo below. You might find it easier to extend your window, red arrow, before making the selection. 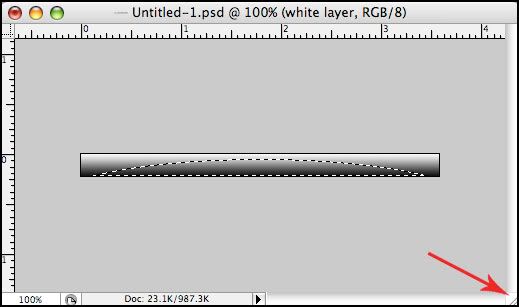 With the white layer as the active layer, click delete then deselect. 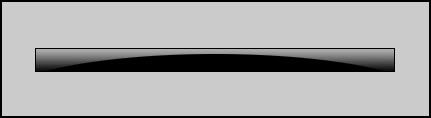 |
|
Jen
Creative Chick
Admin
Posts: 8,311
|
Userbar
Feb 2, 2011 14:14:19 GMT -6
Post by Jen on Feb 2, 2011 14:14:19 GMT -6
Open the image you'd like to add to your bar. I chose Mario. Now bring it into your userbar's file. Make sure your image's layer is under the white layer in the layers palette. 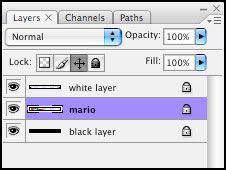 If needed, reduce/enlarge the image so it's at the size you want. And if you choose you can rotate the image as well. Use the move tool to position it on your userbar. 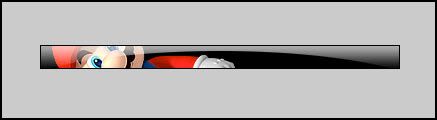 |
|
Jen
Creative Chick
Admin
Posts: 8,311
|
Userbar
Feb 2, 2011 14:17:15 GMT -6
Post by Jen on Feb 2, 2011 14:17:15 GMT -6
Make the black layer a selection. 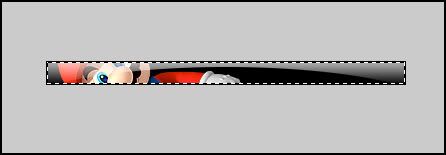 In the menu bar choose Select>Modify>Contract>1.  Now from the menu bar choose Select>Inverse. Click on the white layer and delete. Click on your image's layer, which for me is mario, and delete. Deselect. 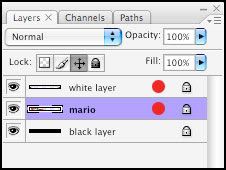 You should now have a thin black border. 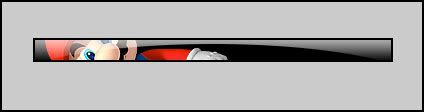 |
|
Jen
Creative Chick
Admin
Posts: 8,311
|
Userbar
Feb 2, 2011 14:17:50 GMT -6
Post by Jen on Feb 2, 2011 14:17:50 GMT -6
Use the type tool to add your text. Put the text layer at the very top in the layers palette. Use the move tool to position the text on your userbar. 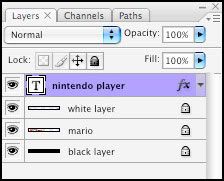 Add a stroke effect to your text's layer. To change the color of the stroke click inside the color box. 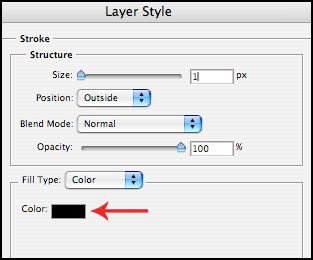 And you're done. To save your userbar use the save as a PNG-24 setting found here, Transparent background without a matte. |
|


