Jen
Creative Chick  Admin
Admin
Posts: 8,309 
|
Post by Jen on Oct 4, 2009 0:02:12 GMT -6
Make a new layer and name it name & des drop. Make a selection of your name/Teddy, left design and right design layers. With black as your foreground color fill the selection then deselect. With the move tool move this layer down and to the right a little. 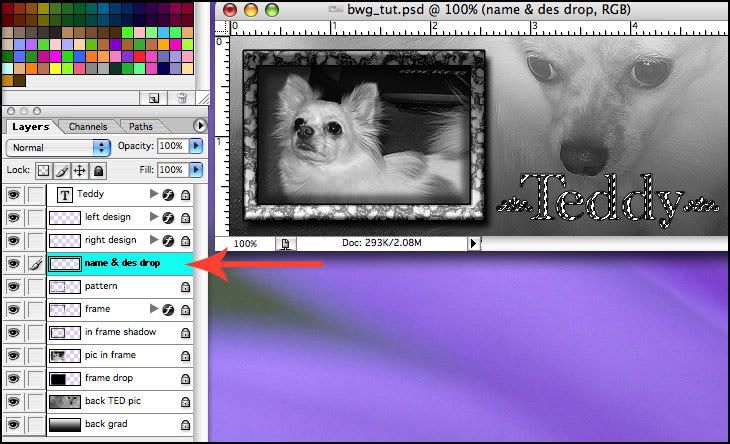 |
|
Jen
Creative Chick
Admin
Posts: 8,309
|
Post by Jen on Oct 4, 2009 0:02:44 GMT -6
Apply Filter>Blur>Gaussian Blur with this setting to the layer. 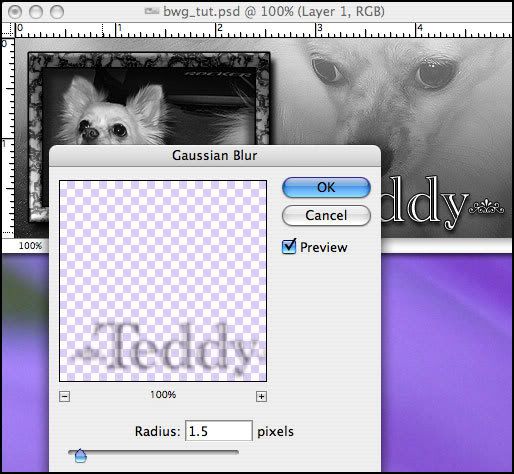 |
|
Jen
Creative Chick
Admin
Posts: 8,309
|
Post by Jen on Oct 4, 2009 0:03:09 GMT -6
Make a new layer and name it trim. To extend your file grab the corner, red arrow, and drag. With the rectangular marquee tool make a selection the length of your siggy. Fill the selection with black. Deselect. 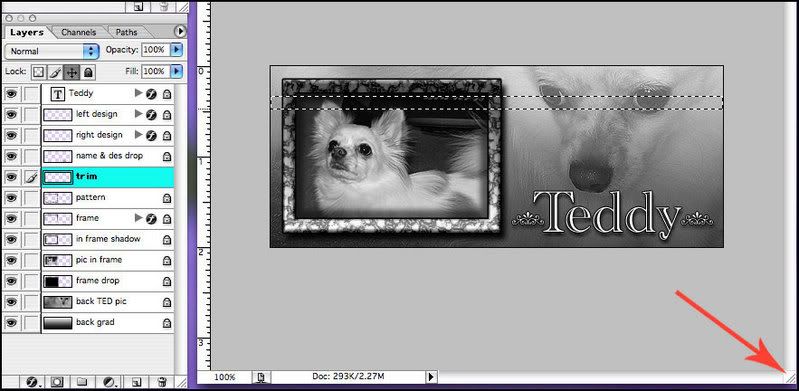 |
|
Jen
Creative Chick
Admin
Posts: 8,309
|
Post by Jen on Oct 4, 2009 0:04:46 GMT -6
Use the move tool while holding the shift key and drag the bar to the top. If you need to you can use the arrows on your keyboard to move the layer as long as your move tool is selected. You don't need to hold the shift key when using the arrows. Make a copy of this layer by clicking and dragging it to the new layer icon. Drag the copy of the bar down. Once they are in place link and merge the trim and trim copy layers so you have one layer named trim. 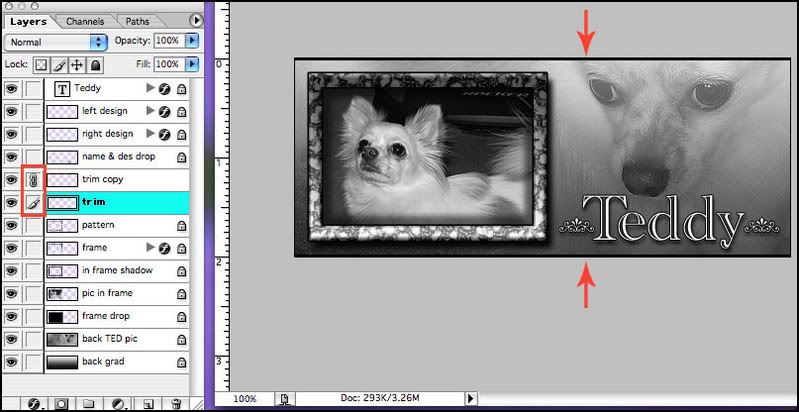 And you're done. To save this signature use the save as a jpg in Photoshop setting found here, My settings. |
|


