Jen
Creative Chick  Admin
Admin
Posts: 8,309 
|
Post by Jen on Oct 4, 2009 11:09:27 GMT -6
Make a new layer and name it picture shadow. Put this layer above your picture layers. Make your pictures a selection. 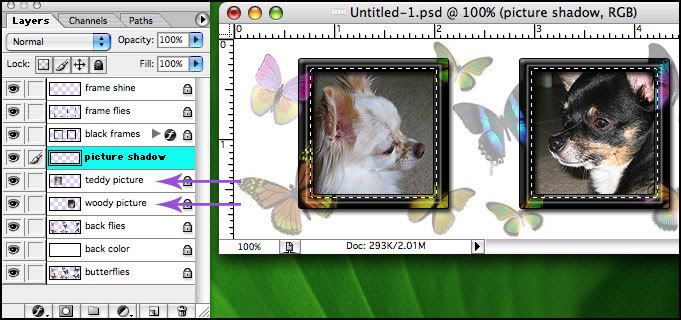 |
|
Jen
Creative Chick
Admin
Posts: 8,309
|
Post by Jen on Oct 4, 2009 11:09:56 GMT -6
With black as your foreground color fill the selection. Don't deselect. Now choose Select>Modify>Contract... with this setting. 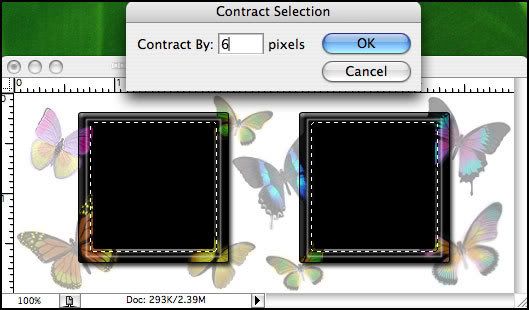 |
|
Jen
Creative Chick
Admin
Posts: 8,309
|
Post by Jen on Oct 4, 2009 11:10:20 GMT -6
Choose delete then deselect. 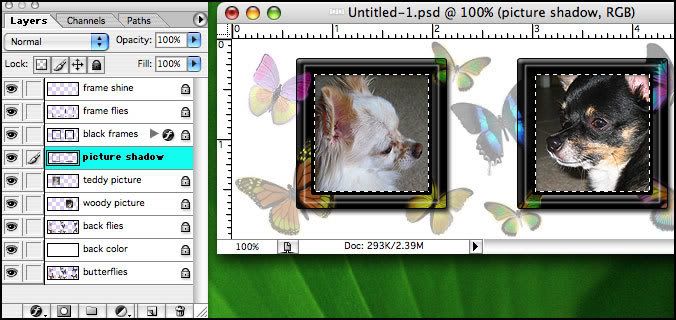 |
|
Jen
Creative Chick
Admin
Posts: 8,309
|
Post by Jen on Oct 4, 2009 11:10:42 GMT -6
Apply Filter>Blur>Gaussain Blur with this setting to the picture shadow layer. 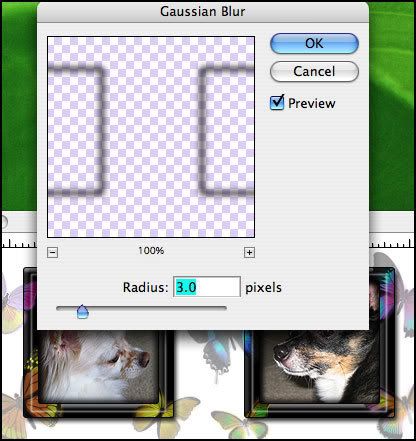 |
|
Jen
Creative Chick
Admin
Posts: 8,309
|
Post by Jen on Oct 4, 2009 11:13:40 GMT -6
Take your type tool and make your name(s). 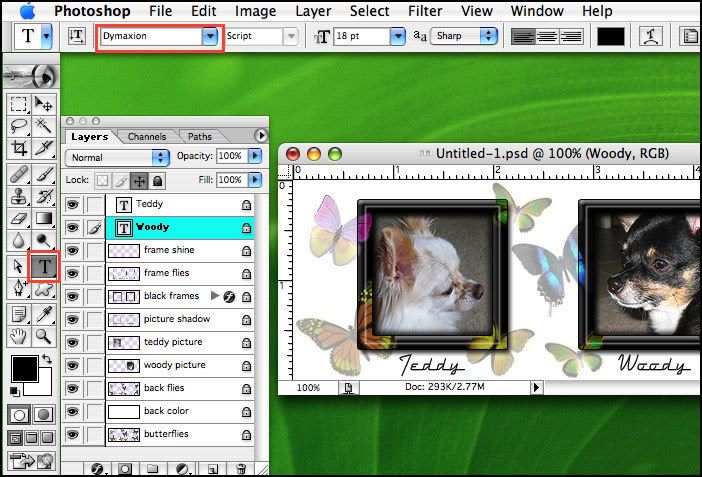 If you're saving this signature with a transparent background throw away or hide the layers back color and butterflies. And you're done. To save this signature use the save as a PNG-24 setting found here, Transparent background without a matte. If you're saving this signature with a solid colored background then don't save it yet and continue with the tutorial. |
|
Jen
Creative Chick
Admin
Posts: 8,309
|
Post by Jen on Oct 4, 2009 11:15:05 GMT -6
To make the border make a new layer and put it at the top in the layers palette. Name this layer border. Select the pencil tool and make sure the Mode is set to Normal in the options bar. Choose the 1 pixel brush from the brushes palette and make black your foreground color. I held the shift key then clicked where the left arrow is and dragged to the arrow on the right. 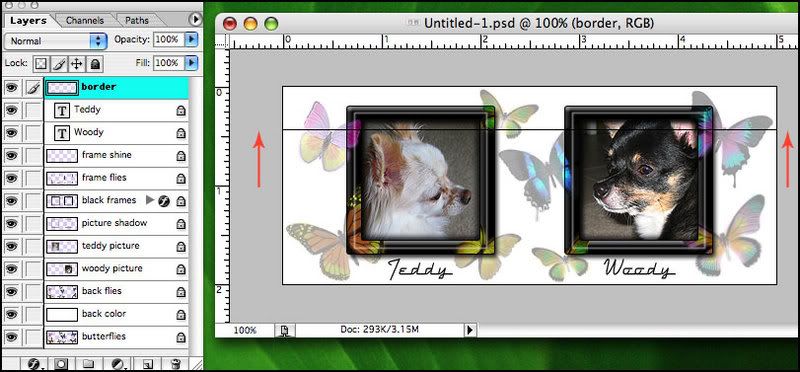 |
|
Jen
Creative Chick
Admin
Posts: 8,309
|
Post by Jen on Oct 4, 2009 11:15:31 GMT -6
Hold your shift key and drag the line up with the move tool. Make a copy of this layer and with the move tool as your selected tool use the arrows on your keyboard to move the copy down a little. Link and merge these two layers. 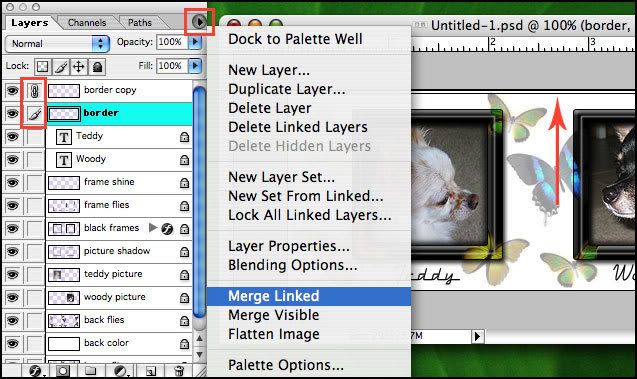 |
|
Jen
Creative Chick
Admin
Posts: 8,309
|
Post by Jen on Oct 4, 2009 11:16:36 GMT -6
Make a copy of the border layer and while holding the shift key use the move tool to move the copy to the bottom. Make a copy of the border copy layer and choose Edit>Transform>Rotate 90˚CW. Move this copy to the left. Make a copy of the border copy 2 layer and drag it to the right. Now link and merge the border layers so you have one layer named border.  And you're done. To save this signature use the save as a jpg in Photoshop setting found here, My settings. |
|


