Jen
Creative Chick  Admin
Admin
Posts: 8,309 
|
Post by Jen on Oct 26, 2009 18:10:58 GMT -6
Open the image you'd like to use with your iPod and bring it into your file. Name the layer image and put it at the top of the layers palette. Reduce/enlarge the layer until the image fits into the screen like below. You can use the rectangular marquee tool to select and delete any extra areas. 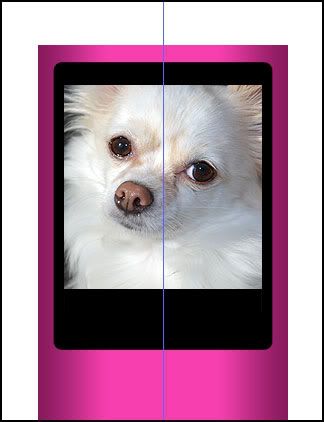 |
|
Jen
Creative Chick
Admin
Posts: 8,309
|
Post by Jen on Oct 26, 2009 18:23:33 GMT -6
Make a selection at the bottom of your image. 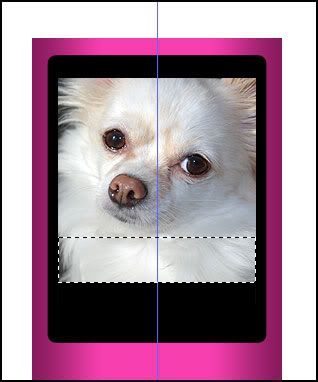 Click on the image layer and choose Layer>New>Layer via Copy. Name the copy image reflect. With the image reflect layer as the active layer, choose Edit>Transform>Flip Vertical. While holding the shift key use the move tool to drag the reflect layer down. Change the opacity for this layer to 30%.  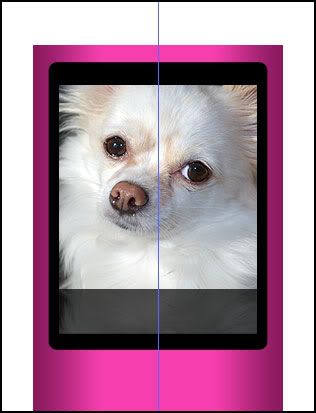 |
|
Jen
Creative Chick
Admin
Posts: 8,309
|
Post by Jen on Oct 26, 2009 18:30:29 GMT -6
Add a new layer. Put it at the top of the layers palette. Make a selection and fill it with white. Don't deselect. 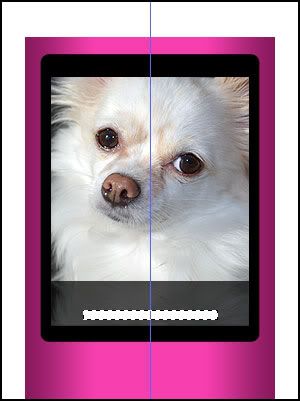 Subtract Subtract from the selection so you have a section on the left still selected. 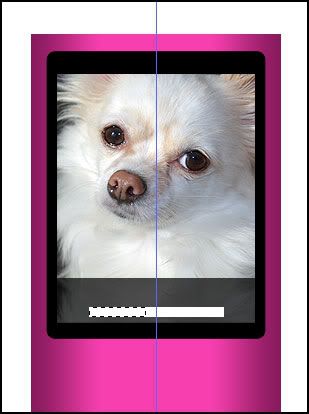 Fill this with blue.  Deselect. |
|
Jen
Creative Chick
Admin
Posts: 8,309
|
Post by Jen on Oct 26, 2009 18:34:32 GMT -6
Add a new layer. With the pencil tool set at 2px, hold the shift key and then click and drag to make a straight line. 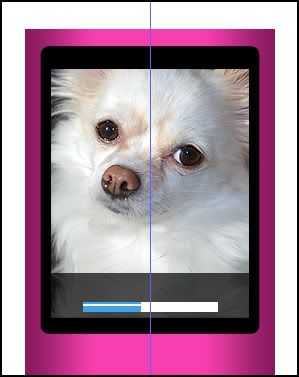 Choose Filter>Blur>Gaussian Blur...>Radius: 0.6 pixels. Look at the left side of the bar. If you notice any of the blurred white line going past the white bar make a selection around it and choose delete. 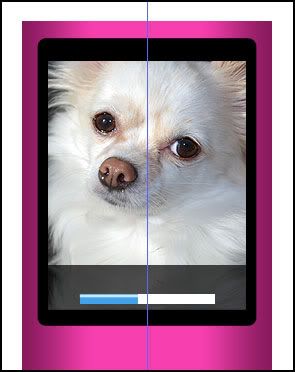 Link and merge Layer 1 and Layer 2 and name the layer blue bar. 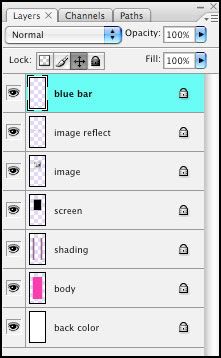 |
|
Jen
Creative Chick
Admin
Posts: 8,309
|
Post by Jen on Oct 26, 2009 18:37:41 GMT -6
With the type tool add your text. Below is the font and settings I used. I did change the pt size for the title and times.  You can use a horizontal guide to line up the times. 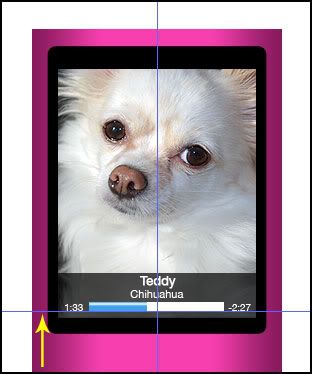 |
|
Jen
Creative Chick
Admin
Posts: 8,309
|
Post by Jen on Oct 27, 2009 11:51:41 GMT -6
Add a new layer. Put it at the top of the layers palette. Make a selection. 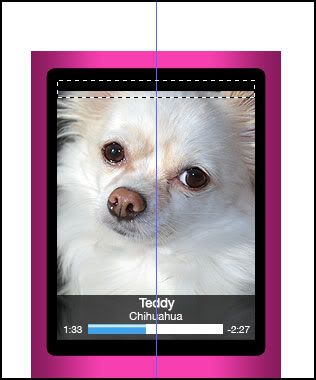 Fill the selection with grey. Don't deselect. Add a new layer. Make white your foreground color. Choose the gradient tool. The Foreground to Transparent grad should still be showing in the options bar. Click from the top of the selection, drag about 3/4 of the way down and release. 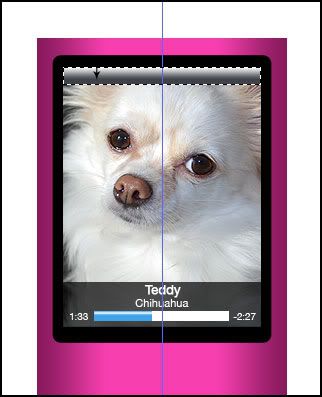 Deselect. Change the opacity for Layer 2 to 50%. 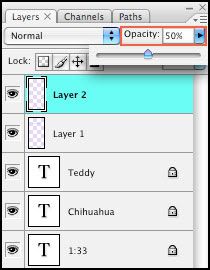 Link and merge Layers 1 and 2 and name the layer grey bar. 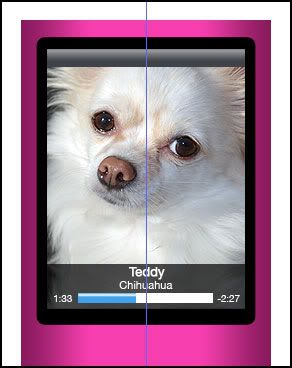 |
|
Jen
Creative Chick
Admin
Posts: 8,309
|
Post by Jen on Oct 27, 2009 12:00:17 GMT -6
Use the type tool to add Now Playing. 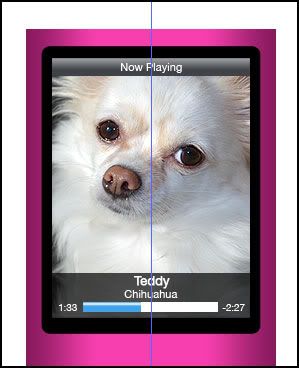 |
|
Jen
Creative Chick
Admin
Posts: 8,309
|
Post by Jen on Oct 27, 2009 12:38:10 GMT -6
Add a new layer and name it top triangle. With white as your color, use the custom shape tool with the settings below to make a triangle. If you click on the shape showing in the options bar you'll see your available shapes.   In the menu bar select Edit>Transform>Rotate 90° CCW. 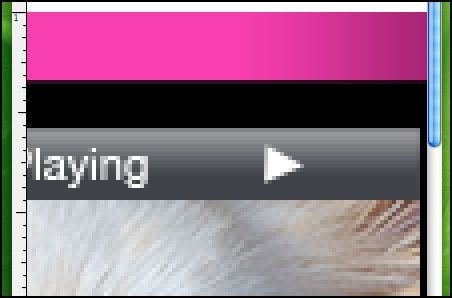 |
|
Jen
Creative Chick
Admin
Posts: 8,309
|
Post by Jen on Oct 27, 2009 12:45:42 GMT -6
Add a new layer. Make a selection for the battery icon. 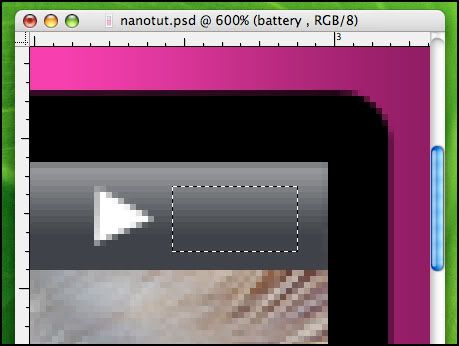 Hold the shift key to add to the selection. Once you start to click and drag you can release the shift key and hold the space bar to move the selection as you're making it. 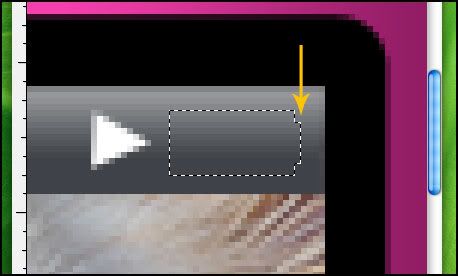 Add the last bit to the selection.  Fill the selection with white and deselect. Change the opacity of Layer 1 to 60%. 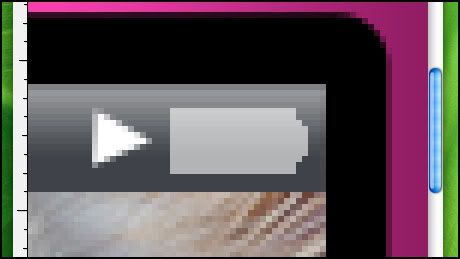 Add a new layer. Make a selection over the battery icon.  With a dark grey as your color choose Edit>Stroke... with the settings below. Deselect. 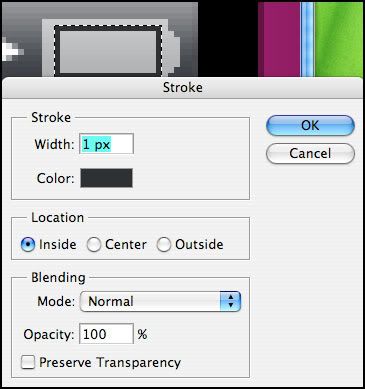 Link and merge Layers 1 and 2 and name the layer battery. 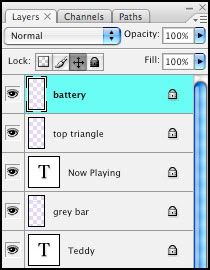 |
|
Jen
Creative Chick
Admin
Posts: 8,309
|
Post by Jen on Oct 27, 2009 13:47:26 GMT -6
Add a new layer and place it under the body layer. Make a selection and fill it with grey to make a button. Deselect. Make a copy of Layer 1. Hold the shift key and use the move tool to place the copy on the right. Link and merge Layer 1 and Layer 1 copy. Name the layer buttons. 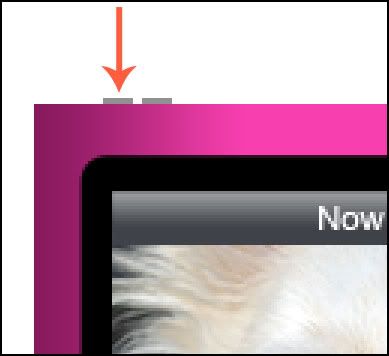  |
|


